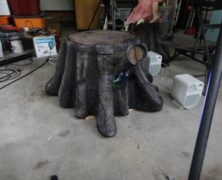
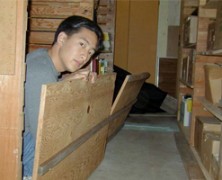
Difficulty: Intermediate | Time: 6–10 hours | Cost: $40–$80 Every outdoor haunt that uses video projection eventually runs into the same problem — where do you hide the projector? This clever solution, originally shared by Rabbit101 on the Halloween Forum, builds a hollow fake tree stump from sonotube, plywood, and blue foam that conceals a projector, DVD player, and FM transmitter inside. Two very rainy Seattle seasons have proven it weather-resistant without any damage to the electronics. Audience members watched the Singing Pumpkins display for extended periods and still couldn’t figure out where the projector was — even after being told it was in the stump. Materials Material Notes Sonotube (concrete form tube) Two pieces totaling about 2/3 of a tube each; size to fit your electronics 3/4″ plywood For the base (organic root shape) and interior support circles Blue foam insulation board Cut into pieces and glued to the outside of the sonotube to build up bark shape Insulfoam spray (Great Stuff) Fills bare spots and gaps in the foam exterior 2″ PVC tube Runs through the bottom for power and audio cables 10″ exhaust fan (110V) Essential for cooling — projector overheats without it Wire coat hanger & propane torch Used together to burn realistic tree rings into the lid Hacksaw blade For carving and shaping the foam into bark texture Spray paint: black, brown, green, grey Black dissolves foam slightly for texture; layered with browns and a dry white wash Jigsaw & staple gun Cutting the base and attaching the sonotube sections Step-by-Step Instructions Step 1 — Cut the Plywood Base and Support Circles Start by cutting the plywood base in a random, organic root pattern — not a circle. Use a jigsaw to cut bumps and lobes that suggest natural...
Ghoul In A Wall
posted by SkeleTony
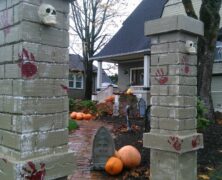
Difficulty: Beginner | Build Time: 1 weekend | Estimated Cost: $15–$30 A ghoul pressing through a crumbling brick wall is one of the most effective cemetery displays you can build for almost no money. This prop uses a styrofoam base, hand-carved foam bricks, joint compound mortar, and a Bucky skull and hand to create the illusion of a specter forcing its way through solid masonry. It reads at distance and holds up indoors or out — and the total material cost is well under $30. Materials & Tools MaterialQty / Notes 1/2" styrofoam insulation boardOne 2×4 ft sheet for the base 1" or 2" styrofoam scrapsFor cutting individual bricks All-purpose joint compoundFor mortar in the brick gaps Bucky skeleton skullStandard full-size skeleton skull Bucky skeleton hand & armOne arm reaching forward Black poster boardBacking behind the skull for contrast String of LED lightsOrange or purple; battery-operated preferred Foam-safe construction adhesiveLiquid nails for foam or hot glue Flat black spray paintBase coat — use foam-safe formula Grey and brown craft paintDry brushing and wash coats Serrated knife or bread knifeCutting and texturing foam Wire brush or stiff-bristle brushRoughening foam brick faces Step-by-Step Instructions Step 1: Cut the Foam Base Start with a 1/2" styrofoam sheet cut to the desired finished size of your wall prop — a good starting size is 18" wide x 24" tall, which is large enough to look impressive but small enough to store flat. This base layer is the structural foundation everything else glues to. Mark your dimensions with a marker and cut with a sharp serrated knife using long, smooth strokes — sawing with short strokes tears the foam instead of slicing it cleanly. Measure and cut your foam base to the finished prop dimensions — a long serrated...
Hands For A Halloween Scarecrow...
posted by SkeleTony
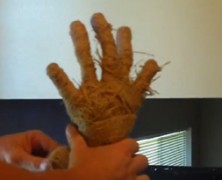
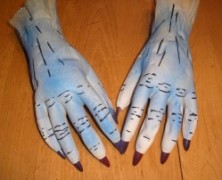
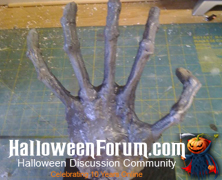
If you’re a fan of American literature then you probably know that the thing the scarecrow wanted the most from the Wizard of Oz was a brain. And that’s a great thing for fictional scarecrows to strive for, but when it comes to non-fictional scarecrows, more often than not they’re in need of more utilitarian things, such as hands. So if your scarecrow is in need of hands then let James Mitchell be your Wizard with his tutorial on making Hands for a Halloween Scarecrow. Actually, whether or not you have need for hands for a scarecrow, this tutorial is worth watching because the bailing wire framework that it is based on is a great method for any pair of hands. It allows for a rigid skeleton that is still completely flexible for posing. Items needed to complete this include: Bailing wire Foam padding Compressed air hose Burlap ...
Paper Mache Clay
posted by SkeleTony
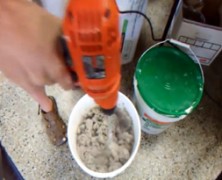
Those of you that work with paper mache regularly may find this a real snoozer, but if you’re looking to get started with paper mache clay, or are just looking for a good recipe for paper mache paste you need to watch this video. There are a ton of recipes for making your own paper mache compounds available online, but when a prolific paper mache artist like Scott A Stoll of Stolloween Studio provides one, you’d be well advised to follow it. His tutorial makes a large quantity of paste and clay but it’s a simple recipe that will keep for a few days without refrigeration. The paper mache clay that this produces is spreadable, will hold it’s shape and allows you the ability to smooth it out and add fine details to your creations. Items needed to complete this include: Paper Mache Paste 6 cups flour 1 cup liquid starch 1 cup white glue For Paper Mache Clay 6 cups Paper Mache Paste (recipe above) 1 cup of drywall joint compound Cellulose fiber insulation added until mix is firm Shop These Materials on Amazon Instant Paper Mache Powder Mix 3.3 lbs Assorted 12" Latex Balloons 120-Pack Affiliate Disclosure: HauntersList.com is a participant in the Amazon Services LLC Associates Program. As an Amazon Associate we earn from qualifying purchases at no extra cost to...
Building Haunt Wall Panels...
posted by SkeleTony
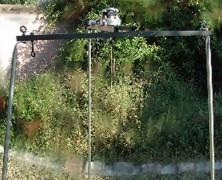
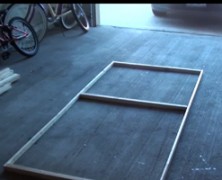
If you’re interested in building some wall panels for your haunt you’re going to want to check in with Terra from the HalloweenForum before you begin. The tutorial for building haunt wall panels that she added to Scaryladyvideos offers an easy and effective design for framing and then covering the panel with landscape fabric. They’re pretty easy to make, and the use of velcro strips for securing the fabric is the perfect solution. Items needed to complete this include: 32 feet – 1 x 2 furring strips (6) Screws DeWitt Weed Barrier Pro 6300 Velcro strips Staples...
Blow Horn Light
posted by SkeleTony
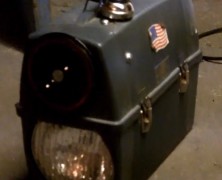
A quick blast from a horn coupled with a burst of light can be startling and disorienting when you’re making your way through a haunt, and those are always two great benchmarks to strive for. Brad Silvertein of Brads Boo Barn has a tutorial for making Blow Horn Lights, which will more than accomplish this, and the idea of putting it inside a lunch pail allows for it to become the perfect portable solution as well! Items needed to complete this include: Lunch pail 12volt 8amp sealed lead acid battery Flashlight Horn Horn switch Wire Foam insulation ...
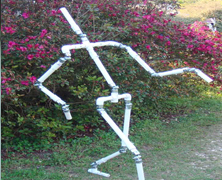
FCG Stand
posted by SkeleTony
Mounting your Flying Crank Ghost can be a challenge, especially if you’ve got nothing above it to hang it from. The Wolfstone Group had this same problem and came up with the idea to Mount a Flying Crank Ghost using electrical metallic tubing (EMT). Its a really creative and simple idea that allows you to get your Flying Crank Ghost really high off the ground. You’ll need to start by pounding the ends of three 1/2″ EMT conduit completely flat. Next, you’ll bend the flattened ends to almost 90 degrees and then drill a hole through the flattened end. Once flattened and drilled, you’ll simply bolt it to your Flying Crank Ghost frame at it’s three main points. The great part about this is you can join multiple lengths of EMT with EMT tubing couplers. You’ll have to determine how much wind you’re going to have to account for when deciding how high to go, but it shouldn’t be too much of a stretch to get your Flying Crank Ghost up at least 10 feet if not more! Items needed to complete this include: Flying Crank Ghost assembly (3) – 10′ sections of 1/2″ EMT (3) – 1/2″ EMT tubing couplets (3) – nuts / bolts to secure EMT to FCG frame Black spray paint Shop These Materials on Amazon 1/3HP Replacement Ceiling Fan Motor (for FCG builds) Braided Fishing Line — thin gauge for rigging 120" Wide White Sheer Voile Fabric x 25 Yards Affiliate Disclosure: HauntersList.com is a participant in the Amazon Services LLC Associates Program. As an Amazon Associate we earn from qualifying purchases at no extra cost to...

Installing a Servo in a Bucky Skull...
posted by SkeleTony
There’s nothing more satisfying than creating your own talking skull. I would have no way of knowing this since I opted to purchase one for fear that I would horribly botch the installation, but I honestly suspect there’s nothing more satisfying than creating your own. With that in mind, Scary Terry has a great tutorial on Installing a Servo in a Bucky Skull. You’ll start by building a mounting bracket for your servo out of aluminum and then you’ll mount the servo bracket in the Bucky skull (ok, there’s a little more to it, but trust me, you’re going to need to check out Scary Terry’s Tutorial). You’re going to break the jaw of your skull next and reconnect it utilizing the zip ties as the new pivot point of the jaw. You’ll next drill a hole in the skull and connect the servo to the jaw using a piece of the music wire. That’s all there is to it, more or less, but you’ll still need an audio circuit to drive the servo. Luckily, Scary Terry has an audio circuit solution as well! Items needed to complete this include: Bucky Skull Servo (HiTec HS-425BB – See details at ServoCity) (2) 3/4″ long 1″x1″x1/16″ angle aluminum 0.039″ Music wire, aka piano wire (1) 1/2″ #6 screw, nut, washer Servo mounting hardware (#4/ 40 screws and nuts) (2) 4″ Zip ties Shop These Materials on Amazon Realistic Replica Human Skull Statue 6.5" 5.4ft Full Size Halloween Foam Skeleton Affiliate Disclosure: HauntersList.com is a participant in the Amazon Services LLC Associates Program. As an Amazon Associate we earn from qualifying purchases at no extra cost to...
Easy Monster Hands
posted by SkeleTony
Ok, remember when you were getting ready to use the Frankenstein Plans to build your very own Frankenstein and it said you’d have to supply your own set of hands? Well unless you were able to run out to your local Halloween store and buy a pair of hands you were out of luck. And a Frankenstein without hands isn’t very scary now is it? Making your own hands isn’t that difficult though, and the crew over at Screaming Scarecrow Studios have created a simple tutorial on how to make really great looking monster hands using latex gloves, witches fingers, and some expanding foam. You’ll start by turning the glove inside out and cutting a small slit in the tips of the fingers of your rubber glove. Once you’ve got your witches fingers securely inserted into each of the fingers you’ll need to get a 12″ piece of 1/2″ pvc pipe for an arm bone. You’ll need to drill a hole in both the bottom and top of your pipe approximately an inch from the bottom. Once you’ve got your holes drilled you’re going to thread some wire through the hole in the pipe to secure the hand to the bone. You’ll also need to secure the wire through the witch’s fingers which is what will keep the hand secured to the bone once its filled with foam. Once you’ve got your hand securely wired to the arm bone you’re ready to add some foam. You can hang the hand by threading another wire through the hole you drilled in the top of the pvc. It may take a while for the foam to fully cure (2 to 3 days), but once they’ve hardened you can remove the glove from around the hands. You’ll need...
Motion Detector Hack
posted by SkeleTony
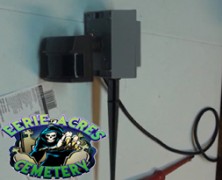
If you’ve ever wanted a motion sensor to trigger your Halloween props but didn’t feel like laying out the cash for an overpriced store bought unit then pay close attention. The reality is, they’re not that difficult to make if you’ve got a moderate amount of electrical skills and you’ll end up with a unit that is tailor made for your use. You’ll also end up saving yourself a lot of money because once you realize how easy it is, you’ll want to make more! I’m sure the folks at Eerie Acres Cemetery wouldn’t mind you sending some of that extra cash their way because they’ve posted a really descriptive tutorial on how to create a motion sensor that will more than get you up and running creating your own. Items needed to complete this include: Replacement motion sensor GFCI outlet 4 hole single gang outdoor outlet box (metal) Outdoor electrical outlet cover (metal) Clamps for gang box PC power cable Threaded ground stake Silicone...
Silicone Skull Mold
posted by SkeleTony
If you’re interested in making your own skulls, and I’m talking seriously making a lot of your own skulls, then you’re going to need a pretty serious mold to cast them in. You can use the Cheap Easy Skulls method provided by Dr. Kreepy, but if you’re interested in some serious skulls you’re going to want to checkout the tutorial that The Devil’s Workshop posted. Creating your mold is a pretty elaborate process but this two part tutorial will walk you through the process from start to finish. http://youtu.be/T261p0MAHdA Shop These Materials on Amazon Realistic Replica Human Skull Statue 6.5" 5.4ft Full Size Halloween Foam Skeleton Affiliate Disclosure: HauntersList.com is a participant in the Amazon Services LLC Associates Program. As an Amazon Associate we earn from qualifying purchases at no extra cost to...
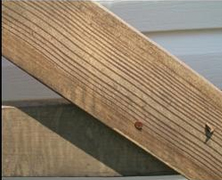
Aging Wood Quickly
posted by SkeleTony
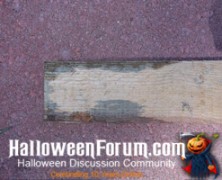
There’s nothing worse than a building a toe pincher coffin with pristine looking lumber. Yeah, it still looks good, but you probably want it to look as though it’s fresh from the ground instead of Home Depot. If you’re lucky enough to have some old pallets or some weathered wood laying around, then read no further, but if you’re anything like me you’re going to want to age it pretty quickly. Terror Tom has a great technique for aging wood that’s easy to achieve and only takes 1 night to prep for. You’ll need to fill a mason jar with as much white vinegar as you think you’ll need to coat your wood and add a nicely rusted item to it. You can use rusty nails, screws, or even steel wool. Let it soak over night and when you wake up you should have a rather rusty (and pungent) solution that will quickly age your wood. Items needed to complete this include: Rusty nails or steel wool Mason jar White...
Cheap Fake Barbed Wire...
posted by SkeleTony
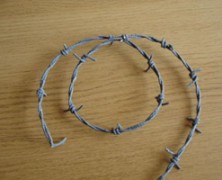
If you’ve got a scene that requires realistic looking barbed wire your best bet is to head over to Home Depot and pick up a roll, it’s only $65 for 1300 feet! I mean, what’s the worst that can happen? Someone grabs it to see if it’s real and cuts their hand, or rips their clothing on it, or actually falls into it and slices themselves up real good leaving a bloody mess on your floor, and if any of that happens you know what that means… BEST HAUNT EVER!!!! It’s probably not worth the liability, though, so with that said, you may want to checkout the tutorial that msraynsford created on how to create Cheap Fake Barbed Wire You’ll start by folding your length of string in half, tying one end of it down and twisting the string whichever direction you prefer. Once you’ve got it good and twisted you’ll dip it completely in your glue. You can mix your paint directly into the glue to ensure a nice even color. Let it dry making sure that it doesn’t touch itself or unwind during this time. You’ll next need to add your barbs, which are nothing more than lengths of 10cm (3 inch) string dipped in the glue and then wrapped around the main string. Once you’ve got the barbs wrapped around the main string and they’ve dried completely, simply cut the barbs on an angle to give them a sharp pointed appearance. Once your barbed wire is completely dried your wire is ready to hang. It looks realistic and won’t cut anybody (probably). Items needed to complete this include: String (roughly 2.5 times more string than you want barbed wire) PVA glue (Elmer’s) Grey...
Rickety Floor
posted by SkeleTony
An unstable, rickety old floor is a great way to catch visitors to your haunt off guard, especially when lights are low. It’s a simple project, and if you’re so inclined (pun intended), Raymond from RFHaunt has a tutorial on how to quickly and easily add this effect to your haunt. Your floor will be made of plywood and is best suited to a hallway section where you can have it extend from wall to wall. You’ll start by making a stationary section which consists of your piece of plywood with sections of 1 x 2 lumber nailed to the entire length of the center and both sides. For the rocking piece you’ll simply nail the 1 x 2 to the length of the center which will allow it to rock back and forth when you walk on it. You’ll want to be careful to make sure there are no gaps between the two sheets of plywood because you don’t want anyone getting their feet stuck in between and a piece of carpet draped on top of it allows for worry free enjoyment. Items needed to complete this include: Two large plywood boards On thin length of wood (Optional) Thick...

Faux Moss Application...
posted by SkeleTony
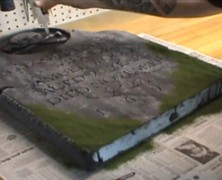
A rolling stone gathers no moss, but a tombstone (and my patio) gathers plenty. So if you want a realistic looking tombstone you’re going to need to find a way to add some realistic moss that will stick to it. Troy from Halloween Hellmouth has a great method that produces a great looking moss for any prop utilizing a mixture of pre-dried moss and paint. You can buy dried moss at most craft stores, but if you have access to moss you can dry it out for a couple of days and use it. You’ll start by puréeing the dried moss in a blender and then you’re going to start mixing your paint until you get your desired color. Once you’ve got the correct color mix you’re ready to start spreading it onto your prop. Use your fingers to spread it and don’t worry if you’re a bit sloppy because moss doesn’t exactly grow straight. After you’ve spread the moss mixture onto your prop you’re going to want to wait for a good three days for the entire mixture to set, which sounds like an inordinate amount of time to wait for something to dry, but trust me, it’s worth it. The end result looks amazing. Troy adds even more detail by tea staining his moss application, but even before doing this his method is a success. Items needed to create this include: Bag of moss (or actual dried moss) Paintbrush Mixing stick Mixing bowl Spray bottle filled with water Drip pan (for water to drip in to) Acrylic paint Blender Shop These Materials on Amazon 5-Pack Foam RIP Tombstone Blanks for Carving Decorative Cemetery Fence Sections Rust-Oleum Flat Black Spray Paint 12oz Affiliate Disclosure: HauntersList.com is a participant in the Amazon Services...
Tombstone Lettering
posted by SkeleTony
Nothing spoils a good tombstone more than poor lettering carved into it. No matter how realistic your tombstone looks, all eyes will eventually focus on the text, and if you want it to look really good, you’ll want to check out the video tutorial that Eerie Acres Cemetery put together on effective tombstone lettering. It covers some very simple but essential techniques for creating really good looking tombstone text. http://youtu.be/lI2jnU1verk Shop These Materials on Amazon 5-Pack Foam RIP Tombstone Blanks for Carving Decorative Cemetery Fence Sections Rust-Oleum Flat Black Spray Paint 12oz Affiliate Disclosure: HauntersList.com is a participant in the Amazon Services LLC Associates Program. As an Amazon Associate we earn from qualifying purchases at no extra cost to...
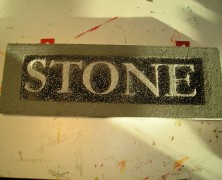
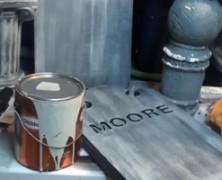
Carved Granite From Foam...
posted by SkeleTony
Acetone will eat away at your styrofoam, and while that’s not exactly what I would call a newsflash here, but Creativeman uses it to great advantage in his instructable on how to use this to create really good looking granite lettering. This is a great way to create a sandblasted stone sign for use on cemetery columns, or to add depth to your tombstone, and it requires only the most rudimentary of skills. The process is simple. Cut your pre-printed letters out with an exacto knife, glue them to your styrofoam, and then spray paint the styrofoam. It’s literally easier than breathing, but it adds a great level of detail to your lettering or sign. Items needed to complete this include: Styrofoam Printout of your letters (each letter cut) Elmer’s glue Spray paint containing acetone Shop These Materials on Amazon XPS Foam Board 1" Thick Craft Sheets 4-Pack 4-in-1 Hot Wire Foam Cutter Kit 15W Loctite Power Grab Foam-Safe Construction Adhesive Affiliate Disclosure: HauntersList.com is a participant in the Amazon Services LLC Associates Program. As an Amazon Associate we earn from qualifying purchases at no extra cost to...
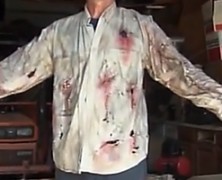
Making Zombie Clothes...
posted by SkeleTony
If a zombie can take the time to dig its way out of its grave, the least you can do is make sure he’s got some appropriate looking clothes, right? And if you’ve taken the time to build a Full Sized Zombie Prop, or just plan on becoming the zombie yourself, you should probably pay equal attention to the clothing since it’s a major part of your zombie’s appearance. If you want truly realistic looking zombie clothing you’re going to want to give Robertb7864’s video a look. This twenty minute trek through zombie clothes modification features a full five minutes dedicated to Robertb7864 taking a belt sander to a shirt. The end result is pretty great looking, though, and is way more authentic looking than you’d achieve by tearing or cutting the cloth yourself....
Foam Masonry
posted by SkeleTony
If you’re in need of some stone or brick panels for your haunt, you’re definitely going to want to check out the tutorial that HIY Productions created. This tutorial takes you through the process of creating brick panels out of styrofoam from start to finish. The tips provided in this tutorial are invaluable if you’re planning on creating any sort of stone or brick for your haunt. The finished product looks amazingly real. http://youtu.be/frq7fZ8SZ8s Shop These Materials on Amazon XPS Foam Board 1" Thick Craft Sheets 4-Pack 4-in-1 Hot Wire Foam Cutter Kit 15W Loctite Power Grab Foam-Safe Construction Adhesive Affiliate Disclosure: HauntersList.com is a participant in the Amazon Services LLC Associates Program. As an Amazon Associate we earn from qualifying purchases at no extra cost to...
Haunted House Wall Panels...
posted by SkeleTony
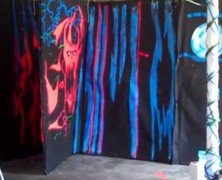
Whether your haunt is in a warehouse somewhere, or just in your garage, you’re eventually going to need to build some wall panels for it. Luckily, there’s nothing tricky about framing walls, especially if you follow Hawthorne Manor Haunted House’s tutorial on building wall panels. These panels are made of 1×2 furring strips with 2×2 cross bracing, and black sheets. Once you’ve got your panels built you can configure and connect them however you want using some three-hole flat brackets. They’re easy to build, go up easily, and (if you’ve got the room) store easily in your attic....
Tombstone Weathering
posted by SkeleTony
It seems like I spend more time watching tutorials on how to carve tombstones than I do actually carving tombstones, and that’s ok with me, because it’s all part of the learning process. Well a major part of that process comes in the form of the two video tutorials that S.K. Austin of The Haunting Grounds provided. This two part in depth analysis of how to weather your tombstones properly is an invaluable resource for those of us interested in created the most realistic looking tombstones possible. http://youtu.be/Owv7yyK5gno Shop These Materials on Amazon 5-Pack Foam RIP Tombstone Blanks for Carving Decorative Cemetery Fence Sections Rust-Oleum Flat Black Spray Paint 12oz Affiliate Disclosure: HauntersList.com is a participant in the Amazon Services LLC Associates Program. As an Amazon Associate we earn from qualifying purchases at no extra cost to...
Prop Dental Plates
posted by SkeleTony
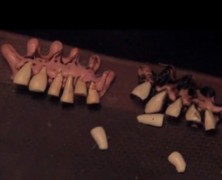
If you create your own masks or creatures for your haunt, you’ve probably needed to find some teeth for them. I always heard the phrase that necessity was the mother of invention, but it turns out it’s actually Allen Hopps. He’s got a great tutorial on how to make dental plates for your masks and props. Since they’re made from hot glue sticks you really don’t want to put them in your mouth, but they’ll look great as an accent to any prop....
Dry Brushing Tips & Tricks...
posted by SkeleTony
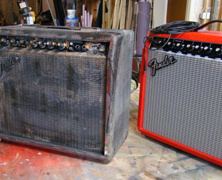
Whether you just finished building your latest masterpiece, or simply want to age a store bought prop a bit, properly painting your prop can make all the difference in the world. Eerie Acres Cemetery has a great video tutorial with some really helpful dry brushing techniques that might just give your next prop that extra bit of realism....
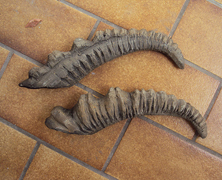
Ermelyn’s Horns...
posted by SkeleTony
If you like creating your own creatures for your haunt you’ll eventually have the need to create some horns for them. You can probably buy some actual antlers, but if you’re planning on incorporating them into a mask or don’t want an overly heavy static prop, you may want to follow Ermelyn Hollerborn’s tutorial for making horns in 10 easy steps. The horns are made using multiple layers of styrofoam that’s shaved down to give it a more rounded appearance. From their it’s a matter of adding detail to it with a soldering iron, or heat gun. Ermelyn’s horns are then coated with Pattex adhesive and painted. They look fantastic and can be made as large as you like without weighing down your prop. Items needed to complete this include: Styrofoam Contact adhesive Acrylic paint Soldering iron / heat gun Google Translate (unless you read German) Shop These Materials on Amazon XPS Foam Board 1" Thick Craft Sheets 4-Pack 4-in-1 Hot Wire Foam Cutter Kit 15W Loctite Power Grab Foam-Safe Construction Adhesive Affiliate Disclosure: HauntersList.com is a participant in the Amazon Services LLC Associates Program. As an Amazon Associate we earn from qualifying purchases at no extra cost to...
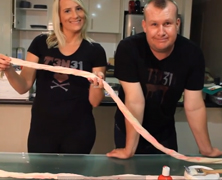
Outback Gorehouse Fake Intestines...
posted by SkeleTony
Many years ago I had to create a scene where an actor’s stomach was sliced open allowing their intestines to spill out. My solution was to buy a long link of Italian sausage, which was boiled and soaked in a Karo syrup blood solution. This allowed the intestines to be eaten by the actor as the neighborhood kids passed through creating quite a memorable scene (it was pretty dark, and they were pretty young, so we could get away with sausage guts). So if you need to make some fake intestines for your haunt, my advice to you is remember my method fondly, and DO NOT USE IT. No matter what you do, sausage guts do not make good intestines, besides that, Sonya and Caid from Outback Gorehouse have a better solution. Their method utilizes paper towels that are wrapped in a mixture of liquid latex and paint. The latex is spread on a flat glass surface for a total of eight layers before it’s wrapped around the towels. The resulting intestines are pretty good looking and you can make a ton of these for hardly any cost, but whatever you do, DO NOT eat them!...
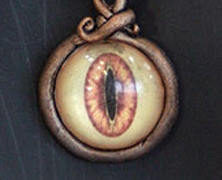
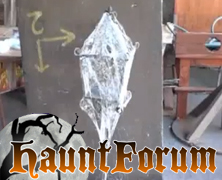
Jeepers Peepers!
posted by SkeleTony
I’ve posted a couple of tutorials on how to make realistic eyes for your props, but the one that Sytnathotep posted over at HauntForum may be the easiest yet. This method only produces a half of an eye, but sometimes that’s more than enough. Before you get started on this you’re going to need to print and cut your iris to fit the circumference of your round palettes. Once you’re ready to start it’s just a matter of pouring some of the epoxy into the palette, making sure to leave a little room for another pour. Place your iris face down into the palette and push it slightly into the epoxy making sure that it’s completely covered, then add enough epoxy so it’s completely level with the top of your palette. That’s all there is to it! Once they’re dry, just pound them out of the palette and you’re good to go. Items needed to complete this include: Plastic paint palettes Smooth-On’s Epoxy Cast 690 Iris...
Easy Bloodshot Eyeballs...
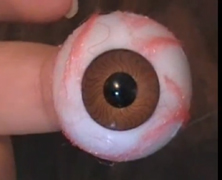
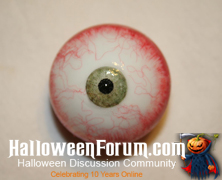
posted by SkeleTony
This easy to do eyeball tutorial makes it’s way to us from HauntItYourself Productions. You’ll need to get some half eyeballs off of Ebay (by searching for half eyeballs of course), some clear nail polish and red yarn for veins. From there, it’s just a matter of painting some nail polish on the eyeball and spreading some of the fine threads of yarn on the eyeball. The effect is quite realistic and you’re going to spend less than 5 minutes and about 5 dollars on this project....

Making Glow In The Dark Teeth...
posted by SkeleTony
If you’ve taken the time to follow Dr. Kreepy’s tutorial on making Cheap Easy Skulls, you’ve no doubt ended up with a boatload of superb looking skulls. The only thing that could possibly make those skulls look better is a little variety. And what can help give a skull some variety better than some realistic looking teeth. Well the Devil’s Workshop has a tutorial on how to make glow in the dark teeth that will really help. It’s a reallysimple process involving a mixture of translucent white and glow in the dark baking clay. http://youtu.be/FbjK2r1Wv0A Shop These Materials on Amazon Realistic Replica Human Skull Statue 6.5" 5.4ft Full Size Halloween Foam Skeleton Affiliate Disclosure: HauntersList.com is a participant in the Amazon Services LLC Associates Program. As an Amazon Associate we earn from qualifying purchases at no extra cost to...
Cheap and easy Skeleton Hands...
posted by SkeleTony
Since many of the prop builds featured on HauntersList involve PVC frames it’s probably not a bad idea to post another tutorial on how to create hands for those frames. LastHouse from HalloweenForum has a tutorial on how to make some gruesome looking skeletal hands that won’t take you too long and the cost is next to nothing. They’re made of styrofoam and wood dowels coated with a little hot glue and then painted. The hardest part about this tutorial is melting the styrofoam to give them a more natural boney look. Make sure to do this step in a well ventilated area as burning styrofoam can be highly toxic (it’s a good idea to wear a respirator). Items needed to complete this include: Styrofoam Hot Glue Wooden dowels Drylock Paint Shop These Materials on Amazon 1" Schedule 40 PVC Pipe 6-Pack Ratcheting PVC Pipe Cutter (up to 1-1/4") 1" PVC Furniture Fittings Assortment 12-Pack Oatey PVC Clear Cement + Primer Handy Pack XPS Foam Board 1" Thick Craft Sheets 4-Pack 4-in-1 Hot Wire Foam Cutter Kit 15W Loctite Power Grab Foam-Safe Construction Adhesive Affiliate Disclosure: HauntersList.com is a participant in the Amazon Services LLC Associates Program. As an Amazon Associate we earn from qualifying purchases at no extra cost to...
Grime Up Props
posted by SkeleTony
Making a prop from scratch takes skill, but aging the prop so that it looks like it’s been around for a few years takes talent. Now, it’s well known that Terra from HalloweenForum can build anything. I mean, I honestly think she could build a structurally sound house out of styrofoam if she wanted to. But when she needs to make something look old, or grunged up, she’s definitely got the talent to make it so. Her video tutorial on how to Grime Up Props details exactly how she does it, and it’s the perfect guide for anyone who needs help making props look and feel like they’ve been around for years. ...
Monster Mud
posted by SkeleTony
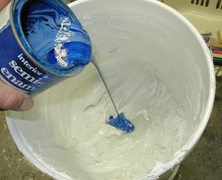
If you’re a veteran prop builder you’re no doubt familiar with how to mix monster mud. But for those that have never had the pleasure of mixing a batch and slopping a handful on their latest prop, well what are you waiting for? And since most tutorials reference monster mud with no additional details, I figured it would probably be a good idea to provide a tutorial from TwistedVisions on how to mix Monster Mud for the uninitiated. It is quite literally, the easiest thing I’ve ever posted on HauntersList and should be considered mandatory reading. Shop These Materials on Amazon USG Sheetrock Drywall Joint Compound 4.5 Gallon Cheesecloth Unbleached 36×36" (for Monster Mud draping) Affiliate Disclosure: HauntersList.com is a participant in the Amazon Services LLC Associates Program. As an Amazon Associate we earn from qualifying purchases at no extra cost to...

Blood on the Cheap
posted by SkeleTony
If you’re looking for the perfect recipe for blood then look no further. Actually, Allen Hopps from Stiltbeast Studios would probably disagree completely with that. He’s provided some great recipes for blood in his Blood on the Cheap tutorial, but I’m sure he would encourage you to experiment with other formulas until you find the blend that best suits your needs....
The Bride of Articulation...
posted by SkeleTony
If you’re building any type of body form PVC is ultimately going to be the best framing option. Wood is good, but PVC is worry free (I want credit for that phrase if it catches on). Anyway, if you like the Movable PVC Joints tutorial then you’re really going to like this one. The Bride of Articulation tutorial that Beelce over at HauntForum has provided us is an incredible example of how to create the skeleton for any form you’re creating. You can literally create any pose that you want, and then cover it in any fashion you see fit. This is not a difficult tutorial, and allows for incredibly detailed forms. Items needed to complete this include (but will need to be calculated per joint): 1″ PVC (for the bones) 1″ PVC coupling Post caps for each joint Flat washers Lock washers Bolts Lock nuts Drywall / Deck screws Shop These Materials on Amazon 1" Schedule 40 PVC Pipe 6-Pack Ratcheting PVC Pipe Cutter (up to 1-1/4") 1" PVC Furniture Fittings Assortment 12-Pack Oatey PVC Clear Cement + Primer Handy Pack Realistic Replica Human Skull Statue 6.5" 5.4ft Full Size Halloween Foam Skeleton Affiliate Disclosure: HauntersList.com is a participant in the Amazon Services LLC Associates Program. As an Amazon Associate we earn from qualifying purchases at no extra cost to...
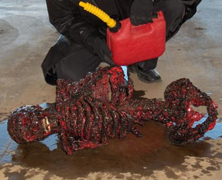
Charred Corpse
posted by SkeleTony
Ok, so maybe you’ve tried corpsing a bucky skeleton, but now you want to try something different, perhaps something a little grimmer. Well here’s a tutorial that may give you what you’re looking for… That is, if you’re looking for a Charred Corpse tutorial. That’s right, if you want the end result without the flames, check out Don P’s tutorial over at I Make Projects. It may not look like much when you start, but as it progresses it really starts to take a gruesome turn. Items needed to create this include: A skeleton A can of expanding foam insulation (“Great Stuff” is one of the many brand names.) A tin of liquid latex (I couldn’t find the good paint-on stuff all the prop houses seem to use, so I just used Contact Cement.) Flat black spray paint Glossy bright red spray paint Small amount of acrylic black paint (it’s water based and will clean up with water and soap as long as it’s wet.) Small amount of acrylic brown paint Small amount of clear gloss finish Some old paintbrushes, rubber gloves, and a well-ventiliated area By the time you’re finished, this thing is just as good, if not better looking than a “standard” corpsed Bucky, and you certainly don’t see these nearly as often! ...
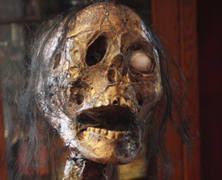
Corpsing a Skeleton
posted by SkeleTony
Ok, so you’ve picked up a nice Bucky skeleton and you’re done admiring it in all it’s boney glory, but what next? Well, if you don’t mind taking that pristine looking skeleton and making it look a little bit more goreified then you might want to take a look at this excellent corpsing tutorial from My Ghoul Friday. I’ve seen a lot of corpsing tutorials on the web, many of which utilize the same techniques that My Ghoul Friday uses, but none are laid out quite as nicely as hers is. And let’s be honest, that is one awesome looking skeleton. The tutorial is divided into two parts, with Part 1 detailing the plastic wrapping and the staining, while Part 2 details the finer dry bushing and hairing of the corpse. Items needed to create this include: Skeleton Wood Stain Paint Brush Rag Heavy Duty/Protective Latex Gloves Heat Gun Thin, clear plastic tarp paints Spray Glue hot glue gun white glue or “Sculpt or Coat” styrofoam ball acrylic paint wig scissors epoxy Shop These Materials on Amazon Realistic Replica Human Skull Statue 6.5" 5.4ft Full Size Halloween Foam Skeleton Creature Liquid Latex 16oz Clear Special Effects Cheesecloth Unbleached (for draping and corpsing) Polyester Fiberfill Stuffing 30 LB Bag Affiliate Disclosure: HauntersList.com is a participant in the Amazon Services LLC Associates Program. As an Amazon Associate we earn from qualifying purchases at no extra cost to...
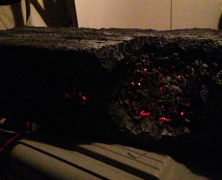
Burning Timber(s)
posted by SkeleTony
Ok, it’s two for Tuesday, and today we’re going to look at burning things. I like both of these tutorials, and since they’re both so similar I’ve decided that they should both be featured in the same post simply because they’re meant to create the same effect in different environments. These props are not to be confused with the very popular hot burning coals tutorial (ok, maybe they are since they’re nearly identical). The first tutorial is provided from thxboy and is really centered around burning timber. The effect is actually really gorgeous because it really conveys the feeling that the building is on fire, but is much more intricate since it involves using a styrofoam frame. Materials needed to create this include: 2″ thick pink foam board Great Stuff (small cracks or large gap version, I can’t tell the difference) Red christmas tree lights. I used a 100 light strand that could be either steady or flickering Hot glue gun Black Primer paint Light grey primer paint Krylon-Make it Stone! (Black with white speckles) Chicken wire paint brushes, drywall saw The second tutorial is provided by OctART, and is slightly easier, but just as good looking. Materials needed to create this include: chicken wire plastic Great Stuff christmas tree lights...

Paint Faux Wood Grain...
posted by SkeleTony
Terra from HalloweenForum has posted a great video tutorial on how to achieve an incredibly realistic wood grain look that can easily be applied to your styrofoam projects. I’m blown away at how realistic it looks and how simple it is. http://youtu.be/0Oe2HdxiolM Shop These Materials on Amazon XPS Foam Board 1" Thick Craft Sheets 4-Pack 4-in-1 Hot Wire Foam Cutter Kit 15W Loctite Power Grab Foam-Safe Construction Adhesive Affiliate Disclosure: HauntersList.com is a participant in the Amazon Services LLC Associates Program. As an Amazon Associate we earn from qualifying purchases at no extra cost to...
Super Sticky Cobwebs
posted by SkeleTony
If you’ve ever used the stretchable spider webs that everyone sells you know that they sometimes don’t stay stretched quite as nicely as you’d like them to. Well the tutorial below from the Dapper Cadaver might be just the solution you’re looking for. I originally found this video in a post on HauntForum, and I strongly urge you to read the posts associated with it. The Dapper Cadaver uses 3M 90 spray adhesive to get the webbing super tacky, which results in a highly flammable finished product. The group over at HauntForum have weighed in on some suggestions to combat the flammability, but do use extra caution if you are going to attempt this. Despite the fact that this is a pretty permanent and highly flammable solution, I have to admit, it does provide some quality looking cobwebs....
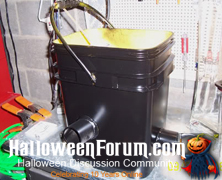
Homemade Vortex Fog Chiller...
posted by SkeleTony
Serialc0d3 over at HalloweenForum.com has a great tutorial on how to build your own Vortex Fog Chiller for very little cash. Now, there are many containers you can use when building your own vortex fog chiller, but reusing a Tidy Cat Litter pail is the ultimate “green” project. Additionally, the finished product looks remarkably familiar. To complete this prop you’ll need the following: Tidy Cat Litter Pail Few ft of 2 in. PVC 2 in. PVC Elbow Few ft of 1/2 in. PVC pipe Some sort of metal mesh or chicken wire to hold ice Epoxy of your choice (I used Oatey Epoxy Putty) Krylon Fusion Paint (optional) Nozzle for Drain Hose (optional) Drain Hose (optional) Tools for cutting the materials And of course, you’ll need a fog machine. Shop These Materials on Amazon 400W Fog Machine with Wireless & Wired Remote FogWorx Extreme High Density Fog Juice Gallon Copper Coil Refrigeration Tubing 1/8" OD x 6.5ft (fog chiller) Affiliate Disclosure: HauntersList.com is a participant in the Amazon Services LLC Associates Program. As an Amazon Associate we earn from qualifying purchases at no extra cost to...
Foam Boarded Windows
posted by SkeleTony
Rchassel over at HalloweenForum.com has a good tutorial on how to use styrofoam boards to board-up your windows. They’re inexpensive, look great and are lightweight enough that they can be held in place over your windows using very thin straps! Items used to create this effect include: 1” thick extruded polystyrene foam insulatio Gorilla Glue Straps to anchor the board system into your windows Paint Behr Faux Glaze Shop These Materials on Amazon XPS Foam Board 1" Thick Craft Sheets 4-Pack 4-in-1 Hot Wire Foam Cutter Kit 15W Loctite Power Grab Foam-Safe Construction Adhesive Affiliate Disclosure: HauntersList.com is a participant in the Amazon Services LLC Associates Program. As an Amazon Associate we earn from qualifying purchases at no extra cost to...
Homemade Web Spinner
posted by SkeleTony
Instant Monsters over at HalloweenForum has posted a great tutorial on how to make your own Web Spinner using some easily obtainable items and a drill. The cobwebs that this thing puts out look amazing and would make most spiders jealous. They’ll require some serious cleanup, but if you’re looking for a realistic web, look no further. ...
Easy Realistic Eyeballs...
posted by SkeleTony
Fangoria over at HalloweeForum.com has a great tutorial on how to make easy, cheap and ultra realistic eyeballs. Trust me, this one I’ve succeeded in doing, and they turn out fantastic every time. You’ll need the following supplies: A package of ping pong balls Deep Red blood color gloss paint Yarn the same color as the paint A printout of iris from the web A tweezers A scissors A paintbrush Clear nail polish/Nail hardener – make sure whatever you use that it is glossy, gloss makes them pop!...