
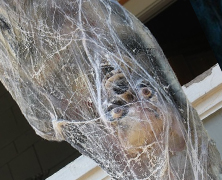
Grimvisions has an interesting take on how to create a cocooned spider victim. While most tutorials would have you wrap a plastic skeleton or torso, Grimvisions utilizes a pvc frame with newspaper and plastic bags to fill the body. While it may take a little more effort to create your own torso (and let’s be honest, it won’t take that much effort), you’ll feel better knowing that you haven’t wasted a perfectly good skeleton for a prop that would render most of it barely visible anyway. Items needed to complete this include: PVC Duct Tape Spray Adhesive Spider Webbing Saran Wrap Fake Eyeballs Wire A skull either plastic or foam Pipe insulation Newspaper Plastic Bags Spray Paint Liquid Latex Shop These Materials on Amazon 1" Schedule 40 PVC Pipe 6-Pack Ratcheting PVC Pipe Cutter (up to 1-1/4") 1" PVC Furniture Fittings Assortment 12-Pack Oatey PVC Clear Cement + Primer Handy Pack 300 Sq Ft Stretch Spider Web with 20 Fake Spiders Giant 295" Fake Spider + Triangular Web Black Braided Fishing Line (for rigging props) Affiliate Disclosure: HauntersList.com is a participant in the Amazon Services LLC Associates Program. As an Amazon Associate we earn from qualifying purchases at no extra cost to...
Monster Mud Wall Breaker...
posted by SkeleTony
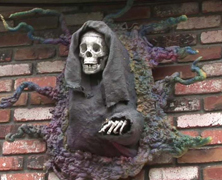
If you’re looking for an eye grabbing prop to welcome guests to your haunt then look no further. The late PerfessorEvil created an excellent Monster Mud Wall Breaker tutorial that looks great. After glancing at the tutorial I was surprised at just how simple this is to create. The pvc frame is simple to put together and the chicken wire framing doesn’t require a high degree of accuracy, it’s a simple cloak wrap. The rest is just monster mudded burlap and great stuff, what could be easier? The finished product looks great and will really be a nice focal point in or around your haunt. I’m not a hunter, so I’ll never be able to mount a deer above my fireplace, but I could easily see putting this beauty up there (at least during the Halloween season) Items needed to create this include: 10′ – PVC – 3/4″ 4 -PVC 3/4″ 90 degree connectors 4 – PVC 3/4″ “T” connectors 1 – Bucky Skull 1 – Bucky Hand 5 gallons – Joint Compound (You will have a LOT left over, but that’s how it comes) 1 gallon Black (or whatever color you want) paint Chicken wire Burlap Heat Gun Assorted drywall screws Zip ties Flat piece of plastic (dropcloth type) Great Stuff Triple Expanding Foam Shop These Materials on Amazon USG Sheetrock Drywall Joint Compound 4.5 Gallon Cheesecloth Unbleached 36×36" (for Monster Mud draping) Affiliate Disclosure: HauntersList.com is a participant in the Amazon Services LLC Associates Program. As an Amazon Associate we earn from qualifying purchases at no extra cost to...
Clay Skeletal Hands
posted by SkeleTony
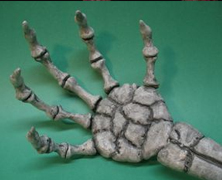
There’s a great tutorial on how to craft some skeletal hands out of Crayola Model Magic and coat hangers at a site called Mousecave. I’m not a good sculptor so I would normally shy away from something like this, but it sure seems super simple, and what could be easier than skeleton arms, right? Items needed to complete this include: Coat hangers – 3 to 5, depending on the length of the forearm Craft wire – any solid single strand wire will do Marker pen Lineman’s pliers – any pliers will do, so long as you can cut and bend the wire Two-part epoxy – because it’s strong and sets fast Acrylic craft paint – black and white Soft paint brush and small mixing dish Paper towels Scissors Modeling tools – nothing fancy, just something to etch some jagged lines Crayola Model Magic –...
Vent Motor Headpopper...
posted by SkeleTony
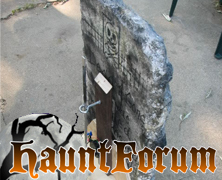
If you’ve ever wanted a headpopper prop in your haunt but didn’t think that a wiper/vent motor would create a good enough effect? Relax, Dave the Dead has a really good tutorial over at HauntForum on how to create your own headpopper. What I like best about this one is that as the head peeks over the tombstone it slowly rotates its way from side to side. This makes for a much creepier effect than just a popup / popdown. Items needed for this prop include: 16″ square of 1/2 inch plywood, cut in half (two 8″ X 16″ pieces) 20″ long 1″ X 4″ wood slat 1/8 X 1/2″ aluminum bar stock, cut into 5″ and 25″ lengths 3/8″ X 4-1/2 inch lag Screw Eye (2) 1/4-20 X 1.5″ Bolts (3) 1/4-20 Nuts (2) 1/4″ lock washers (1) 1/4-20 locking nut (2) 1 1/2″ wood screws Motor 12Vdc wallwart Shop These Materials on Amazon 12V Wiper Motor 2.5" Shaft 110 Degree (prop building) PWM DC Motor Speed Controller 9-70V 35A 45Kg High-Torque Waterproof Digital Servo Motor Affiliate Disclosure: HauntersList.com is a participant in the Amazon Services LLC Associates Program. As an Amazon Associate we earn from qualifying purchases at no extra cost to...
The Scarecrow
posted by SkeleTony
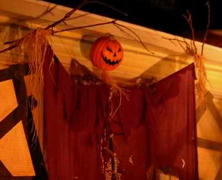
Like a giant sentry standing guard against the legions of masked marauders that descend upon our fair homestead, the pumpkin king provides tasty treats to the interlopers in exchange for their deference. Ok, that may be waxing poetic a bit, but I’ve always wanted to build a giant Pumpkin King prop to mount to the side of our garage to welcome the neighborhood kids to our house on Halloween. Most of the ones that I’ve seen involve using vines to create the body, and while I think that those tend to look more realistic, there’s just no way that I see myself gathering all of the vine necessary to pull it off. That’s why the DemonWare Scarecrow tutorial appeals to me, because with a pvc frame, I could actually see myself getting this one done. You can still use vines to fill in the gaps, but it’s not the major component here. The best part is you can make this prop as tall as your house if you want (although the size of the pumpkin may make it look a bit disproportionate if you do). Items needed to complete this include: 20 feet of PVC pipe PVC Fittings: (2) tees, (2) 45° Angle, 2 straight 2 Yards of crinkled cotton (or other cheap material) Fake Pumpkin Sticks- 6 long ones for fingers, 6-8 short ones for ribs Screws Paint (to cover PVC) Raffia (found at local craft store) Wire RIT Dye, 2 boxes of purple or black 5 Gallon Plastic Bucket Optional Materials: Large cardboard box Leaves 50 lbs of sand Eye hooks 5ft 1/2 – 3/4 in metal pipe PVC and connectors for...

Keeba’s Tombstones...
posted by SkeleTony
If you’ve ever had a cemetery in your haunt or yard you already know the pain of having to purchase tombstones for it. The pain revolves around having to pay for a foam product that you could easily produce yourself. Moreover, yours will certainly look better because you can put as much detail as you desire into it, and personalize it to your hearts content. Personally, I can’t stand working with styrofoam, but for those that don’t have a problem with it, you’re going to want to take a look at Keeba’s Tombstones. Not only is Keeba’s tutorial nicely laid out from the start of the project to completion, but offers some really good examples of detailing techniques like dry and wet warping that you just don’t find in most tombstone tutorials. After undergoing some simple painting and aging, the finished products look fantastic. These will take a while to make, and you’re going to have to factor your time into these when deciding whether or not it’s worth your while, but you certainly don’t find tombstones this nice for sale. Shop These Materials on Amazon 5-Pack Foam RIP Tombstone Blanks for Carving Decorative Cemetery Fence Sections Rust-Oleum Flat Black Spray Paint 12oz XPS Foam Board 1" Thick Craft Sheets 4-Pack 4-in-1 Hot Wire Foam Cutter Kit 15W Loctite Power Grab Foam-Safe Construction Adhesive Affiliate Disclosure: HauntersList.com is a participant in the Amazon Services LLC Associates Program. As an Amazon Associate we earn from qualifying purchases at no extra cost to...

Large Cauldron
posted by SkeleTony
If you’ve ever needed to purchase a cauldron for a haunt you’ve probably been disappointed with your purchasing options. They’re tiny. I mean, so tiny that a baby witch would feel uncomfortable using them. So your best option is to craft your own cauldron. I’ve seen several really good tutorials on how to build your own cauldron, and Old Man Bakke has a pretty good one posted over at HalloweenForum. I must admit that when I first saw the cardboard, hot glue gun, and duct tape I was reluctant to continue, but by the time I reached the finished product images on page 7, I was sold. The size is what I would expect that a couple of old hags would use, and it looks completely realistic. What I like best about this tutorial is that it was a completely fluid tutorial. If you follow the posts you’ll see that during the creation of this tutorial a user posted a link to some photos from Dave The Dead’s aging technique tutorial that really helped make this into the finished product that it became. Most of the time tutorials don’t get better on the fly like this one did. Items needed to complete this prop include: Large rope handled bin (rope removed) Heavy duty cardboard Duct tape Hot glue gun Paper Mache Spar Varnish Round towel rings Oatmeal & sand / water & glue...
Hangman Prop
posted by SkeleTony
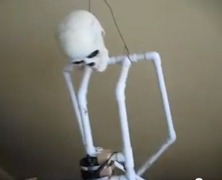
Ulcerative has posted a great video of the perfect frame for a hangman prop. When the attached wiper motor is turned on the flailing effect is supreme, and even though it’s just a PVC frame in the tutorial, you can more than visualize the awesome effect you’ll get when you clothe the frame and light it for effect. If you don’t want to get into pneumatics, but still want a great visual, this is definitely one you’re going to want to try. http://youtu.be/ENJVcyWUU7w Shop These Materials on Amazon 1" Schedule 40 PVC Pipe 6-Pack Ratcheting PVC Pipe Cutter (up to 1-1/4") 1" PVC Furniture Fittings Assortment 12-Pack Oatey PVC Clear Cement + Primer Handy Pack Affiliate Disclosure: HauntersList.com is a participant in the Amazon Services LLC Associates Program. As an Amazon Associate we earn from qualifying purchases at no extra cost to...
Floating Grim Reaper
posted by SkeleTony
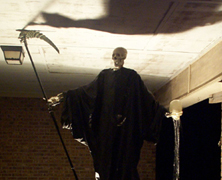
If the end justifies the means then this prop is going to be worth everybody’s time and effort. This cool floating grim reaper made mostly out of black iron piping could be one of the coolest additions to any haunter’s graveyard. Floating close to 10′ off the ground, the only trick is to shield the base from view as illustrated in this photo. Dating back to 2003 this prop tutorial comes to us by the Evil Geniuses Howard I. Scott, III and his partner in crime Ron. Items needed for this prop include: Torso, Arms, and Skull Scythe blade (plastic) 1/2″ Black Iron Threaded Pipe in the following lengths: One 48″ Two 36″ Three 24 Four 12″ One 6″ (unused) One 5″ Seven T connectors Three connecting nipples One 90 degree elbow Two 45 degree...
$25 Full-Size Toe-Pincher Coffin...
posted by SkeleTony
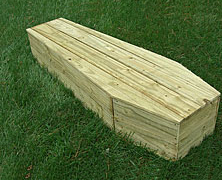
Every haunt needs a toe pincher coffin. It’s a fact. Ok, well, it’s not a hard and fast rule, but if you’re looking for a good tutorial on how to build your own full sized toe-pincher coffin, look no further. Woody over at ScareFX has a great tutorial on how to build one and here’s the best part, his build should only cost around $25.00! You’ll need a modicum of skill with a circular or table saw to get this done, but the rest is just piecing it together and gluing / screwing the pieces in place. The thing I like best about this tutorial (besides the fact that it doesn’t involve any miter cuts) is that it looks just rough enough to be completely realistic looking. There are 100’s of tutorials on how to build a toe pincher coffin, but this is the one for me. Items needed to complete this include (ScareFX pricing included): $15 for 15 Fence Pickets $5 for drywall screws $4 for wood...

Skeletal Columns
posted by SkeleTony
If you’re looking to make a creepy entrance to your haunt you may want to take a look at the Skeletal Sonotube Columns tutorial that Effie posted at HalloweenForum. These columns are really simple to make and would easily make an eerie entrance to a cemetery, dungeon, or mausoleum. All of the pieces of this puzzle are easily obtained and the best part is that Effie actually planned to use the empty sonotubes for storage at the end of the season! Items needed to create this include: Sonotube 10″ x 4′ (Sonotube comes in many diameters and heights, 4′ being the most easily obtainable at Home Depot, but you can get 6′, 8′ and 10′ heights as well) Century Novelty Plastic Skeleton Heavy pressboard Foam pipe insulation Spray...
Faux Wrought Iron Fence...
posted by SkeleTony
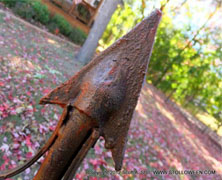
Ok, so we all know there are about 1,000 tutorials on the web about how to build a fence for a graveyard. Most of them use the typical 1 x 2″ furring strips at the top and bottom with PVC creating the bars of the fence. Well, Scott A. Stoll has definitely taken it up a notch, and if I was going to pick a tutorial to follow to make my own cemetery fence, I would choose his method. His tutorial on how to build his fencing is incredibly detailed, and the resulting product is well worth the time spent because it is remarkably realistic looking. This could pass for a real fence. The finials and curved iron is also incredibly easy to implement and adds so much to this fence. The best part is that you won’t have to worry about running out of finials, or heating up the PVC to accomplish this because it’s done using craft foam! If you are thinking of making some cemetery fence, you would be well served to check out this tutorial, it is the real deal. Items used to create fencing include: 1×2″ lumber 1/2″ PVC Craft Foam Drywall screws Hot glue Shop These Materials on Amazon 5-Pack Foam RIP Tombstone Blanks for Carving Decorative Cemetery Fence Sections Rust-Oleum Flat Black Spray Paint 12oz Affiliate Disclosure: HauntersList.com is a participant in the Amazon Services LLC Associates Program. As an Amazon Associate we earn from qualifying purchases at no extra cost to...

Animated Ouija Board
posted by SkeleTony
Ok, I’ve seen a couple of animated Ouija boards on the net, but DaveintheGrave from the HalloweenForum has the most detailed tutorial on how to make this prop I’ve ever seen. It’s broken down into two parts, with Part 1 focusing on how to prep the box that will house the guts of the Ouija board prop, while Part 2 details the mechanics of the prop. DaveintheGrave utilizes a small vent motor for this prop, and breaks down the motor instructions into two additional tutorials for further clarity (Motor Part1, Motor Part2). There is a link to the video of this prop in action at the beginning of Part 1 of the tutorial, and as you will see, this prop is worth the time spent making it, it looks...
Charred Corpse
posted by SkeleTony
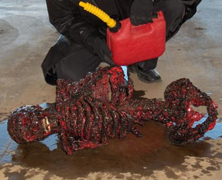
Ok, so maybe you’ve tried corpsing a bucky skeleton, but now you want to try something different, perhaps something a little grimmer. Well here’s a tutorial that may give you what you’re looking for… That is, if you’re looking for a Charred Corpse tutorial. That’s right, if you want the end result without the flames, check out Don P’s tutorial over at I Make Projects. It may not look like much when you start, but as it progresses it really starts to take a gruesome turn. Items needed to create this include: A skeleton A can of expanding foam insulation (“Great Stuff” is one of the many brand names.) A tin of liquid latex (I couldn’t find the good paint-on stuff all the prop houses seem to use, so I just used Contact Cement.) Flat black spray paint Glossy bright red spray paint Small amount of acrylic black paint (it’s water based and will clean up with water and soap as long as it’s wet.) Small amount of acrylic brown paint Small amount of clear gloss finish Some old paintbrushes, rubber gloves, and a well-ventiliated area By the time you’re finished, this thing is just as good, if not better looking than a “standard” corpsed Bucky, and you certainly don’t see these nearly as often! ...
Corpsing a Skeleton
posted by SkeleTony
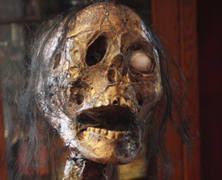
Ok, so you’ve picked up a nice Bucky skeleton and you’re done admiring it in all it’s boney glory, but what next? Well, if you don’t mind taking that pristine looking skeleton and making it look a little bit more goreified then you might want to take a look at this excellent corpsing tutorial from My Ghoul Friday. I’ve seen a lot of corpsing tutorials on the web, many of which utilize the same techniques that My Ghoul Friday uses, but none are laid out quite as nicely as hers is. And let’s be honest, that is one awesome looking skeleton. The tutorial is divided into two parts, with Part 1 detailing the plastic wrapping and the staining, while Part 2 details the finer dry bushing and hairing of the corpse. Items needed to create this include: Skeleton Wood Stain Paint Brush Rag Heavy Duty/Protective Latex Gloves Heat Gun Thin, clear plastic tarp paints Spray Glue hot glue gun white glue or “Sculpt or Coat” styrofoam ball acrylic paint wig scissors epoxy Shop These Materials on Amazon Realistic Replica Human Skull Statue 6.5" 5.4ft Full Size Halloween Foam Skeleton Creature Liquid Latex 16oz Clear Special Effects Cheesecloth Unbleached (for draping and corpsing) Polyester Fiberfill Stuffing 30 LB Bag Affiliate Disclosure: HauntersList.com is a participant in the Amazon Services LLC Associates Program. As an Amazon Associate we earn from qualifying purchases at no extra cost to...
Burning Timber(s)
posted by SkeleTony
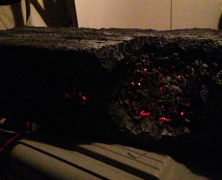
Ok, it’s two for Tuesday, and today we’re going to look at burning things. I like both of these tutorials, and since they’re both so similar I’ve decided that they should both be featured in the same post simply because they’re meant to create the same effect in different environments. These props are not to be confused with the very popular hot burning coals tutorial (ok, maybe they are since they’re nearly identical). The first tutorial is provided from thxboy and is really centered around burning timber. The effect is actually really gorgeous because it really conveys the feeling that the building is on fire, but is much more intricate since it involves using a styrofoam frame. Materials needed to create this include: 2″ thick pink foam board Great Stuff (small cracks or large gap version, I can’t tell the difference) Red christmas tree lights. I used a 100 light strand that could be either steady or flickering Hot glue gun Black Primer paint Light grey primer paint Krylon-Make it Stone! (Black with white speckles) Chicken wire paint brushes, drywall saw The second tutorial is provided by OctART, and is slightly easier, but just as good looking. Materials needed to create this include: chicken wire plastic Great Stuff christmas tree lights...

Goldie’s Bubbling Halloween Cauldron...
posted by SkeleTony
If you’re a fan of the Hot Burning Coals Prop then you’re going to love Goldie’s Bubbling Halloween Cauldron, because it’s essentially the same. The difference is in the details, however, and Woodhegm has built his to fit around a person (or prop) sitting in a large cauldron making them look as if they are cooking in bubbling hot liquid. You’ll need to find a cauldron large enough (and strong enough) to support someone, but one completed this prop will add a neat effect to any live scene in a haunt. Add a fog machine under the person and you’ll really be cooking! Items needed to complete this include: Cardboard Aluminum foil Whiffle balls 1 set orange lights (solid) 1 set orange lights (flashing) Great stuff Paint A...
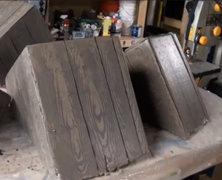
Paint Faux Wood Grain...
posted by SkeleTony
Terra from HalloweenForum has posted a great video tutorial on how to achieve an incredibly realistic wood grain look that can easily be applied to your styrofoam projects. I’m blown away at how realistic it looks and how simple it is. http://youtu.be/0Oe2HdxiolM Shop These Materials on Amazon XPS Foam Board 1" Thick Craft Sheets 4-Pack 4-in-1 Hot Wire Foam Cutter Kit 15W Loctite Power Grab Foam-Safe Construction Adhesive Affiliate Disclosure: HauntersList.com is a participant in the Amazon Services LLC Associates Program. As an Amazon Associate we earn from qualifying purchases at no extra cost to...

The Breathing Grave
posted by SkeleTony
Madmax at HalloweenForum has a great tutorial on how to make a Breathing Grave prop that you’re really going to dig (ridiculous pun intended) . The effect is subtle, looks great, and when viewed at night with proper lighting, is sufficiently creepy. When you see just how easy this prop is to craft, and how inexpensive it is, you’ll want to put them in front of all your tombstones! Items needed to create this include: Vent Motor 11′ – 1×4 power supply 12VDC 300mA 1 Yard Burlap paint, 1 spray can or latex house paint 22″ threaded rod (1/4″) 6 nuts 6 lock washers 12 screws 2 Cams (1/2″ PVC with a cap)...

Zombie Doll
posted by SkeleTony
What’s more creepy than those two little girls from The Shining? How about imagining the creepy dolls those girls would play with! I expect that they would look something like the zombie dolls that Cyclonejack from HauntForum creates, and he’s been nice enough to create a video detailing exactly how to make them. They look amazingly creepy and the only real cost involved is the doll and some paint! If you have a creepy little girl in your haunt, be sure to make one of these for her, because nothing says “abnormal” quite like a little girl that would play with one of these!...
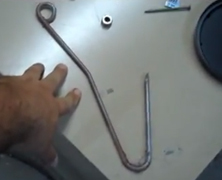
Homemade Meat Hooks
posted by SkeleTony
Allen Hopps of Stiltbeast Studios has a fantastic tutorial on how to make some really realistic looking meat hooks out of plastic hangers. You’ll absolutely love how easy they are to make and the cost for a dozen is next to nothing. All that’s left to do after this tutorial is attach your favorite gored up body parts and hang them from the ceiling....
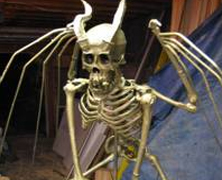
Demon Skeleton
posted by SkeleTony
I’m not sure who to credit this tutorial with but I suspect it goes to Jeff Davis. Regardless, the Demon Skeleton tutorial from the Davis Graveyard site sure looks incredible. I don’t think I could make this look as good as Jeff did, but it really makes me want to buy a budget Bart and give it a shot because the finished product is really cool looking. I can just imagine how it would look at night lit up! The first line of the tutorial sums it up, though, “This is NOT an easy project”. Shop These Materials on Amazon Realistic Replica Human Skull Statue 6.5" 5.4ft Full Size Halloween Foam Skeleton Affiliate Disclosure: HauntersList.com is a participant in the Amazon Services LLC Associates Program. As an Amazon Associate we earn from qualifying purchases at no extra cost to...

The Bleeding Portrait...
posted by SkeleTony
“Calm? Calm? Do murder and calm go together? Calm and murder? Murder?” -Luther Heggs In 1966 Don Knotts posed that question, and fans of the Ghost and Mr. Chicken have been laughing at his classic portrayal of Luther Heggs, intrepid reporter ever since. If you’re at all familiar with the film you’ll recall the classic scene where Luther comes across the portrait of old Mrs. Simmons that he had just seen intact five minutes earlier has been pierced with a pruning shears and is dripping blood, the exact way she was murdered 20 years prior. Luther’s conniption fit upon seeing this is pure comedic gold, and he drops like a leaf, out cold. I’ve always wanted a house like the old Simmons Mansion, and with Chris’ tutorial of the Bleeding Portrait, I’ll be one step closer. It looks to be a little bit of a tricky build, but would definitely be a crowd pleaser in any haunt. Items used to create this include: Picture frame Portrait (one that you can cut up) Small water pump Flexible tubing Tray for blood Blood Varnish ...
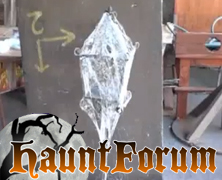
Super Sticky Cobwebs
posted by SkeleTony
If you’ve ever used the stretchable spider webs that everyone sells you know that they sometimes don’t stay stretched quite as nicely as you’d like them to. Well the tutorial below from the Dapper Cadaver might be just the solution you’re looking for. I originally found this video in a post on HauntForum, and I strongly urge you to read the posts associated with it. The Dapper Cadaver uses 3M 90 spray adhesive to get the webbing super tacky, which results in a highly flammable finished product. The group over at HauntForum have weighed in on some suggestions to combat the flammability, but do use extra caution if you are going to attempt this. Despite the fact that this is a pretty permanent and highly flammable solution, I have to admit, it does provide some quality looking cobwebs....
Circus Freak Puppeteer...
posted by SkeleTony
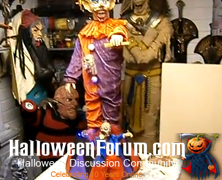
Every now and then someone builds a prop that you look at and immediately wish you had the talent to pull off the same build. That’s exactly how I felt when I saw TwistedUK’s Circus Freak Puppeteer tutorial. It’s not that the frame and motors are overly intricate, but the clay work that went into the crafting of both clowns (and shoes) is what really tells me I’ve no chance of building something nearly as nice as his. Of course, if you can find some premade items that would work you could always eliminate the clay, but you might not get as good looking of a finished product. I’m filing this under Motorized Props, but I really feel like there should be a Prop Showcase category because this one definitely deserves more than just a cursory glance. Items needed to complete this include: Child Mannequin Hair dressing practice head Wiper motor Large piece of chip board 1’thick One pack of DAS clay 3/4′ plastic tubing Sea fishing line 3 blue LEDs 1 1/2′ length of wood 1 sheet of plywood More patience than I...
Homemade Vortex Fog Chiller...
posted by SkeleTony
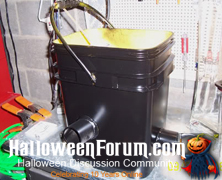
Serialc0d3 over at HalloweenForum.com has a great tutorial on how to build your own Vortex Fog Chiller for very little cash. Now, there are many containers you can use when building your own vortex fog chiller, but reusing a Tidy Cat Litter pail is the ultimate “green” project. Additionally, the finished product looks remarkably familiar. To complete this prop you’ll need the following: Tidy Cat Litter Pail Few ft of 2 in. PVC 2 in. PVC Elbow Few ft of 1/2 in. PVC pipe Some sort of metal mesh or chicken wire to hold ice Epoxy of your choice (I used Oatey Epoxy Putty) Krylon Fusion Paint (optional) Nozzle for Drain Hose (optional) Drain Hose (optional) Tools for cutting the materials And of course, you’ll need a fog machine. Shop These Materials on Amazon 400W Fog Machine with Wireless & Wired Remote FogWorx Extreme High Density Fog Juice Gallon Copper Coil Refrigeration Tubing 1/8" OD x 6.5ft (fog chiller) Affiliate Disclosure: HauntersList.com is a participant in the Amazon Services LLC Associates Program. As an Amazon Associate we earn from qualifying purchases at no extra cost to...
Foam Boarded Windows
posted by SkeleTony
Rchassel over at HalloweenForum.com has a good tutorial on how to use styrofoam boards to board-up your windows. They’re inexpensive, look great and are lightweight enough that they can be held in place over your windows using very thin straps! Items used to create this effect include: 1” thick extruded polystyrene foam insulatio Gorilla Glue Straps to anchor the board system into your windows Paint Behr Faux Glaze Shop These Materials on Amazon XPS Foam Board 1" Thick Craft Sheets 4-Pack 4-in-1 Hot Wire Foam Cutter Kit 15W Loctite Power Grab Foam-Safe Construction Adhesive Affiliate Disclosure: HauntersList.com is a participant in the Amazon Services LLC Associates Program. As an Amazon Associate we earn from qualifying purchases at no extra cost to...

Simple Pneumatic Ground Breaker...
posted by SkeleTony
I gotta admit, when I first watched Casa Fear’s tutorial on how to build a simple pneumatic ground breaker at HauntForum, I didn’t think the finished product was going to be worth the effort. The frame of this prop doesn’t exactly inspire confidence that it’s going to stay in one piece, let alone be creepy looking. Boy was I wrong. And that’s what’s so great about this prop. It’s simple to build, won’t break the bank, and really results in a great prop. The quick jerking of the cylinders creates a nice startling effect that you just don’t get from a standard ground breaker. So if you’ve got your head wrapped around the pneumatics, the rest of this prop should be smooth sailing for you. Items needed for this prop include: 6′ of 2×4 2 pneumatic cylinders 2 foot brackets 2 rod clevis 2 clevis mounting brackets 2 – 4 way solenoid valves 1 prop controller 4 – 3″ hinges (wrist/elbow) 2 – 2.8″ hinges (shoulders) 12 carriage bolts (attaching cylinders) 10 flat phillips bolts (hinges) 2 hex bolts (shoulders) Locking nuts/washers for all bolts Plywood for base ...
Grave Grabber Tutorial...
posted by SkeleTony
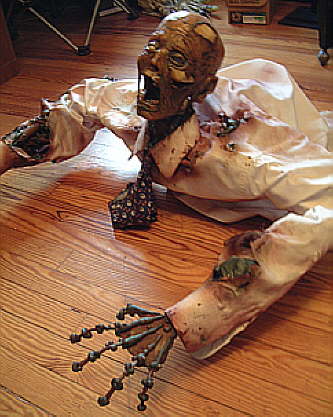
If you’ve ever wanted to build your very own grave grabber but didn’t think you had the skill to get it done right, take a look at this tutorial posted by Kevin Kennedy on the Haunt101 website. This prop is simple to create and looks awesome in any graveyard environment. Unfortunately, some of the links in the tutorial are dead, but they’re relatively insignificant to the tutorial and the mechanism should be enough to inspire your creativity. Items needed to build this include: 9’ of 1” x 1/8” aluminium flat stock 36” wooden dowl 8 – 8/32” x 5/8” machine screws 24 #8 SAE washers (you could use nylon washers) 8 – 8/32” nuts with nylon threads a low speed high torque motor 1 spooky head 1 pair of spooky hands along w/ coat hanger and spray foam Some of the assorted lumber every haunter has lying in the back of their...

Movable PVC Joints
posted by SkeleTony
Discozombie over at HalloweenForum.com has come up with a great way to give your PVC creations moveable joints. This technique is so simple to do, but really gives your creations an added level of realism. Items needed to create this include: PVC Heat gun clamp sander or grinder drill Bolts Locking Nuts Washers Shop These Materials on Amazon 1" Schedule 40 PVC Pipe 6-Pack Ratcheting PVC Pipe Cutter (up to 1-1/4") 1" PVC Furniture Fittings Assortment 12-Pack Oatey PVC Clear Cement + Primer Handy Pack Affiliate Disclosure: HauntersList.com is a participant in the Amazon Services LLC Associates Program. As an Amazon Associate we earn from qualifying purchases at no extra cost to...

Tarpit Monster
posted by SkeleTony
Created by Jeff, aka Noah Fentz, of thecreepyhousenextdoor.com this tar pit monster tutorial could prove to be a very difficult and noxious project, but it sure is a cool idea. All you need are a “duct taped” body cast, a styrofoam head and some roof tar. If you’ve never used roof tar, a word of warning, it’s very sticky and is not easily if ever removed (also see the disclaimer on the bottom that was pulled from Noah’s tutorial for extra emphasis). *DISCLAIMER- Flashing cement is flammable and highly combustible . All tar props are for outdoor use...
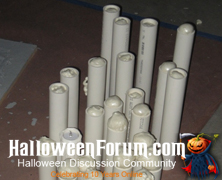
PVC Flicker Candles
posted by SkeleTony
Jimmyzdc over at HalloweenForum has posted an awesome tutorial on how to make your own PVC candles. It’s super simple, and when you pop some battery powered tealight candles on top of them you’ll be free to create and put out as many candles as you want without having to worry about setting your haunt on fire. Items used to create these include: 1 1/2″ PVC Pipe – Full length 8-10 ft pipes Great Stuff Insulation LED Tea Lights Hot Glue Gun 1 1/2″ Forstner Drill Bit Rustoleum Spray...
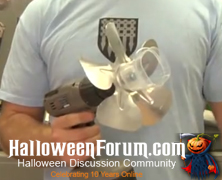
Homemade Web Spinner
posted by SkeleTony
Instant Monsters over at HalloweenForum has posted a great tutorial on how to make your own Web Spinner using some easily obtainable items and a drill. The cobwebs that this thing puts out look amazing and would make most spiders jealous. They’ll require some serious cleanup, but if you’re looking for a realistic web, look no further. ...

Mr. Chicken’s Madame Leota...
posted by SkeleTony
This prop tutorial is an oldie but a goodie. I first saw Mr. Chicken’s Madame Leota tutorial when it appeared on HauntForum. He moved it to the Mr. Chicken’s Yard Haunt blog quite a while ago and it deserves to be featured because of the great job he did on it. Positioning of the projector on this prop is just as essential and tricky as creating the form inside the globe and will make or break this effect....
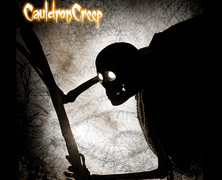
Cauldron Creep Tutorial...
posted by SkeleTony
The Devil’s Workshop blog has posted an awesome tutorial on how to build what is possibly one of the best looking Cauldron Creeps I’ve ever seen. Seriously, I wouldn’t have a problem paying them to make this for me because it deserves to be in every haunter’s yard. This tutorial was for the original Cauldron Creep, constructed in 2009. The videos are spectacular. Items needed to create this prop include: 20 ft 1/2″ PVC 8 1/2″ PVC “T”s 4 1/2″ PVC 90° 1 5rpm motor (for head action) 1 Monsterguts Wiper motor 2 ultrabright LEDs Red and Black electrical wire small gauge 2 monsterguts eyball blanks 1 foam skull 1 large “bag of Bones” from biglots Creepy Cloth 1 can Greatstuff 1 can Black spray paint 1″ drywall screws 5′ 2×4 plumbers tape ATX power supply...

Easy Realistic Eyeballs...
posted by SkeleTony
Fangoria over at HalloweeForum.com has a great tutorial on how to make easy, cheap and ultra realistic eyeballs. Trust me, this one I’ve succeeded in doing, and they turn out fantastic every time. You’ll need the following supplies: A package of ping pong balls Deep Red blood color gloss paint Yarn the same color as the paint A printout of iris from the web A tweezers A scissors A paintbrush Clear nail polish/Nail hardener – make sure whatever you use that it is glossy, gloss makes them pop!...
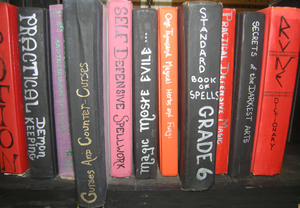
Tim’s Haunted Bookshelf...
posted by SkeleTony
This is a project that I spent a lot of time working on and when you get it right can be a superb effect for your haunt. I never seemed to get mine working as smoothly as Timothy Ewing seems to have, but with his tutorial you should be able to do better than me. You’ll need a round steel shaft the length of your books, some aluminum stock, some screw eyes, rubberbands, a small motor (I used a wiper motor), and of course books! I’m still hatching a plan to do this effect with mini-linear actuators, but until then, go with Tim’s Haunted Bookshelves blueprint. ...

Hot Burning Coals Prop...
posted by SkeleTony
Loach160 over at HalloweenForum.com has posted a great tutorial on how to make hot burning coals without the heat. This effect looks great with a witches cauldron above it and is super simple to create (I actually think I might be able to do this one). Items used to create this effect include: 1 string of 50 orange LED Christmas lights 1 can expanding spray foam 1 12 inch square piece of wood or plastic 1 can black spray paint masking tape assorted plastic bottle tops and/or bottoms box cutter or...
Dr Kreepy’s FCG...
posted by SkeleTony
For the longest time I struggled with how to build a simple Flying Crank Ghost. The guide at Phantasmechanics.com (R.I.P.) seemed ridiculously complicated to my simple mind. Then I found Dr. Kreepy’s YouTube videos and everything clicked. My FCG might have even flown had the party I was building it for not been cancelled, but that’s another story. http://www.youtube.com/watch?v=OXD9XGIt83Y Shop These Materials on Amazon 1/3HP Replacement Ceiling Fan Motor (for FCG builds) Braided Fishing Line — thin gauge for rigging 120" Wide White Sheer Voile Fabric x 25 Yards Affiliate Disclosure: HauntersList.com is a participant in the Amazon Services LLC Associates Program. As an Amazon Associate we earn from qualifying purchases at no extra cost to...