


If you’re looking to add a little excitement to your haunt, or just want to give the trick or treaters a quick startle before sugaring them up for the season, then a rumble bridge might be just what you need. It’s a pretty simple project to build and the guys over at CreepyCreations have created a great video detailing how its done. How to Build A Rumble Bridge The completed Rumble Bridge: Items needed to complete this inlclude: (1) – 3/4″ sheet of plywood (4) – 2×2 wood, 36″ long (4) – 2×2 wood, 30″ long (1) – 2×2 wood, 48″ long (2) – 2×4 wood, 43″ long (4) – 2×4 wood, 25″ long (4) – 4×4 wood, 6 to 8″ long (2) – 4″ diameter rubber balls (1) – clamp (1) – bracket (1) – 2 oz fishing weight (8) – 7″ bolts with nuts & washer – 1/2″ diamter Assorted screws, nuts & bolts for weight Hot glue Metal strapping High speed motor...
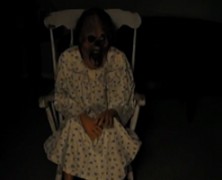
Rockin’ Granny
posted by Tony
There’s something completely unsettling about a decrepit looking old lady slowly rocking back and forth in her chair. If you know a decrepit looking old lady then you’re half way there, but if you don’t, you can always follow ScareFX’s tutorial and make your own Rockin’ Granny prop. What you’re building in this tutorial is a self contained rocking mechanism that you’ll build your Granny on top of. The frame is built of 2×6 material with the wiper motor mounted vertically. A piece of aluminum flat bar connects the wiper motor to a piece of 2×6 that is connected to the base via a 4″ hinge which will allow it to rock back and forth when the motor spins. The upper part of the Granny is built on the 2×6 that is hinged by connecting some 1″ PVC to the 2×6 and then creating some shoulders with the 90 degree elbows and adding some sections of pool noodles over the PVC for the upper arms. You’ll need to add some prop hands if they’ll be visible. The lower body is connected to the base and consists of a PVC T connection which connects some 1″ PVC to two 90 degree elbows and forms the legs. Again, you’ll need to add some prop legs if they’ll be visible. Once your mechanism and skeleton is complete, the entire device is connected to the rocking chair with clamps to prevent it from flying forward once it gets rocking. After you’ve got everything clamped down it’s time to put the Styrofoam head on it and you’ll probably want to put a mask on it as well. Oh, and don’t forget to put some clothes on Granny! Items needed to complete this include: Rocking Chair Wiper motor 4′ of 2×6 board 4×4 post cap & brackets (or...

Sparking Fence
posted by Tony
Want to create an impressive looking spark effect for your haunt that’s absolutely harmless? Bradsboobarn has a video tutorial on how you can achieve this effect and it’s easier than you think. If you take one thing away from this video, it should be that in order to achieve this effect safely, you’ll need to utilize a car battery charger, and not just a car battery. Using a regular car battery in place of the battery charger could potentially cause the battery to heat up and explode. Items needed to complete this include: Chain link fence Jumper cables Car battery charger Long metal object...
Rotisserie Motor Torture Rack...
posted by Tony
If you’re a fan of The Wheel of Death prop but don’t want to create something quite as heavy duty then the Rotisserie Motor Torture Rack that Toktorill constructed may be just what you’re looking for. This torture rack relies on an inexpensive lazy susan and a 110v rotisserie motor to spin a cardboard wheel. The cardboard was covered with a woodgrain patterned self-adhesive contact paper, which looks remarkably realistic. It’s a fairly simple prop to create and looks fantastic, just make sure it doesn’t get wet. Items needed to complete this include: 110v Rotisserie motor Lazy susan Cardboard Assortment of 1×2 & 1×4 wood Woodgrain patterned contact paper Victim for...
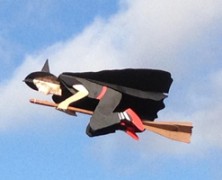
The Broom Flyer Witch...
posted by Tony
If you have some serious crafting skills and a ton of ambition, you too can create a Flying Witch prop just like the one that Otto Dieffenbach created. Or you could just watch the video of Otto’s prop and marvel at his creation. Seriously, this prop is one of the coolest builds I’ve ever seen, it turned out amazing, but the third sentence of the tutorial pretty much rules me out from ever attempting it: “This is a difficult build and should not be attempted by a newcomer to the hobby. There is a lot of wood work involved. You may want to find a friend with superior build skills if you are a newcomer.” I’m not even sure I could find a friend with enough moxy to try to build this, but if you can find one, the full tutorial is posted over at the RCgroups.com website. Items needed to complete this include: Frame Broom Flyer cutouts in 6 mm Depron (available from Hoosier Cutout Service) Two 0.196″ OD x 0.125″ ID x 40″ Carbon Fiber square tubes (Midwest Products) One 0.125″ OD x 0.060″ ID x 40″ Carbon Fiber tube (Midwest Products) One .034″ x .121″ x 40″ Carbon Fiber strip (Midwest Products) 1/8 inch plywood sheet 1 ft x 2 ft ¼ inch plywood sheet 6 x 12 inches 8 Sheet metal screws 8 x ½ E-Flite Sea Fury retract landing gear (Optional) Master Air Screw 3 blade 10 x 7 propeller Two packages of Dubro micro pushrods #852 One bag of 15 Dubro Hinges #117 Two 1 7/8 inch wheels (Parkzone T-28 or F4u) Clear Gorilla Glue Foam safe CA and activator 5 minute epoxy 30 minute epoxy Paint Electronics: At least a 3 channel full range receiver Three...
Spider Hill Prop Works Swaying Zombie...
posted by Tony
Spider Hill Prop Works has posted a great video detailing the framework for their Swaying Zombie prop. This silent film is meant to be more of a companion to the full Swaying Zombie Tutorial they put together which details the build. The parts list included details everything you’ll need to get this up and running and contains many of the pvc fittings and articulating joints that they sell. The frame consists of a plywood base with two pvc legs attached that connect to another plywood base that forms the waist. The wiper motor is mounted on the waist plywood and a swivel assembly is created out of pvc that connects the upper body of the zombie to the drive arm of the wiper motor. This will eventually create the swaying motion for your zombie. It’s a pretty intricate build that will require a delicate hand when setting up. The tutorial is well laid out with great images and descriptions to give you everything you need to get your zombie swaying short of a hula hoop and some extra brains. Items needed to complete this include: 10.5 feet of schedule 40 1 inch PVC pipe 4 feet of schedule 40 ½ inch PVC pipe (6) UMB-1 Universal Mounting Bases (2) ST-1 1 inch PVC slip-T fittings (1) Schedule 40 1 inch PVC cross fitting (1) Schedule 40 1 inch PVC T fitting (2) Schedule 40 1 inch PVC 45 elbows (1) Schedule 40 1 inch to ½ inch PVC reducer 12 Volt wiper motor with 5 volt power supply wiper motor bracket (hauntedparts.com) Approx. 25 #10 x 5/8” self drilling screws (1) ¼” x 20 x 3 ½” hex bolt (4) ¼” x 20 x 1 inch hex bolts (1) ¼” x 20...
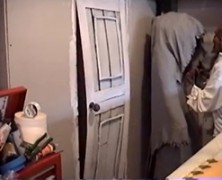
Bulging Door
posted by Tony
If you’re a fan of Disney’s Haunted Mansion, then you’ve probably already spent a considerable amount of time trying to figure out how to incorporate some of your favorite effects from it into your haunt already. Some are easier to accomplish than others, but if you’re looking for inspiration, HalloweenAddiction has a great tutorial on how to create a bulging door just like the one that appears to be breathing as it bows in and out in the corridor of doors. The great thing about his prop is that it’s really not that hard to build. Of course, you’ll need an empty door frame and a variable speed motor to create the effect, but the rest is constructed using 4 x 6″ foam that is held in the door frame via tension wire used for fencing. ...

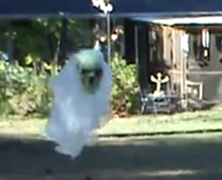
Flying Ghosts
posted by Tony
Originally created by Scott Axworthy in 1988, the Axworthy Flying Ghost prop is a great effect that is pretty easy to understand conceptually, but always seems to elicit some really hard to follow tutorials. The prop features ghosts that zip along on a tie line along the path of your choosing. It’s proven to be a time consuming prop that is prone to bogging down if things don’t go just right, but when it’s working and the ghosts are chugging around your line, it looks awesome. The Haunted Driveway has done a great job of putting this prop into an easy to understand tutorial that just might inspire someone to give this prop a shot this year. Items needed to complete this include: Gear motor around 1/8 hp and speed around 110 RPM Wheels made for V-belts, 5 inch diameter Threaded metal rod that will fit the wheels Locking nuts that fit the threaded rod Wood or angled steel to attach the threaded rod Black tie line Fishing line to hang the ghosts Hot glue gun Ghosts...

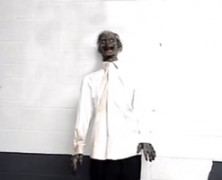
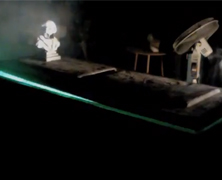
Scary Guy at the End of the Hall...
posted by Tony
The HollywoodHaunter has a hilarious prop idea for you if you have a corner of a haunt that’s in need of a prop. It’s also proof that haunt props don’t have to be exceedingly elaborate to add to the creep factor of your haunt. It’s essentially an oscillating fan with a head on it that appears to be a scary guy at the end of the hall! What could be easier, right? I can guarantee you, though, that more than a few people were creeped out by it before they realized what it was. Items needed to create this include: Oscillating fan PVC end cap w/screw 12″ of 1/2″ PVC Dark fabric Foam head Form...
One Armed Grave Grabber...
posted by Tony
If you’re not familiar with the Grave Grabber tutorial that Kevin over at Haunt101 posted, you really owe it to yourself to check it out…right after you take a look at his One Armed Grave Grabber tutorial! This prop is a little easier to build than the full Grave Grabber but it’ll still provide you with an awesome effect in your cemetery. The mechanics are very similar between the two props, although the One Armed Grave Grabber utilizes an animated deer motor instead of a higher torque motor. There’s also an added element with the skull linkage in the One Armed prop. The animated deer motor actually reverses when it meets any resistance, thus the two “stop” screws that are drilled in the base. If you check out the video of this thing in action at Haunt101, you’ll see that this prop has just the right amount of movement to create an unforgettable prop. Items needed to complete this include: One foam skull One length of plastic tubing One tape and wire hand One length of 1/8”x1/2” aluminum flat bar One length of heavy wire One length of thin wire One length small foam block Burlap One Buck animated deer motor Two pieces of lumber 4” and 2 ½”...
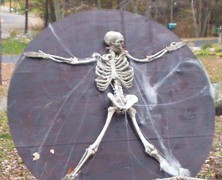
Wheel of Death
posted by Tony
Have you ever seen the knife throwers that tie a person to a spinning wheel and then proceed to throw knives at them as they’re spinning around? Ever wonder what happens when they’re not very accurate throwers? The Wheel of Death prop created for The Haunted Driveway is a six foot diameter wheel that spins around with a skeleton, or whatever else you decide to tie to it. If you make it heavy duty enough you can even strap an actor to it (warning: DO NOT throw knives at people!). It’s an eye catching prop that will take a little bit of effort to create, but it has a gruesome potential that is limited only by your imagination. Items needed to complete this include: Two full size sheets of 1/2 inch plywood (6) 2 X 4 boards that are eight feet long (1) 8 X 6 board that is 8 feet long (6) 3/8 X 4 inch Carriage bolts (6) 3/8 inch nuts to fit the Carriage bolts 6 inch lazy susan (2) Ball bearings that fit a 5/8 inch rod and they should have tabs so you can attach them to the face of the wood 5/8 inch rod 16 inches long (1) 6 inch diameter V-belt wheel that fits a 5/8 shaft (1) 2 inch diameter V-belt wheel that fits a 5/8 shaft (this will fit on to the motor if the motor has a 5/8 shaft, if not get a different size that will fit) V-belt around a foot long (4) 1/4 inch bolts that are 2 inches long and washer and locking nuts for the blots A gear motor around 35 RPM and 1/8 hp will do the trick ...
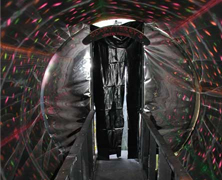
Scary Terry’s Vortex Tunnel...
posted by Tony
If you’re feeling extra industrious this year, and the notion that your efforts could result in an epic failure don’t frighten you, you might want to attempt to build a vortex tunnel for your haunt. Scary Terry has laid out a tutorial on how he built his, and while it doesn’t contain a complete supplies list, it should be more than enough to get you started. The tunnel has a frame that consists of three 10′ diameter “hoops” that are attached to each other, and it’s the precision required to get the plywood cut accurately that will ultimately determine your success with this project. The hoops are spun around by three pairs of bicycle wheels, five of which are free spinning with the sixth being driven by a motor. It’s the sixth wheel that actually rotates the tunnel itself. You’ll need to build a bridge for people to walk on, and the hoops will actually fit around the bridge, rotating around it. Once the frame is complete it’s just a matter of attaching fabric around the inside of the hoops and painting a sufficiently nauseating pattern on it. Building a vortex tunnel is a pretty serious undertaking that requires skill and accuracy. I’ve always said that confidence is a great asset, but knowing when you’re in over your head is a better one. I know that I would be in over my head with this build, but if you’ve got the skill to get it done, it will be a crowd pleaser. Good luck storing it, though!...
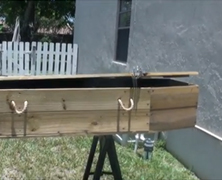
Animated Coffin
posted by Tony
If you’ve got a coffin that’s looking for a little something extra then consider adding a slow rotating wiper motor to it. Eerie Acres Cemetery has a video tutorial on how he built his and it turned out great. The wiper motor spins at the perfect speed so that it doesn’t look obnoxious and you don’t even notice the wooden wheel that’s lifting the coffin lid. This is a great effect, and there’s really not much needed to get it done. In fact, building the coffin takes more skill than animating it does....
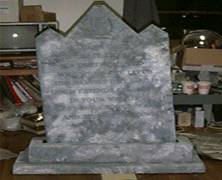
Rocking Tombstone
posted by Tony
A styrofoam tombstone is about the simplest prop you can make for your haunt assuming you don’t make it overly intricate, but sometimes even the simplest of props can take on a whole new life by adding a motor. Just ask Christoper, of Chris’ Crypt who has a really simple tutorial on how to turn your Styrofoam tombstone into a rocking tombstone. You’ll need to build a wooden base to hold the tombstone on one end (pivot point) and the motor on the opposite side. When you connect the cam to the tombstone the slow rotation of the motor will get your tombstone rocking back and forth. Items needed to complete this include: Styrofoam tombstone Motor Wood for base 1/2″ piece...
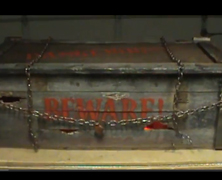
Cyclone Jack’s Monster In A Box...
posted by Tony
The monster in a box prop has been done a million times, and it seems like each one is done just a little bit differently than the last one. That’s ok, though, because they all operate using the same principle in which a spinning motor pushes a rod up forcing the top of the box to pop up and down creating the unsettling and startling effect. Add a couple of eerie lights inside the box and possibly some fog and you’ve got a winner, and that’s exactly what CycloneJackHH did when he made his monster in a box tutorial....

Breathing Grave Prop: Behind The Scenes...
posted by Tony
The Breathing Grave tutorial we posted a while back is a favorite of many home haunters that visit us here at Haunters List, so the opportunity to post a video tutorial on this prop is not going to be missed. The HollywoodHaunter made the aforementioned video tutorial for his incredible looking breathing grave prop (seriously, forget about the breathing part, I’d be happy if I could make a grave look as good as his). The footage of this breathing grave in action is spectacular and should be considered a staple in any home haunters yard....
Moving Tomb Lid
posted by Tony
If you took our advice and ordered your copy of the 2012 Home Haunter DVD Collection then you’re already familiar with Steve’s Haunted Yard and have probably already seen his above ground tomb with the moving lid. If you missed it, though, (and trust me, there’s a lot of cool stuff worth seeing in his cemetery), you can check out the tutorial he’s been kind enough to post on how it works. It’s a simple build and it looks great when it’s moving. The tomb itself looks to be made of 2″ styrofoam insulation and has a wiper motor mounted on the inside. You’ll need to rout out a small hole in the styrofoam for the glide to properly move the lid from side to side....
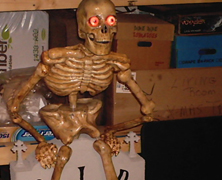
Leer
posted by Tony
I never got to see Jeff Baird’s Leering skeleton prop tutorial, but I have seen the video of his prop in action (it comes around 1:30 mark in the video below) and it looks great. So when I found the tutorial that SpiderFreak of SpyderWood had created based on Jeff’s prop with a full surround of the motor mechanism I knew that it needed to be featured on HauntersList. I love seeing certain prop builds get modified and improved upon in the process, and the fact that you can’t see the mechanics of this prop when viewing it from behind is certainly an upgrade. I am purposely not including an items list on this tutorial because the tutorial does not really detail the lengths sufficiently enough for me to approximate...
Ruining Your Life with an Axworthy Flying Ghost...
posted by Tony
I’ve always wanted to build an Axworthy Flying Ghost for a haunt. Unfortunately the spacing of the trees in my yard would make for a ridiculously long run for it so it’s never really been an option to attempt it. That may be a good thing, though, if you ask Joseph Keller, a.k.a Mr. Macabre. His short video tutorial on the pros and cons of building one is definitely worth watching and you do get some insight into how this prop is built....
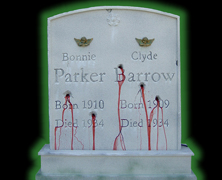
Bleeding Tombstone
posted by Tony
Mourning Cemetery & Manor have a really good tutorial on how to build a bleeding tombstone. The trick to this one involves two plexiglass blood tanks, the main tank is mounted in the styrofoam base and a secondary tank is mounted above the bullet holes. A 1/2″ tube feeds the blood from the main tank to the secondary tank, while 1/4″ tubes drain the blood down into the bullet holes. This setup allows for the blood to slowly seep out of the holes rather than flowing out at an unnatural rate. Items needed to complete this include: 1/4″ Plexiglass tanks (width determined by tombstone) water pump (1) 1/2″ tubing (5) 1/4″ tubes Plexiglass squares Styrofoam...
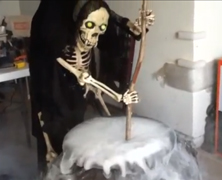
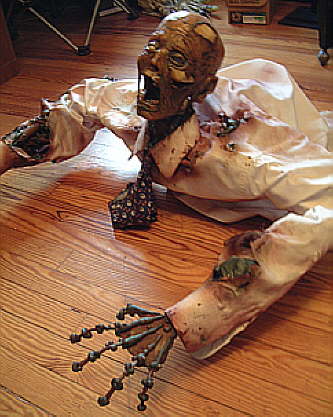
Cauldron Vampire Creep...
posted by Tony
Since the launch of HauntersList the number one most often searched for item that has resulted in a hit to our site has been the Cauldron Creep tutorial by the Devil’s Workshop. I would surmise from this that just about everyone is planning on building one this year, and if that’s the case, you may want to take a look at this cool looking Cauldron Vampire Creep tutorial from Docmansound1. It’s inspired by the original Cauldron Creep by the Devil’s Workshop, and while there’s not much difference between the two (other than some cool looking vampire teeth), the tutorial is a little more detailed on this one....
Vent Motor Headpopper...
posted by Tony
If you’ve ever wanted a headpopper prop in your haunt but didn’t think that a wiper/vent motor would create a good enough effect? Relax, Dave the Dead has a really good tutorial over at HauntForum on how to create your own headpopper. What I like best about this one is that as the head peeks over the tombstone it slowly rotates its way from side to side. This makes for a much creepier effect than just a popup / popdown. [iframe src=”http://vid105.photobucket.com/player.swf?file=http://vid105.photobucket.com/albums/m240/davethedead/headpopper%20prop/headpopperprop.flv&sr=1″ width=”425″ height=”350″] Items needed for this prop include: 16″ square of 1/2 inch plywood, cut in half (two 8″ X 16″ pieces) 20″ long 1″ X 4″ wood slat 1/8 X 1/2″ aluminum bar stock, cut into 5″ and 25″ lengths 3/8″ X 4-1/2 inch lag Screw Eye (2) 1/4-20 X 1.5″ Bolts (3) 1/4-20 Nuts (2) 1/4″ lock washers (1) 1/4-20 locking nut (2) 1 1/2″ wood screws Motor 12Vdc...
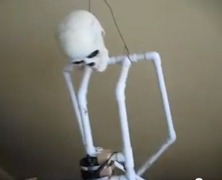
Hangman Prop
posted by Tony
Ulcerative has posted a great video of the perfect frame for a hangman prop. When the attached wiper motor is turned on the flailing effect is supreme, and even though it’s just a PVC frame in the tutorial, you can more than visualize the awesome effect you’ll get when you clothe the frame and light it for effect. If you don’t want to get into pneumatics, but still want a great visual, this is definitely one you’re going to want to try....
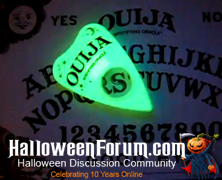
Animated Ouija Board
posted by Tony
Ok, I’ve seen a couple of animated Ouija boards on the net, but DaveintheGrave from the HalloweenForum has the most detailed tutorial on how to make this prop I’ve ever seen. It’s broken down into two parts, with Part 1 focusing on how to prep the box that will house the guts of the Ouija board prop, while Part 2 details the mechanics of the prop. DaveintheGrave utilizes a small vent motor for this prop, and breaks down the motor instructions into two additional tutorials for further clarity (Motor Part1, Motor Part2). There is a link to the video of this prop in action at the beginning of Part 1 of the tutorial, and as you will see, this prop is worth the time spent making it, it looks...

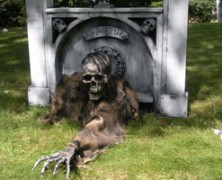
The Breathing Grave
posted by Tony
Madmax at HalloweenForum has a great tutorial on how to make a Breathing Grave prop that you’re really going to dig (ridiculous pun intended) . The effect is subtle, looks great, and when viewed at night with proper lighting, is sufficiently creepy. When you see just how easy this prop is to craft, and how inexpensive it is, you’ll want to put them in front of all your tombstones! Items needed to create this include: Vent Motor 11′ – 1×4 power supply 12VDC 300mA 1 Yard Burlap paint, 1 spray can or latex house paint 22″ threaded rod (1/4″) 6 nuts 6 lock washers 12 screws 2 Cams (1/2″ PVC with a cap)...

The Bleeding Portrait...
posted by Tony
“Calm? Calm? Do murder and calm go together? Calm and murder? Murder?” -Luther Heggs In 1966 Don Knotts posed that question, and fans of the Ghost and Mr. Chicken have been laughing at his classic portrayal of Luther Heggs, intrepid reporter ever since. If you’re at all familiar with the film you’ll recall the classic scene where Luther comes across the portrait of old Mrs. Simmons that he had just seen intact five minutes earlier has been pierced with a pruning shears and is dripping blood, the exact way she was murdered 20 years prior. Luther’s conniption fit upon seeing this is pure comedic gold, and he drops like a leaf, out cold. I’ve always wanted a house like the old Simmons Mansion, and with Chris’ tutorial of the Bleeding Portrait, I’ll be one step closer. It looks to be a little bit of a tricky build, but would definitely be a crowd pleaser in any haunt. Items used to create this include: Picture frame Portrait (one that you can cut up) Small water pump Flexible tubing Tray for blood Blood Varnish ...
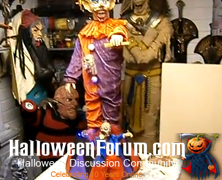
Circus Freak Puppeteer...
posted by Tony
Every now and then someone builds a prop that you look at and immediately wish you had the talent to pull off the same build. That’s exactly how I felt when I saw TwistedUK’s Circus Freak Puppeteer tutorial. It’s not that the frame and motors are overly intricate, but the clay work that went into the crafting of both clowns (and shoes) is what really tells me I’ve no chance of building something nearly as nice as his. Of course, if you can find some premade items that would work you could always eliminate the clay, but you might not get as good looking of a finished product. I’m filing this under Motorized Props, but I really feel like there should be a Prop Showcase category because this one definitely deserves more than just a cursory glance. Items needed to complete this include: Child Mannequin Hair dressing practice head Wiper motor Large piece of chip board 1’thick One pack of DAS clay 3/4′ plastic tubing Sea fishing line 3 blue LEDs 1 1/2′ length of wood 1 sheet of plywood More patience than I...
Grave Grabber Tutorial...
posted by Tony
If you’ve ever wanted to build your very own grave grabber but didn’t think you had the skill to get it done right, take a look at this tutorial posted by Kevin Kennedy on the Haunt101 website. This prop is simple to create and looks awesome in any graveyard environment. Unfortunately, some of the links in the tutorial are dead, but they’re relatively insignificant to the tutorial and the mechanism should be enough to inspire your creativity. Items needed to build this include: 9’ of 1” x 1/8” aluminium flat stock 36” wooden dowl 8 – 8/32” x 5/8” machine screws 24 #8 SAE washers (you could use nylon washers) 8 – 8/32” nuts with nylon threads a low speed high torque motor 1 spooky head 1 pair of spooky hands along w/ coat hanger and spray foam Some of the assorted lumber every haunter has lying in the back of their...
Cauldron Creep Tutorial...
posted by Tony
The Devil’s Workshop blog has posted an awesome tutorial on how to build what is possibly one of the best looking Cauldron Creeps I’ve ever seen. Seriously, I wouldn’t have a problem paying them to make this for me because it deserves to be in every haunter’s yard. This tutorial was for the original Cauldron Creep, constructed in 2009. The videos are spectacular. Items needed to create this prop include: 20 ft 1/2″ PVC 8 1/2″ PVC “T”s 4 1/2″ PVC 90° 1 5rpm motor (for head action) 1 Monsterguts Wiper motor 2 ultrabright LEDs Red and Black electrical wire small gauge 2 monsterguts eyball blanks 1 foam skull 1 large “bag of Bones” from biglots Creepy Cloth 1 can Greatstuff 1 can Black spray paint 1″ drywall screws 5′ 2×4 plumbers tape ATX power supply...

Tim’s Haunted Bookshelf...
posted by Tony
This is a project that I spent a lot of time working on and when you get it right can be a superb effect for your haunt. I never seemed to get mine working as smoothly as Timothy Ewing seems to have, but with his tutorial you should be able to do better than me. You’ll need a round steel shaft the length of your books, some aluminum stock, some screw eyes, rubberbands, a small motor (I used a wiper motor), and of course books! I’m still hatching a plan to do this effect with mini-linear actuators, but until then, go with Tim’s Haunted Bookshelves blueprint. ...
Dr Kreepy’s FCG...
posted by Tony
For the longest time I struggled with how to build a simple Flying Crank Ghost. The guide at Phantasmechanics.com (R.I.P.) seemed ridiculously complicated to my simple mind. Then I found Dr. Kreepy’s YouTube videos and everything clicked. My FCG might have even flown had the party I was building it for not been cancelled, but that’s another story. ...