I’ve got a confession to make. I’m clueless when it comes to basic electrical circuitry. In fact, pretty much all of the concepts of electricity other than don’t stick your fingers in the outlets seem to be over my head (ok, well, don’t stick your fingers in the outlets while your standing in water, yeah, I got that one too). So when it came to buying the components to make my own Homemade LED Spotlights my inexperience with a few basic LED concepts was a definite confidence killer. The worst part is that up until this point every written tutorial I’ve seen on this has been a complete snoozer. Thankfully, CreepyCreations have posted a really simple to follow tutorial that outlines all of the essentials you’ll need to purchase the correct resistors to power your LED’s without fear of them blowing up on you. The tutorial is really well made and it’s really simple to follow....

Make a Fake Brain
posted by SkeleTony
It turns out the Scarecrow didn’t need to make a pilgrimage to see the Wizard of Oz after all, he just needed to check in with a Girl In Winnipeg! Her tutorial on how to make a fake brain is awesome in its simplicity and seems like the kind of project that the whole family can participate in. You’ll start with a base of crumpled newspaper covered in duct tape to form your brain mass. The next step is to painstakingly roll your playdough into long round lengths so you’ve got enough to completely cover your brain. After applying some spray adhesive to your duct taped brain mass, the playdough is simply placed on it in a sufficiently wavy brain pattern. Once your gray matter is in place you can paint it in whatever color scheme pleases you. Items needed to complete this include: 2 parts red playdough, 1 part blue newspaper duct tape spray adhesive corn syrup food...

DOT: Terror in April
posted by SkeleTony
If you didn’t get a chance to checkout The Sheboygan Jacycees Dominion of Terror in 2013, consider yourself lucky! Not because you missed it, but because they’re presenting an encore show just for you! That’s right, before they tear down the rooms that terrorized patrons last October and start prepping for the 2014 scares, they’re opening the doors once again to spread some fear. The doors will be open from 7:00 pm to 10:00 pm on Friday April 11th & 12th with tickets costing just $10.00! All proceeds from this event will benefit a local food drive to be held on May 3rd from 11am-3pm at the Quarry View Center. All those in need are encouraged to come and each family will receive paper bags to fill with non-perishable and perishable items. For more information please call 920-918-2270. This event is sponsored by :...

Cheap Rusty Chain
posted by SkeleTony
I must admit that when I first glanced at the tutorial that Lake of the Dead penned over at the HalloweenForum for Cheap Rusty Chain I was a bit underwhelmed. The opening photos of the PVC used to create the chain left me skeptical that the finished product would deliver. Luckily I didn’t stop reading because the finished chain looks amazing and it’s incredibly easy to create. You’ll need to start by cutting all of the links for your full chain. Next, using a PVC pipe cutter you’re going to cut a slit in 1/3 of your links to easily attach the rest of the links. Once you’ve got all your links threaded you can paint the chain using a rust colored paint. Rust-Oleum’s multicolored texture sprays are perfect for this. Items needed to complete this include: 3/4 PVC pipe Rust colored paint Shop These Materials on Amazon 1" Schedule 40 PVC Pipe 6-Pack Ratcheting PVC Pipe Cutter (up to 1-1/4") 1" PVC Furniture Fittings Assortment 12-Pack Oatey PVC Clear Cement + Primer Handy Pack Affiliate Disclosure: HauntersList.com is a participant in the Amazon Services LLC Associates Program. As an Amazon Associate we earn from qualifying purchases at no extra cost to...

Kitchen Accident
posted by SkeleTony
If you’re looking for a gruesome looking makeup effect for your scare actors then CrazyHappy08 has a tutorial that may suit your needs. Its a super simple effect to achieve (assuming you’re reasonably adept at applying makeup) and the results look amazing. You’ll need glue, foundation, some makeup, and a bit of a depraved imagination....

HauntX Haunter’s Retreat & Tradeshow 2014...
posted by SkeleTony
HauntX Haunter’s Retreat & Tradeshow is coming to the Circus Circus Hotel in Reno, Nevada May 9th – 11th, 2014 and whether you’re a pro haunter, home haunter, or just love Halloween, you’re going to want to check out this show! This three day Haunter’s retreat offers seminars, workshops, and a trade show including Froggy’s Fog, EFX-TEK, Trick or Treat Studios, and Skulltronix just to name a few. You’ll also be able to join in on a Paranormal tour of Virginia City, Vampire Pub crawl, attend the Circus of the Damned Masquerade Ball, or browse through the Graveyard sale & swap meet. Seminars included in the admission price include: LED Lighting Options for Your Haunt Writing a Back Story Managing your Monsters Production Makeup Techniques for Your Haunt Choosing a Ticketing Solution Evil Super Genius: Diabolically Successful Haunt Advertising & Marketing Foam Cutting tools Foam Cutting techniques Advanced Prop Programming Intro to Microprocessors Taking Your Haunt to the Next Level PicAxe Programming Living With Your Fire Marshal at Outdoor Events If you’re looking for more in depth training you can purchase tickets to the advanced training sessions offered on Thursday and Saturday including: I Know Why You Didn’t Sleep Last Summer (It’s Because You’re A Haunt Builder), hosted by Steve O’Connor, creator of The Garage of Evil Open Your First Haunted Attraction: Without Losing An Arm And A Leg Drew Badgers Scare Actor Training (limited to 20 students) Several Ticket options are available online. Show Hours: Thursday: 11:00 am – 4:30 pm (advanced training session) Friday: 9:00 am – 11:00 pm Saturday: 9:00 am – 11:00 pm Sunday: 9:00 am – 11:00...
1-2-3 EZ Creep
posted by SkeleTony
It’s 5 pm on Halloween night and you’ve put up no decorations to great your trick or treaters. Actually, if you’re a regular at Haunter’s List, there’s probably no chance that this has ever happened to you, but it might be the type of recurring dream that plagues you. If anyone you know finds themselves in this predicament, though, tell them not to panic, because they’ve probably got all the materials they need to create this cheap and EZ Creep that SpookySam from HauntForum created. You’ll take your ladder and attach your skull (and arms if you’ve got them) to a piece of scrap wood and then set it on the paint shelf. You can add a cardboard box to the top rung of the ladder and attach it to the scrap wood. This will add a little bulk to your Creep as well as hold both items in place. The final step is to add your fabric or clothes to your creep, which can be stapled to itself to keep its shape. This creep looks great and is the perfect last minute no hassle prop to build. Items needed to create this include: Step stool (preferably with paint shelf) Foam skull (arms and hands optional) Scrap board Cardboard box Scrap cloth or landscaping fabric Shop These Materials on Amazon Realistic Replica Human Skull Statue 6.5" 5.4ft Full Size Halloween Foam Skeleton Affiliate Disclosure: HauntersList.com is a participant in the Amazon Services LLC Associates Program. As an Amazon Associate we earn from qualifying purchases at no extra cost to...
Cheap Fake Barbed Wire...
posted by SkeleTony
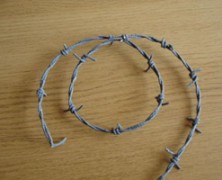
If you’ve got a scene that requires realistic looking barbed wire your best bet is to head over to Home Depot and pick up a roll, it’s only $65 for 1300 feet! I mean, what’s the worst that can happen? Someone grabs it to see if it’s real and cuts their hand, or rips their clothing on it, or actually falls into it and slices themselves up real good leaving a bloody mess on your floor, and if any of that happens you know what that means… BEST HAUNT EVER!!!! It’s probably not worth the liability, though, so with that said, you may want to checkout the tutorial that msraynsford created on how to create Cheap Fake Barbed Wire You’ll start by folding your length of string in half, tying one end of it down and twisting the string whichever direction you prefer. Once you’ve got it good and twisted you’ll dip it completely in your glue. You can mix your paint directly into the glue to ensure a nice even color. Let it dry making sure that it doesn’t touch itself or unwind during this time. You’ll next need to add your barbs, which are nothing more than lengths of 10cm (3 inch) string dipped in the glue and then wrapped around the main string. Once you’ve got the barbs wrapped around the main string and they’ve dried completely, simply cut the barbs on an angle to give them a sharp pointed appearance. Once your barbed wire is completely dried your wire is ready to hang. It looks realistic and won’t cut anybody (probably). Items needed to complete this include: String (roughly 2.5 times more string than you want barbed wire) PVA glue (Elmer’s) Grey...

How to Chop Someone in Half...
posted by SkeleTony
Seeing a person cut in half can be a life altering event. The kind of event that makes you want to try to recreate yourself, which is ok, provided you see the person cut in half at a haunt and not in some back alley in the wee hours of the night. And that’s pretty much how I’ve felt ever since I was 10 years old and got to see this done at the March of Dimes Haunted House. It was a terrifying and exhilarating thing for a kid to see, and while it may seem a bit campy by today’s standards, it’s still one of my fondest haunt memories. I’ve seen several tutorials that tackle this prop, but I really like the video tutorial that HauntingHooligan has created. The tutorial is fairly general, but will give you everything you need to get started creating this effect. Items needed to complete this include: 16′ – 1 x 3″ lumber (approximate) 2′ x 6′ sheet of 1/4″ plywood (approximate) Wire Styrofoam Cloth to cover platform Great stuff Newspaper Old pants Old shirt...
Monster Mud Reaper
posted by SkeleTony
Nothing looks better than a well crafted Monster Mud Reaper standing guard over your cemetery. As he welcomes recently departed souls to their final resting grounds, this dark and foreboding spirit will cause all eyes to focus their attention to him if for no other reason than to make sure he isn’t actually alive. And the best part is, he’s pretty easy to build if you follow the tutorial that Jimmyzdc wrote up at HalloweenForum. The frame of your reaper will be created by securing a steel flange to a 2 x 2′ piece of MDF board and then threading a 4” steel pipe to the flange. You’ll connect the PVC that will create your reaper’s spine to the 4″ steel pipe and then connect your 4 way PVC cross fitting to the top so you can add your arms. Once the PVC frame is complete you’ll wrap some chicken wire around the skeleton for the reaper’s body and then measure out your burlap and drape it on the chicken wire to verify you have the correct size and shape for the reaper you want. Once you have the reaper shaped to your liking you’ll peel your burlap off and dip it in your monster mud until its completely submerged in the mud. Once coated, remove it from the mud and squeeze off the excess mud as you pull. Re-drape it on your frame and continue until you’ve got all of your burlap reassembled on the reaper. Once coated in monster mud, make sure you use a some Drylock masonry sealer to weather proof your reaper otherwise you may have a mess on your hands if it rains. Items needed to complete this include: (2) 90 degree PVC elbows (3) 45 degree PVC elbows (1) 4-Way PVC...
Rickety Floor
posted by SkeleTony
An unstable, rickety old floor is a great way to catch visitors to your haunt off guard, especially when lights are low. It’s a simple project, and if you’re so inclined (pun intended), Raymond from RFHaunt has a tutorial on how to quickly and easily add this effect to your haunt. Your floor will be made of plywood and is best suited to a hallway section where you can have it extend from wall to wall. You’ll start by making a stationary section which consists of your piece of plywood with sections of 1 x 2 lumber nailed to the entire length of the center and both sides. For the rocking piece you’ll simply nail the 1 x 2 to the length of the center which will allow it to rock back and forth when you walk on it. You’ll want to be careful to make sure there are no gaps between the two sheets of plywood because you don’t want anyone getting their feet stuck in between and a piece of carpet draped on top of it allows for worry free enjoyment. Items needed to complete this include: Two large plywood boards On thin length of wood (Optional) Thick...

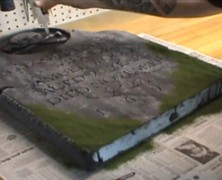
Faux Moss Application...
posted by SkeleTony
A rolling stone gathers no moss, but a tombstone (and my patio) gathers plenty. So if you want a realistic looking tombstone you’re going to need to find a way to add some realistic moss that will stick to it. Troy from Halloween Hellmouth has a great method that produces a great looking moss for any prop utilizing a mixture of pre-dried moss and paint. You can buy dried moss at most craft stores, but if you have access to moss you can dry it out for a couple of days and use it. You’ll start by puréeing the dried moss in a blender and then you’re going to start mixing your paint until you get your desired color. Once you’ve got the correct color mix you’re ready to start spreading it onto your prop. Use your fingers to spread it and don’t worry if you’re a bit sloppy because moss doesn’t exactly grow straight. After you’ve spread the moss mixture onto your prop you’re going to want to wait for a good three days for the entire mixture to set, which sounds like an inordinate amount of time to wait for something to dry, but trust me, it’s worth it. The end result looks amazing. Troy adds even more detail by tea staining his moss application, but even before doing this his method is a success. Items needed to create this include: Bag of moss (or actual dried moss) Paintbrush Mixing stick Mixing bowl Spray bottle filled with water Drip pan (for water to drip in to) Acrylic paint Blender Shop These Materials on Amazon 5-Pack Foam RIP Tombstone Blanks for Carving Decorative Cemetery Fence Sections Rust-Oleum Flat Black Spray Paint 12oz Affiliate Disclosure: HauntersList.com is a participant in the Amazon Services...
Tombstone Lettering
posted by SkeleTony
Nothing spoils a good tombstone more than poor lettering carved into it. No matter how realistic your tombstone looks, all eyes will eventually focus on the text, and if you want it to look really good, you’ll want to check out the video tutorial that Eerie Acres Cemetery put together on effective tombstone lettering. It covers some very simple but essential techniques for creating really good looking tombstone text. http://youtu.be/lI2jnU1verk Shop These Materials on Amazon 5-Pack Foam RIP Tombstone Blanks for Carving Decorative Cemetery Fence Sections Rust-Oleum Flat Black Spray Paint 12oz Affiliate Disclosure: HauntersList.com is a participant in the Amazon Services LLC Associates Program. As an Amazon Associate we earn from qualifying purchases at no extra cost to...
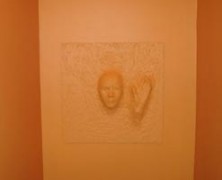
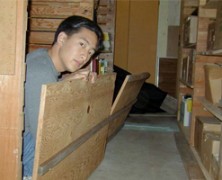
Spirit Panel
posted by SkeleTony
If you want to add a bit of subtle detail to your haunt walls, Violetkitty has an instructable for a Spirit Panel that could very easily be used. The tutorial is based on an original idea titled Ghosts in the Bookcase Halloween Project, and it’s a simple way to add some depth to any flat surface. In a nutshell you’re going to glue or screw down the item you want protruding from the wall. You’ll then start to cover the protruding items with your paper mache mixture so that it completely covers them and appears to be stretching the wall. After you’ve got the items coated you’ll need to let them dry a bit and then cover the entire surface with the paper mache mixture. Once completely coated you can sand it down a bit and paint it. The great thing about this idea is that you can use plastic masks, skulls, prop hands, pretty much whatever you want to appear to be coming through the walls. It’s not a tricky project, and it can add a nice wrinkle to an otherwise plain wall. Items needed to complete this include: Plywood (or the flat surface of your choice) Plastic Mask Manicure plastic hand Gorilla glue Celluclay paper- mache Sandpaper Latex paint Shop These Materials on Amazon Instant Paper Mache Powder Mix 3.3 lbs Assorted 12" Latex Balloons 120-Pack Affiliate Disclosure: HauntersList.com is a participant in the Amazon Services LLC Associates Program. As an Amazon Associate we earn from qualifying purchases at no extra cost to...
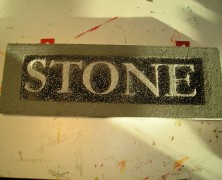
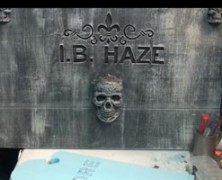
Carved Granite From Foam...
posted by SkeleTony
Acetone will eat away at your styrofoam, and while that’s not exactly what I would call a newsflash here, but Creativeman uses it to great advantage in his instructable on how to use this to create really good looking granite lettering. This is a great way to create a sandblasted stone sign for use on cemetery columns, or to add depth to your tombstone, and it requires only the most rudimentary of skills. The process is simple. Cut your pre-printed letters out with an exacto knife, glue them to your styrofoam, and then spray paint the styrofoam. It’s literally easier than breathing, but it adds a great level of detail to your lettering or sign. Items needed to complete this include: Styrofoam Printout of your letters (each letter cut) Elmer’s glue Spray paint containing acetone Shop These Materials on Amazon XPS Foam Board 1" Thick Craft Sheets 4-Pack 4-in-1 Hot Wire Foam Cutter Kit 15W Loctite Power Grab Foam-Safe Construction Adhesive Affiliate Disclosure: HauntersList.com is a participant in the Amazon Services LLC Associates Program. As an Amazon Associate we earn from qualifying purchases at no extra cost to...
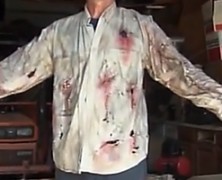
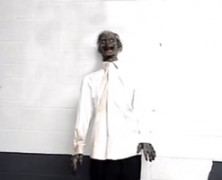
Making Zombie Clothes...
posted by SkeleTony
If a zombie can take the time to dig its way out of its grave, the least you can do is make sure he’s got some appropriate looking clothes, right? And if you’ve taken the time to build a Full Sized Zombie Prop, or just plan on becoming the zombie yourself, you should probably pay equal attention to the clothing since it’s a major part of your zombie’s appearance. If you want truly realistic looking zombie clothing you’re going to want to give Robertb7864’s video a look. This twenty minute trek through zombie clothes modification features a full five minutes dedicated to Robertb7864 taking a belt sander to a shirt. The end result is pretty great looking, though, and is way more authentic looking than you’d achieve by tearing or cutting the cloth yourself....
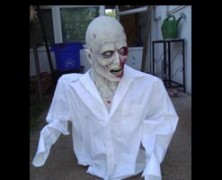
Full Size Zombie
posted by SkeleTony
If you’re looking to build a full size zombie that you can leave outside you’re going to need something that is a little more solid, and once again, Dr. Kreepy has just the tutorial you’re looking for. The lower body is framed using 2 x 4’s for legs attached to a 1 x 6 waist while the spine, shoulders, and arms are crafted out of PVC. After the frame is in place you’ll need to bulk out the torso and the legs. You can certainly wrap the legs and body with foam and duct tape it tight, or you can use the Dr. Kreepy method and use balled up newspaper or plastic. When mounting it you can use a plywood base and screw the legs to it, otherwise you can grab a pair of old boots and throw in some quick drying cement. You’ll need to add your favorite mask and a pair of prop hands if they’ll be visible. Items needed to complete this include: 2 – 2×4 approximately 35″ 1 – 1 x 6 appoximately 17″ 1 – 20″ 2 x 4 6 pieces 3/4 PVC 4 – 3/4″90 degree PVC 3/8″ or thicker 2′ x 2′ plywood Old clothes Skull or mask Duct Tape Newspaper or foam Screws Shop These Materials on Amazon 1" Schedule 40 PVC Pipe 6-Pack Ratcheting PVC Pipe Cutter (up to 1-1/4") 1" PVC Furniture Fittings Assortment 12-Pack Oatey PVC Clear Cement + Primer Handy Pack Affiliate Disclosure: HauntersList.com is a participant in the Amazon Services LLC Associates Program. As an Amazon Associate we earn from qualifying purchases at no extra cost to...
Quick & Easy Armature...
posted by SkeleTony
I’ve got to tip my hat to Nightrideproductions from the HalloweenForum, who has proof that literally everything you own can be incorporated into your next prop build. This Quick and Easy Armature is built using a tomato cage and is all you’ll need to get a few more last minute zombies popping out of your cemetery without exerting much effort along the way. You’ll start by flipping your tomato cage so the largest circle is on the ground and then bend the two side wires so they form shoulders and arms. The third and final wire should be bent inward and then up 90 degrees so the styrofoam head can slide down onto it. The newspaper and duct tape should be added around the shoulders and arms to add a little body to your armature before adding your mask and shirt, but that’s pretty much all there is to it. Bend the wires back into place when your done using it and it’ll be ready for the spring tomato crop. Items needed to complete this include: Tomato cage Styrofoam head Tent stakes Newspaper Duct tape Wire...
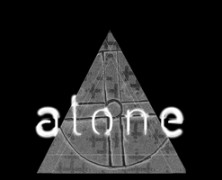
Alone 2013
posted by SkeleTony
There is nothing more terrifying than having to face your fears alone. Perhaps that’s why it’s rare to see someone go to a haunted attraction solo, but visitors to Alone [an existential haunting] will be required to have this experience Alone. Billed as one part interactive theater and one part psychological haunting Alone forces you to become a part of your own nightmare. There’s no gore, no chainsaws and no clowns with this experience. This attraction promises that you will be dislocated, disoriented and disturbed, and I have no doubt in my mind that they will succeed. This attraction is my idea of what fear is, and what most haunted attractions lack, the sense of isolation. ALONE will take place in downtown Los Angeles in a former fraternal order temple built in 1924. It’s just south of the 10 freeway, and just west of the 110 freeway. The exact address will be emailed to you prior to the event. Each participant must present valid photo identification and be over the age of 18, and must enter ALONE....

Brad’s Boo Barn 2013...
posted by SkeleTony
Brad Silverstein’s got a haunted barn on his hands and on Fridays and Saturdays this October you can venture through the Slaughterhouse that is Brad’s Boo Barn. With over 25 actors and 6 areas to explore, this home haunt located in Spanaway, Washington will make sure you get a fun scare out of Halloween. Featuring the dark school house, jail, and back by popular demand, the new clown maze. With all new scares for 2013 from the human B.B.Q. to the Slaughter house, will you have what it takes to make it all the way through Brad’s Boo Barn? Proceeds from this haunt benefit the Bethel School...
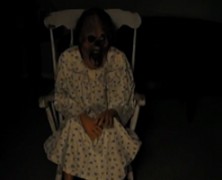
Rockin’ Granny
posted by SkeleTony
There’s something completely unsettling about a decrepit looking old lady slowly rocking back and forth in her chair. If you know a decrepit looking old lady then you’re half way there, but if you don’t, you can always follow ScareFX’s tutorial and make your own Rockin’ Granny prop. What you’re building in this tutorial is a self contained rocking mechanism that you’ll build your Granny on top of. The frame is built of 2×6 material with the wiper motor mounted vertically. A piece of aluminum flat bar connects the wiper motor to a piece of 2×6 that is connected to the base via a 4″ hinge which will allow it to rock back and forth when the motor spins. The upper part of the Granny is built on the 2×6 that is hinged by connecting some 1″ PVC to the 2×6 and then creating some shoulders with the 90 degree elbows and adding some sections of pool noodles over the PVC for the upper arms. You’ll need to add some prop hands if they’ll be visible. The lower body is connected to the base and consists of a PVC T connection which connects some 1″ PVC to two 90 degree elbows and forms the legs. Again, you’ll need to add some prop legs if they’ll be visible. Once your mechanism and skeleton is complete, the entire device is connected to the rocking chair with clamps to prevent it from flying forward once it gets rocking. After you’ve got everything clamped down it’s time to put the Styrofoam head on it and you’ll probably want to put a mask on it as well. Oh, and don’t forget to put some clothes on Granny! Items needed to complete this include: Rocking Chair Wiper motor 4′ of 2×6 board 4×4 post cap & brackets (or...

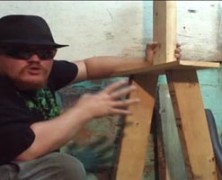
Sparking Fence
posted by SkeleTony
Want to create an impressive looking spark effect for your haunt that’s absolutely harmless? Bradsboobarn has a video tutorial on how you can achieve this effect and it’s easier than you think. If you take one thing away from this video, it should be that in order to achieve this effect safely, you’ll need to utilize a car battery charger, and not just a car battery. Using a regular car battery in place of the battery charger could potentially cause the battery to heat up and explode. Items needed to complete this include: Chain link fence Jumper cables Car battery charger Long metal object...

Don’t Blink
posted by SkeleTony
I’ve never really watched Dr. Who, but I’m sure glad that MacabreRob over at HalloweenForum has because the “Blink” episode of the British television series gave him the inspiration to build two life-sized angel statues for his haunt. To say that the statues are constructed out of paper mache and expanding foam insulation really underscores the amount of work that went into these. Several coats of paper mache were carefully coated onto a mannequin and then cut and removed in sections. After they were carefully pieced back together, 1″ wood boards were inserted to add some support and it was filled with expanding foam insulation. The wings were created using a similar technique with the form created using styrofoam and then coated with paper mache. MacabreRob went even so far as to cast his daughters face in alginate to provide for the face on Angelica, the passive angel. Once the bodies were complete he dressed them in robes made from bed sheets and thoroughly coated them in monster mud. Both angels turned out amazing and it’s really cool to see a family working together on a Halloween project. It’s definitely an intricate build, but if you can pull it off you’ll have the best looking cemetery in the neighborhood. Shop These Materials on Amazon Great Stuff Gaps & Cracks Expanding Foam 12oz Professional Spray Foam Applicator Gun (2-Pack) Instant Paper Mache Powder Mix 3.3 lbs Assorted 12" Latex Balloons 120-Pack XPS Foam Board 1" Thick Craft Sheets 4-Pack 4-in-1 Hot Wire Foam Cutter Kit 15W Loctite Power Grab Foam-Safe Construction Adhesive Affiliate Disclosure: HauntersList.com is a participant in the Amazon Services LLC Associates Program. As an Amazon Associate we earn from qualifying purchases at no extra cost to...
Rotisserie Motor Torture Rack...
posted by SkeleTony
If you’re a fan of The Wheel of Death prop but don’t want to create something quite as heavy duty then the Rotisserie Motor Torture Rack that Toktorill constructed may be just what you’re looking for. This torture rack relies on an inexpensive lazy susan and a 110v rotisserie motor to spin a cardboard wheel. The cardboard was covered with a woodgrain patterned self-adhesive contact paper, which looks remarkably realistic. It’s a fairly simple prop to create and looks fantastic, just make sure it doesn’t get wet. Items needed to complete this include: 110v Rotisserie motor Lazy susan Cardboard Assortment of 1×2 & 1×4 wood Woodgrain patterned contact paper Victim for wheel Shop These Materials on Amazon 12V Wiper Motor 2.5" Shaft 110 Degree (prop building) PWM DC Motor Speed Controller 9-70V 35A 45Kg High-Torque Waterproof Digital Servo Motor Affiliate Disclosure: HauntersList.com is a participant in the Amazon Services LLC Associates Program. As an Amazon Associate we earn from qualifying purchases at no extra cost to...
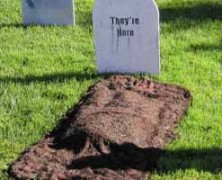
Halloween Graves
posted by SkeleTony
You’ve built your fence, carved your tombstones, and even built a grave grabber to put in your cemetery. Job well done, but if you want to add a touch of that “freshly buried” look to your cemetery you do have a couple of options. You could dig down about 2 inches into your yard removing the top layer of nicely manicured green grass and mix up your dirt until it’s nicely mounded, or you could follow the tutorial provided by Adrian McCarthy on creating Halloween Graves. His method utilizes a beach towel, some chicken wire, and some potting soil. No need for a shovel or grass seed when you’re done! Items needed to complete this include: an old beach towel brown fabric dye spray glue potting soil or mulch chicken wire or newspapers several 3-inch nails (optional) tombstone (optional) skeletal hands and feet (optional) Shop These Materials on Amazon 5-Pack Foam RIP Tombstone Blanks for Carving Decorative Cemetery Fence Sections Rust-Oleum Flat Black Spray Paint 12oz Affiliate Disclosure: HauntersList.com is a participant in the Amazon Services LLC Associates Program. As an Amazon Associate we earn from qualifying purchases at no extra cost to...

The Haunt 2013
posted by SkeleTony
There is nothing more scenic than the streets of downtown Cedarburg, Wisconsin on a brisk Autumn afternoon. And when night falls, scenic turns to gruesome as The Haunt opens its doors at the Ozaukee County Fairgrounds. This haunted attraction is celebrating its seventh year of fear in 2013, and they’re waiting for you… This haunt is run entirely by the volunteer efforts of members of the Ozaukee County 4-H Program, who pride themselves on providing a high scare attraction every year. All proceeds from this haunt go directly to support the 4-H...

The Hill Has Eyes 2013...
posted by SkeleTony
When truckloads of hazardous waste were dumped into this abandoned quarry in Franklin, Wisconsin, nobody had any concern for the residents of the nearby mobile home community. The mutations that followed have riddled this 130 acre site with mutants hungry for human flesh. The Hill Has Eyes offers two Haunted Trails and a ride on a run down chair lift which rewards its survivors with a trip through their 3D Zombie Maze. After you’ve toured all of the attractions you can kick back in the beer tent and enjoy some music with a few of the undead or relax at the bonfire. After the side effects began to develop, the mutated hillbillies were shunned by the public and forced to grow their population amongst themselves. Taking refuge in the nature that once surrounded their small mobile home community, they built homes and shelters using materials found in the landfill. Mutated inhabitants, confined to the landfill, hunger for fresh human flesh. In Hunger Hollow, the captured are brutally butchered, eaten and given a satanic burial that harvests their souls into the walking dead. Try to escape Zombie warfare by hopping a ride on The Ski Hill’s Scare Lift, ascending you into the horror of the hill. Nothing can prepare you for the terror that awaits you as you board a rickety chair lift, once the cause of horrific accident, which took the lives of 43 skiers back in January of 1973. The lift is now operated by these Zombies and continues to act as a death trap for those brave enough to take a ride. What waits for those who survive the Scare Lift is The Hill Has Eyes newest attraction – Wisconsin’s very first 3D attraction — The...
Foam Masonry
posted by SkeleTony
If you’re in need of some stone or brick panels for your haunt, you’re definitely going to want to check out the tutorial that HIY Productions created. This tutorial takes you through the process of creating brick panels out of styrofoam from start to finish. The tips provided in this tutorial are invaluable if you’re planning on creating any sort of stone or brick for your haunt. The finished product looks amazingly real. http://youtu.be/frq7fZ8SZ8s Shop These Materials on Amazon XPS Foam Board 1" Thick Craft Sheets 4-Pack 4-in-1 Hot Wire Foam Cutter Kit 15W Loctite Power Grab Foam-Safe Construction Adhesive Affiliate Disclosure: HauntersList.com is a participant in the Amazon Services LLC Associates Program. As an Amazon Associate we earn from qualifying purchases at no extra cost to...
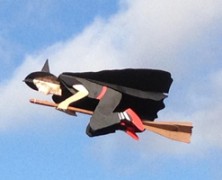
The Broom Flyer Witch...
posted by SkeleTony
If you have some serious crafting skills and a ton of ambition, you too can create a Flying Witch prop just like the one that Otto Dieffenbach created. Or you could just watch the video of Otto’s prop and marvel at his creation. Seriously, this prop is one of the coolest builds I’ve ever seen, it turned out amazing, but the third sentence of the tutorial pretty much rules me out from ever attempting it: “This is a difficult build and should not be attempted by a newcomer to the hobby. There is a lot of wood work involved. You may want to find a friend with superior build skills if you are a newcomer.” I’m not even sure I could find a friend with enough moxy to try to build this, but if you can find one, the full tutorial is posted over at the RCgroups.com website. Items needed to complete this include: Frame Broom Flyer cutouts in 6 mm Depron (available from Hoosier Cutout Service) Two 0.196″ OD x 0.125″ ID x 40″ Carbon Fiber square tubes (Midwest Products) One 0.125″ OD x 0.060″ ID x 40″ Carbon Fiber tube (Midwest Products) One .034″ x .121″ x 40″ Carbon Fiber strip (Midwest Products) 1/8 inch plywood sheet 1 ft x 2 ft ¼ inch plywood sheet 6 x 12 inches 8 Sheet metal screws 8 x ½ E-Flite Sea Fury retract landing gear (Optional) Master Air Screw 3 blade 10 x 7 propeller Two packages of Dubro micro pushrods #852 One bag of 15 Dubro Hinges #117 Two 1 7/8 inch wheels (Parkzone T-28 or F4u) Clear Gorilla Glue Foam safe CA and activator 5 minute epoxy 30 minute epoxy Paint Electronics: At least a 3 channel full range receiver Three...
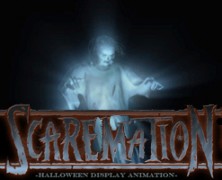
Scaremation Halloween Displays...
posted by SkeleTony
If you’re a fan of projected Halloween displays there’s a good chance that Scaremation has an animation in their catalog that will appeal to you. These inexpensive animations can easily be rear projected onto a plain white bedsheet and incorporated into your haunt, or used just as a cool effect for the trick or treaters. Setup is a snap and the digital files are loopable for hassle free operation. Scare-1: Rough Night, 4 minutes (Loopable) – Price:$45 Scare-2: Mansion Parlour 1, 4 minutes (Loopable) – Price:$20 (anniversary pricing) Scare-3: Window Slammer, 1/2 minute – Price:$10 Scare-4: Skeleton Zombies!, 3 minutes (Loopable) – Price:$35 Scare-5: Spider Lab, 3 minutes (Loopable) – Price:$45 Scare-6: Underworld, 4 minutes (Loopable) – Price:$45 Scare-7: Spectre, 55 seconds (Loopable) – Price:$20 Scare-8: Zombie Slammer, 1 minute (Loopable) – Price:$25 Scare-9: Mansion Parlour 2, 8 1/2 minutes (Loopable) – Price:$45 Scare-10: Gorewall, 3 minutes (Loopable) –...

Making LED Spotlights...
posted by SkeleTony
I love mini LED spotlights, and they truly don’t cost that much to buy, but if you’re anything like me (is uber-frugal better than saying cheap?), it’s hard to justify paying for something that’s pretty simple to make. There are tons of tutorials online to guide you through the process of making your own LED spotlights, but none of the tutorials I’ve read have so clearly articulated the process as the video tutorial posted below. And with that being said, it should come as no surprise that it was created by Allen Hopps of Stiltbeast Studios. ...
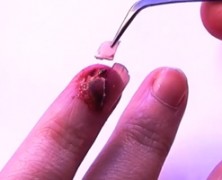
I Ripped Up My Nail!
posted by SkeleTony
I’ve never considered wearing artificial nails, and I’ve never actually had a reason to want to. Those are things I used to say prior to coming across this video tutorial from KlairedelysArt. The fact of the matter is that if you’re taking the time to do you own makeup, you’re probably already doing your hands as well, but if your willing to take the time to do your nails, the results can be truly gruesome. I must admit, the beginning of this video is hard to stomach, but well worth it....

Creepywoods Haunted Forest 2013...
posted by SkeleTony
Now in it’s sixth year, Creepywoods Haunted Forest in Kingsville, Maryland offers one of the most complex haunted trails in America with the most detailed set designs of any haunted trail ever created! Located on the Jones Family Farm, this haunted attraction was voted one of the top 13 Haunted Trails of 2013 by Hauntworld. This once peaceful forest now breathes life to evil, unleashing gigantic creatures, a terrifying pack of blood thirsty werewolves, ghostly spirits attacking from above, and even the trees themselves forbid all who enter to escape with their lives. If you thought going into the dark of the forest at night was frightening before, temp your fate and summon your courage, as the creatures of Creepywoods Haunted Forest awaits your arrival. There is parking at Jones Family Farm. The price for parking is a donation per car. Creepywoods Haunted Forest is an intense Haunted Attraction. Those with very small children or who are too afraid to enter the woods can enjoy the Jones Family...

The Haunted Hall of Horrors 2013...
posted by SkeleTony
The Fort Bragg Leo Youth Club is getting ready to spread some more fear this year with the Haunted Hall of Horrors Death Asylum 3D! This haunted attraction located in Fort Bragg, California is the Leo’s annual fundraiser with proceeds going towards anti-bullying school programs and vocational scholarships. This haunt is geared towards older teens and adults and is not recommended for young children. Children under 10 most certainly must be accompanied by an adult....
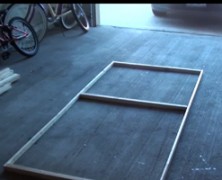
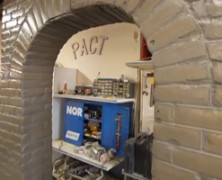
Haunted House Wall Panels...
posted by SkeleTony
Whether your haunt is in a warehouse somewhere, or just in your garage, you’re eventually going to need to build some wall panels for it. Luckily, there’s nothing tricky about framing walls, especially if you follow Hawthorne Manor Haunted House’s tutorial on building wall panels. These panels are made of 1×2 furring strips with 2×2 cross bracing, and black sheets. Once you’ve got your panels built you can configure and connect them however you want using some three-hole flat brackets. They’re easy to build, go up easily, and (if you’ve got the room) store easily in your attic....
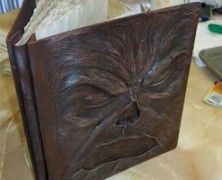
Necronomicon Tutorial...
posted by SkeleTony
Writing the Necronomicon may take you a lifetime, but creating the cover for this ancient tome isn’t that difficult if you follow the tutorial from Zombie Nations. You’ll start by pulling the paper off of a photo album until you’re down to the cardboard. Create your basic shapes for the back cover using some Super Sculpey sculpting compound and then continue to cover the entire page. Once you’ve got the entire page covered you can use a little turpentine and an artists brush to smooth out the Sculpey. Once the turpentine dries you can add some wrinkles and other finer details. Once dried, put it in the oven at 250 degrees for about 30 minutes and once its fully baked, coat it with some black primer. The front of the Necronomicon created in this tutorial pretty much follows the same procedure as the back cover. You’ll use your Super Sculpey to create the face and then continue to cover the entire cover with Sculpey. You’ll need to smooth it out using turpentine, then cook it and prime it. Once you’ve got both side fully primed with the black paint you’re going to apply a base coat of brown to both covers. Once complete, you’ll be brushing some thinned down dark brown acrylic paint to it. This will settle into the cracks of the book and you’ll finish it off by drybrushing a lighter brown over the entire book. The eyes can be painted using whatever color scheme you see fit to use. When completed lightly spray the entire book with some Spray Matte Fixative. The book that was created in this tutorial turned out amazing, I wouldn’t mind having a copy of the one pictured above. Rest assured, though, that...
Spider Hill Prop Works Swaying Zombie...
posted by SkeleTony
Spider Hill Prop Works has posted a great video detailing the framework for their Swaying Zombie prop. This silent film is meant to be more of a companion to the full Swaying Zombie Tutorial they put together which details the build. The parts list included details everything you’ll need to get this up and running and contains many of the pvc fittings and articulating joints that they sell. The frame consists of a plywood base with two pvc legs attached that connect to another plywood base that forms the waist. The wiper motor is mounted on the waist plywood and a swivel assembly is created out of pvc that connects the upper body of the zombie to the drive arm of the wiper motor. This will eventually create the swaying motion for your zombie. It’s a pretty intricate build that will require a delicate hand when setting up. The tutorial is well laid out with great images and descriptions to give you everything you need to get your zombie swaying short of a hula hoop and some extra brains. Items needed to complete this include: 10.5 feet of schedule 40 1 inch PVC pipe 4 feet of schedule 40 ½ inch PVC pipe (6) UMB-1 Universal Mounting Bases (2) ST-1 1 inch PVC slip-T fittings (1) Schedule 40 1 inch PVC cross fitting (1) Schedule 40 1 inch PVC T fitting (2) Schedule 40 1 inch PVC 45 elbows (1) Schedule 40 1 inch to ½ inch PVC reducer 12 Volt wiper motor with 5 volt power supply wiper motor bracket (hauntedparts.com) Approx. 25 #10 x 5/8” self drilling screws (1) ¼” x 20 x 3 ½” hex bolt (4) ¼” x 20 x 1 inch hex bolts (1) ¼” x 20...

Two Way Mirror
posted by SkeleTony
There’s nothing scarier than a good two way mirror prop, except of course paying for the two way mirror, which can be downright terrifying. Thankfully, Gila Privacy Film can help you turn a piece of glass into a fully functional two way mirror for at least an eighth of what you would drop for a manufactured two-way mirror. It’s available at Home Depot and other home improvement stores and comes in 3′ x 15′ rolls (you’ll want to pickup some of the Gila Window Film Application Solution and a squeegie as well). HalloweenAlliance has put together a nice video tutorial on the entire process, which is overall a pretty simple project. You will definitely want two people for this because peeling the privacy film apart can be a tricky solo proposition. Getting the bubbles out can be frustrating, but it’s not impossible and if you’re persistent enough you can create a flawless looking two way mirror. Items needed to complete this include: Piece of glass Frame Gila Privacy Film Gila Window Film application solution...
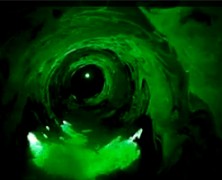
Simple Laser Vortex Construction...
posted by SkeleTony
I’ve always wanted to post a link to a tutorial on how to build a laser vortex but I’ve not been able to find one that wasn’t either too detailed to the point of confusion, or lacking in detail, which is equally confusing. Luckily, UrDaddyO31 posted a short video detailing the design of the laser vortex he used for his prop. It’s not so much a tutorial, but it does lay out the design he used which was originally created by kimcfadd who has them for sale on HalloweenForum. This ultra-simplistic design incorporates a mirror mounted on a cpu fan. The cpu fan and the laser are mounted to blocks of wood and as the cpu fan spins the mirror projects the circular laser effect which will become your laser vortex when you add a little fog. ** Warning: Lasers can cause serious and/or permanent eye damage. Never look directly at a laser or point it directly in someone’s eyes. Consult Safety Recommendations for Laser Pointers for more information. Shop These Materials on Amazon 400W Fog Machine with Wireless & Wired Remote FogWorx Extreme High Density Fog Juice Gallon Copper Coil Refrigeration Tubing 1/8" OD x 6.5ft (fog chiller) Affiliate Disclosure: HauntersList.com is a participant in the Amazon Services LLC Associates Program. As an Amazon Associate we earn from qualifying purchases at no extra cost to...

CarnEvil Chicago 2013...
posted by SkeleTony
Chicago’s newest haunted attraction, CarnEvil promises to put your sanity to the test this year. This haunted attraction is located on the grounds of the 10,000 seat Sears Centre Arena in Hoffman Estates, Illinois and offers visitors five terrifying haunted houses and mazes. You’ll enter a gruesome world of disfigured clowns, nightmare-inducing circus freaks, blood-thirsty carnies and butchered corpses. Peek behind the curtain of this traveling carnival of death and decay, and you’ll see how the other half live. Keep quiet as you emerge from the sewers and make your way into the carny’s twisted world; sneaking into their rotting trailer and discovering the horrors that lie within. They won’t be gone for long, but you can’t leave until you discover the “secret” ingredient used in their processing plant, cleverly hidden behind their ramshackle home. The good news, it’s MADE IN AMERICA, but the bad news you’ll have to learn for yourself. Wander into this bustling factory, and watch as workers transform various parts into eerily lifelike dolls, almost too lifelike. But the smell of death is everywhere and after a quick trip down the rickety freight elevator, you discover the real factory floor. Slick with blood, this factory is full of satanic workmen, butchering and embalming the innocent as part of a hellish assembly line. Beyond the lights and sounds of the carnival, lay the remnants of a long abandoned circus tent, where a detestable world of disfigured clowns waits for unwitting victims. Prepare for a long night as this chaotic maze is nearly impossible to escape; overflowing with nightmarish creatures at every turn. Explore the cemetery grounds; final resting place for CARNEVIL’s most recent victims and home to the Tomb of the Voodoo High Priestess. Enter...

The Haunted Garden 2013...
posted by SkeleTony
10/15/2013 UPDATE: A District Court of MD judge has determined that the Haunted Garden is in fact NOT a commercial event and is allowing The Haunted Garden to be open ONLY on 2 nights – the 25th and 26th of October. 10/5/2013 UPDATE: The District Court of MD just granted a TEMPORARY RESTRAINING ORDER requiring cancellation of The Haunted Garden in 2013. They will be fighting this legal maneuver, but for now The Haunted Garden is canceled and not open to the public. Back for its fourth year, The Haunted Garden is an over the top Halloween feast for the eyes. Hosted by Donna Kerr and Rania Peet the Haunted Garden is located on a beautiful 1/4 acre lot in Silver Spring, Maryland. This incredible yard haunt offers 8 exhibits total and utilizes a mixture of larger than life hand crafted props, special effects, and live actors all designed to force you to face your fears. This is a neighborhood event, and parking is limited. If driving, please be courteous to the neighborhood flow and find parking within the blocks surrounding the garden. Parking signs will be posted. Please do NOT park in No Parking...
Tombstone Weathering
posted by SkeleTony
It seems like I spend more time watching tutorials on how to carve tombstones than I do actually carving tombstones, and that’s ok with me, because it’s all part of the learning process. Well a major part of that process comes in the form of the two video tutorials that S.K. Austin of The Haunting Grounds provided. This two part in depth analysis of how to weather your tombstones properly is an invaluable resource for those of us interested in created the most realistic looking tombstones possible. http://youtu.be/Owv7yyK5gno Shop These Materials on Amazon 5-Pack Foam RIP Tombstone Blanks for Carving Decorative Cemetery Fence Sections Rust-Oleum Flat Black Spray Paint 12oz Affiliate Disclosure: HauntersList.com is a participant in the Amazon Services LLC Associates Program. As an Amazon Associate we earn from qualifying purchases at no extra cost to...
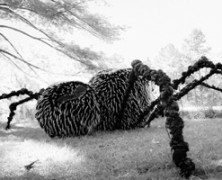
The Build of a Giant Spider...
posted by SkeleTony
It seems like we can’t go more than a few weeks without a good spider tutorial here at Haunter’s List, but Rania Peet’s latest prop tutorial, The Build of a Giant Spider is way better than “good”. This is one oversized arachnid that could not possibly have turned out any better. In her tutorial you’ll start off making your head and body out of tension wire covered with chicken wire. The tension wire comes round but is completely bendable to get whatever shape you see fit to make, it doesn’t necessarily have to be round. The base is a rounded sheet of plywood that holds securely in place the 8 pieces of pvc that will form your legs. Once the base is complete and painted, the body of your spider can be connected to it via a piece of metal flat bar. The legs consist of three sections of 1″ pvc, a 5′ section that comes off the 45 degree fittings at the base, then connects to a 3′ section at the middle of the leg, and finishes with a 2′ section at the end. Once the legs are attached Rania wrapped the pvc with some burlap and proceeded to spray Great Stuff in the gap. The Great Stuff pushes the burlap and expands through the tiny gaps creating an amazingly creepy appearance that look both bulbous and hairy (just as I suspect spider legs would look like if you enlarged them to 17 feet in diameter). Once complete they legs were coated with flat black spray paint. The body is covered with several yards of two tone long pile fur that were applied in sections. The fur can be costly, but you cannot beat the appearance it gives the spider, it’s creepy unto...
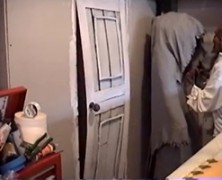
Bulging Door
posted by SkeleTony
If you’re a fan of Disney’s Haunted Mansion, then you’ve probably already spent a considerable amount of time trying to figure out how to incorporate some of your favorite effects from it into your haunt already. Some are easier to accomplish than others, but if you’re looking for inspiration, HalloweenAddiction has a great tutorial on how to create a bulging door just like the one that appears to be breathing as it bows in and out in the corridor of doors. The great thing about his prop is that it’s really not that hard to build. Of course, you’ll need an empty door frame and a variable speed motor to create the effect, but the rest is constructed using 4 x 6″ foam that is held in the door frame via tension wire used for fencing. http://youtu.be/GfM8eUTCaig Shop These Materials on Amazon 12V Wiper Motor 2.5" Shaft 110 Degree (prop building) PWM DC Motor Speed Controller 9-70V 35A 45Kg High-Torque Waterproof Digital Servo Motor Affiliate Disclosure: HauntersList.com is a participant in the Amazon Services LLC Associates Program. As an Amazon Associate we earn from qualifying purchases at no extra cost to...

Sand Casting Skulls
posted by SkeleTony
If you have access to a sandbox, or even just have some sand and a box you can put it to good use in making some skulls using the sand casting tutorial that partsman at HalloweenForum wrote. You’ll need some play sand, a box, some great stuff, and a foam skull (or whatever you chose to cast). Once you’ve got all your supplies, you’re basically just pressing the skull into the sand and packing the sand really tight around it. Once it’s packed, just remove the form and add some great stuff to the impression you’ve created. As you can see the resulting product has a really great looking stone appearance to it. Shop These Materials on Amazon Realistic Replica Human Skull Statue 6.5" 5.4ft Full Size Halloween Foam Skeleton Affiliate Disclosure: HauntersList.com is a participant in the Amazon Services LLC Associates Program. As an Amazon Associate we earn from qualifying purchases at no extra cost to...
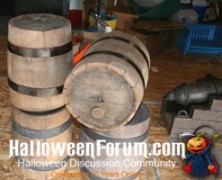
Foam Barrels
posted by SkeleTony
Ok, since September 19th was International Talk Like a Pirate Day, (and I was completely unaware of this fact), I thought I’d post the tutorial that fravak from HalloweenForum penned on how to make foam barrels. The barrels are crafted using styrofoam blocks, the kind that are used to stack small flatbed trailers, and while these may be hard to come by, even if you don’t need barrels and have access to these, they are gold, take them. Since the foam blocks start out square, fravak utilized the lid from a 5-gallon bucket to outline the round shape you’ll need. From there the corners were cut off using a hot wire cutter and the entire block was sanded down using a drywall rasp to round it out. Once this is complete the detailing of the barrel will actually begin. A soldering iron will be needed to carve out the individual pieces of wood on all sides of the barrel. Once this is complete you can add some finer detail by adding graining to all the wood planks with the soldering iron. Fravak utilized paper mache for the straps around the barrels and a piece of blue foam for the plug. Once all of these steps are complete it’s time to paint it up. The base is a browish color while the top he top is covered with a black wash that fravak rubbed all over the barrel to make the color more uneven. The end result is phenomenal, these barrels look completely realistic they don’t cost much, and they’re light as a feather. So next International Talk Like a Pirate Day, don’t forget to grab one of your barrels as you strut around town saying “Ahoy, me hearties, let’s see what crawled out of the bung hole.”, it’ll just make a lot more...

Kingsbury Cemetery 2013...
posted by SkeleTony
The Kingsbury Cemetery Haunted House is back for more scares in 2013 and they’ve got an all new location in the Galleria of Shops (the old Ames plaza) in Painted Post, New York. This attraction sets its sights on being a traditionally scary, Victorian themed haunt, as opposed to the stereotypical “blood and gore” houses that are a dime a dozen. The haunt relies on superior storylines, special effects and actors to provide an immersive experience that promises to raise the hair on the back of your neck. This year’s attractions include: Kingsbury Manor – The Phantom Opus: Young, creative, and sensitive to the supernatural, William Kingsbury discovers an heirloom organ that soon consumes his days. Regrettably, it’s a musical instrument of doom when angry ghosts are drawn to its power…note for note, and an eye for an eye! The Cabinet of Curiosities: Thaddeus Ortch is the owner of the Cabinet of Curiosities, a museum of bizarre and grotesque oddities that otherwise would be flawless except for two things: his Egyptian sarcophagus needs a mummy, and he needs something from the Kingsbury family. When one of those things falls into his possession, his quest for the other has dire consequences! Some doors should remain locked...

Midnight Terror Haunted House 2013...
posted by SkeleTony
The Midnight Terror Haunted House started as a small yard display in 2000 and has grown into the full walk through haunt that it is today. Completely rethemed for 2013 the Midnight Terror Haunted House beckons you to enter “The Asylum”. This charity driven home haunt is located in Oak Lawn, Illinois and showcases a majority of hand crafted props. Coming off a strong 2012 showing in which they were rated 6th in the visitor’s favorite Halloween event by Hauntedillinois.com, the Midnight Terror Haunted House is looking forward to another year of fear. Donations from this haunt benefit the Autism Society of...

Halls of Terror in Prairie du Chien 2013...
posted by SkeleTony
Scream Xtreme and Great Country Q94 are getting set to bring back the Halls of Terror in Prairie Du Chien and have added two days to this years event. Located in Prairie du Chien, Wisconsin they’ve got a completely redesigned layout this year featuring new scares and effects, including outdoor elements as well. While this haunt is not recommended for children under 12, there will be a special kid friendly haunt on October 26th from 2pm to 6pm. For only $2.00 the kids will get a lights on trek through the haunt with friendly monsters and candy handed out at the end. Proceeds from this haunt go towards the Prarie du Chien Fire Department, Parks Department, and other various...

Asylum Haunted Scream Park 2013...
posted by SkeleTony
After expanding their operations three years ago, the Asylum Haunted Scream Park has quickly become a must see haunted attraction. Located in Louisville, Kentucky this haunt offers visitors 4 unique and separate attractions all located on a forty acre site. All of the attractions here are completely immersive and give visitors the opportunity to experience a world overtaken by alien zombies and hillbilly freaks. More than just a quiet stroll through the woods… Be prepared to face your darkest fears on this hellish mile long trek through frightful indoor and outdoor displays of terror. You’ve seen zombie movies, now come live one! Zombie City is a live action interactive haunted attraction unlike any you’ve ever experienced before. Think you can stop an invasion of killer zombie aliens? This fully interactive first-person shooting experience offers a 9,000 square foot arena of doom filled with zombie aliens. Open every Friday and Saturday night this full carnival and freakshow showcases the talents of the Human Pincushion, a Fire Eater, Fortune Teller, Games, Prizes, Food and more....