
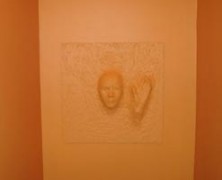
If you want to add a bit of subtle detail to your haunt walls, Violetkitty has an instructable for a Spirit Panel that could very easily be used. The tutorial is based on an original idea titled Ghosts in the Bookcase Halloween Project, and it’s a simple way to add some depth to any flat surface. In a nutshell you’re going to glue or screw down the item you want protruding from the wall. You’ll then start to cover the protruding items with your paper mache mixture so that it completely covers them and appears to be stretching the wall. After you’ve got the items coated you’ll need to let them dry a bit and then cover the entire surface with the paper mache mixture. Once completely coated you can sand it down a bit and paint it. The great thing about this idea is that you can use plastic masks, skulls, prop hands, pretty much whatever you want to appear to be coming through the walls. It’s not a tricky project, and it can add a nice wrinkle to an otherwise plain wall. Items needed to complete this include: Plywood (or the flat surface of your choice) Plastic Mask Manicure plastic hand Gorilla glue Celluclay paper- mache Sandpaper Latex paint Shop These Materials on Amazon Instant Paper Mache Powder Mix 3.3 lbs Assorted 12" Latex Balloons 120-Pack Affiliate Disclosure: HauntersList.com is a participant in the Amazon Services LLC Associates Program. As an Amazon Associate we earn from qualifying purchases at no extra cost to...
Carved Granite From Foam...
posted by SkeleTony
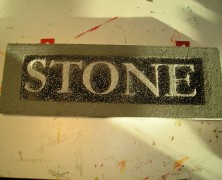
Acetone will eat away at your styrofoam, and while that’s not exactly what I would call a newsflash here, but Creativeman uses it to great advantage in his instructable on how to use this to create really good looking granite lettering. This is a great way to create a sandblasted stone sign for use on cemetery columns, or to add depth to your tombstone, and it requires only the most rudimentary of skills. The process is simple. Cut your pre-printed letters out with an exacto knife, glue them to your styrofoam, and then spray paint the styrofoam. It’s literally easier than breathing, but it adds a great level of detail to your lettering or sign. Items needed to complete this include: Styrofoam Printout of your letters (each letter cut) Elmer’s glue Spray paint containing acetone Shop These Materials on Amazon XPS Foam Board 1" Thick Craft Sheets 4-Pack 4-in-1 Hot Wire Foam Cutter Kit 15W Loctite Power Grab Foam-Safe Construction Adhesive Affiliate Disclosure: HauntersList.com is a participant in the Amazon Services LLC Associates Program. As an Amazon Associate we earn from qualifying purchases at no extra cost to...
Making Zombie Clothes...
posted by SkeleTony
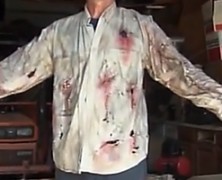
If a zombie can take the time to dig its way out of its grave, the least you can do is make sure he’s got some appropriate looking clothes, right? And if you’ve taken the time to build a Full Sized Zombie Prop, or just plan on becoming the zombie yourself, you should probably pay equal attention to the clothing since it’s a major part of your zombie’s appearance. If you want truly realistic looking zombie clothing you’re going to want to give Robertb7864’s video a look. This twenty minute trek through zombie clothes modification features a full five minutes dedicated to Robertb7864 taking a belt sander to a shirt. The end result is pretty great looking, though, and is way more authentic looking than you’d achieve by tearing or cutting the cloth yourself....
Full Size Zombie
posted by SkeleTony
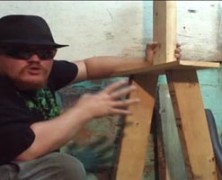
If you’re looking to build a full size zombie that you can leave outside you’re going to need something that is a little more solid, and once again, Dr. Kreepy has just the tutorial you’re looking for. The lower body is framed using 2 x 4’s for legs attached to a 1 x 6 waist while the spine, shoulders, and arms are crafted out of PVC. After the frame is in place you’ll need to bulk out the torso and the legs. You can certainly wrap the legs and body with foam and duct tape it tight, or you can use the Dr. Kreepy method and use balled up newspaper or plastic. When mounting it you can use a plywood base and screw the legs to it, otherwise you can grab a pair of old boots and throw in some quick drying cement. You’ll need to add your favorite mask and a pair of prop hands if they’ll be visible. Items needed to complete this include: 2 – 2×4 approximately 35″ 1 – 1 x 6 appoximately 17″ 1 – 20″ 2 x 4 6 pieces 3/4 PVC 4 – 3/4″90 degree PVC 3/8″ or thicker 2′ x 2′ plywood Old clothes Skull or mask Duct Tape Newspaper or foam Screws Shop These Materials on Amazon 1" Schedule 40 PVC Pipe 6-Pack Ratcheting PVC Pipe Cutter (up to 1-1/4") 1" PVC Furniture Fittings Assortment 12-Pack Oatey PVC Clear Cement + Primer Handy Pack Affiliate Disclosure: HauntersList.com is a participant in the Amazon Services LLC Associates Program. As an Amazon Associate we earn from qualifying purchases at no extra cost to...
Quick & Easy Armature...
posted by SkeleTony
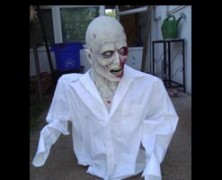
I’ve got to tip my hat to Nightrideproductions from the HalloweenForum, who has proof that literally everything you own can be incorporated into your next prop build. This Quick and Easy Armature is built using a tomato cage and is all you’ll need to get a few more last minute zombies popping out of your cemetery without exerting much effort along the way. You’ll start by flipping your tomato cage so the largest circle is on the ground and then bend the two side wires so they form shoulders and arms. The third and final wire should be bent inward and then up 90 degrees so the styrofoam head can slide down onto it. The newspaper and duct tape should be added around the shoulders and arms to add a little body to your armature before adding your mask and shirt, but that’s pretty much all there is to it. Bend the wires back into place when your done using it and it’ll be ready for the spring tomato crop. Items needed to complete this include: Tomato cage Styrofoam head Tent stakes Newspaper Duct tape Wire...
Rockin’ Granny
posted by SkeleTony
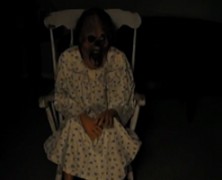
There’s something completely unsettling about a decrepit looking old lady slowly rocking back and forth in her chair. If you know a decrepit looking old lady then you’re half way there, but if you don’t, you can always follow ScareFX’s tutorial and make your own Rockin’ Granny prop. What you’re building in this tutorial is a self contained rocking mechanism that you’ll build your Granny on top of. The frame is built of 2×6 material with the wiper motor mounted vertically. A piece of aluminum flat bar connects the wiper motor to a piece of 2×6 that is connected to the base via a 4″ hinge which will allow it to rock back and forth when the motor spins. The upper part of the Granny is built on the 2×6 that is hinged by connecting some 1″ PVC to the 2×6 and then creating some shoulders with the 90 degree elbows and adding some sections of pool noodles over the PVC for the upper arms. You’ll need to add some prop hands if they’ll be visible. The lower body is connected to the base and consists of a PVC T connection which connects some 1″ PVC to two 90 degree elbows and forms the legs. Again, you’ll need to add some prop legs if they’ll be visible. Once your mechanism and skeleton is complete, the entire device is connected to the rocking chair with clamps to prevent it from flying forward once it gets rocking. After you’ve got everything clamped down it’s time to put the Styrofoam head on it and you’ll probably want to put a mask on it as well. Oh, and don’t forget to put some clothes on Granny! Items needed to complete this include: Rocking Chair Wiper motor 4′ of 2×6 board 4×4 post cap & brackets (or...
Sparking Fence
posted by SkeleTony
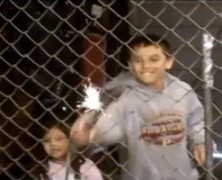
Want to create an impressive looking spark effect for your haunt that’s absolutely harmless? Bradsboobarn has a video tutorial on how you can achieve this effect and it’s easier than you think. If you take one thing away from this video, it should be that in order to achieve this effect safely, you’ll need to utilize a car battery charger, and not just a car battery. Using a regular car battery in place of the battery charger could potentially cause the battery to heat up and explode. Items needed to complete this include: Chain link fence Jumper cables Car battery charger Long metal object...

Don’t Blink
posted by SkeleTony
I’ve never really watched Dr. Who, but I’m sure glad that MacabreRob over at HalloweenForum has because the “Blink” episode of the British television series gave him the inspiration to build two life-sized angel statues for his haunt. To say that the statues are constructed out of paper mache and expanding foam insulation really underscores the amount of work that went into these. Several coats of paper mache were carefully coated onto a mannequin and then cut and removed in sections. After they were carefully pieced back together, 1″ wood boards were inserted to add some support and it was filled with expanding foam insulation. The wings were created using a similar technique with the form created using styrofoam and then coated with paper mache. MacabreRob went even so far as to cast his daughters face in alginate to provide for the face on Angelica, the passive angel. Once the bodies were complete he dressed them in robes made from bed sheets and thoroughly coated them in monster mud. Both angels turned out amazing and it’s really cool to see a family working together on a Halloween project. It’s definitely an intricate build, but if you can pull it off you’ll have the best looking cemetery in the neighborhood. Shop These Materials on Amazon Great Stuff Gaps & Cracks Expanding Foam 12oz Professional Spray Foam Applicator Gun (2-Pack) Instant Paper Mache Powder Mix 3.3 lbs Assorted 12" Latex Balloons 120-Pack XPS Foam Board 1" Thick Craft Sheets 4-Pack 4-in-1 Hot Wire Foam Cutter Kit 15W Loctite Power Grab Foam-Safe Construction Adhesive Affiliate Disclosure: HauntersList.com is a participant in the Amazon Services LLC Associates Program. As an Amazon Associate we earn from qualifying purchases at no extra cost to...
Rotisserie Motor Torture Rack...
posted by SkeleTony
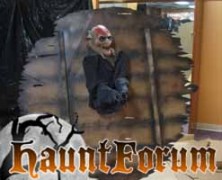
If you’re a fan of The Wheel of Death prop but don’t want to create something quite as heavy duty then the Rotisserie Motor Torture Rack that Toktorill constructed may be just what you’re looking for. This torture rack relies on an inexpensive lazy susan and a 110v rotisserie motor to spin a cardboard wheel. The cardboard was covered with a woodgrain patterned self-adhesive contact paper, which looks remarkably realistic. It’s a fairly simple prop to create and looks fantastic, just make sure it doesn’t get wet. Items needed to complete this include: 110v Rotisserie motor Lazy susan Cardboard Assortment of 1×2 & 1×4 wood Woodgrain patterned contact paper Victim for wheel Shop These Materials on Amazon 12V Wiper Motor 2.5" Shaft 110 Degree (prop building) PWM DC Motor Speed Controller 9-70V 35A 45Kg High-Torque Waterproof Digital Servo Motor Affiliate Disclosure: HauntersList.com is a participant in the Amazon Services LLC Associates Program. As an Amazon Associate we earn from qualifying purchases at no extra cost to...

Halloween Graves
posted by SkeleTony
You’ve built your fence, carved your tombstones, and even built a grave grabber to put in your cemetery. Job well done, but if you want to add a touch of that “freshly buried” look to your cemetery you do have a couple of options. You could dig down about 2 inches into your yard removing the top layer of nicely manicured green grass and mix up your dirt until it’s nicely mounded, or you could follow the tutorial provided by Adrian McCarthy on creating Halloween Graves. His method utilizes a beach towel, some chicken wire, and some potting soil. No need for a shovel or grass seed when you’re done! Items needed to complete this include: an old beach towel brown fabric dye spray glue potting soil or mulch chicken wire or newspapers several 3-inch nails (optional) tombstone (optional) skeletal hands and feet (optional) Shop These Materials on Amazon 5-Pack Foam RIP Tombstone Blanks for Carving Decorative Cemetery Fence Sections Rust-Oleum Flat Black Spray Paint 12oz Affiliate Disclosure: HauntersList.com is a participant in the Amazon Services LLC Associates Program. As an Amazon Associate we earn from qualifying purchases at no extra cost to...
Foam Masonry
posted by SkeleTony
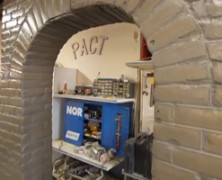
If you’re in need of some stone or brick panels for your haunt, you’re definitely going to want to check out the tutorial that HIY Productions created. This tutorial takes you through the process of creating brick panels out of styrofoam from start to finish. The tips provided in this tutorial are invaluable if you’re planning on creating any sort of stone or brick for your haunt. The finished product looks amazingly real. http://youtu.be/frq7fZ8SZ8s Shop These Materials on Amazon XPS Foam Board 1" Thick Craft Sheets 4-Pack 4-in-1 Hot Wire Foam Cutter Kit 15W Loctite Power Grab Foam-Safe Construction Adhesive Affiliate Disclosure: HauntersList.com is a participant in the Amazon Services LLC Associates Program. As an Amazon Associate we earn from qualifying purchases at no extra cost to...

The Broom Flyer Witch...
posted by SkeleTony
If you have some serious crafting skills and a ton of ambition, you too can create a Flying Witch prop just like the one that Otto Dieffenbach created. Or you could just watch the video of Otto’s prop and marvel at his creation. Seriously, this prop is one of the coolest builds I’ve ever seen, it turned out amazing, but the third sentence of the tutorial pretty much rules me out from ever attempting it: “This is a difficult build and should not be attempted by a newcomer to the hobby. There is a lot of wood work involved. You may want to find a friend with superior build skills if you are a newcomer.” I’m not even sure I could find a friend with enough moxy to try to build this, but if you can find one, the full tutorial is posted over at the RCgroups.com website. Items needed to complete this include: Frame Broom Flyer cutouts in 6 mm Depron (available from Hoosier Cutout Service) Two 0.196″ OD x 0.125″ ID x 40″ Carbon Fiber square tubes (Midwest Products) One 0.125″ OD x 0.060″ ID x 40″ Carbon Fiber tube (Midwest Products) One .034″ x .121″ x 40″ Carbon Fiber strip (Midwest Products) 1/8 inch plywood sheet 1 ft x 2 ft ¼ inch plywood sheet 6 x 12 inches 8 Sheet metal screws 8 x ½ E-Flite Sea Fury retract landing gear (Optional) Master Air Screw 3 blade 10 x 7 propeller Two packages of Dubro micro pushrods #852 One bag of 15 Dubro Hinges #117 Two 1 7/8 inch wheels (Parkzone T-28 or F4u) Clear Gorilla Glue Foam safe CA and activator 5 minute epoxy 30 minute epoxy Paint Electronics: At least a 3 channel full range receiver Three...
Haunted House Wall Panels...
posted by SkeleTony
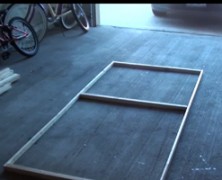
Whether your haunt is in a warehouse somewhere, or just in your garage, you’re eventually going to need to build some wall panels for it. Luckily, there’s nothing tricky about framing walls, especially if you follow Hawthorne Manor Haunted House’s tutorial on building wall panels. These panels are made of 1×2 furring strips with 2×2 cross bracing, and black sheets. Once you’ve got your panels built you can configure and connect them however you want using some three-hole flat brackets. They’re easy to build, go up easily, and (if you’ve got the room) store easily in your attic....
Necronomicon Tutorial...
posted by SkeleTony
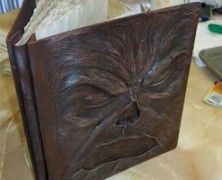
Writing the Necronomicon may take you a lifetime, but creating the cover for this ancient tome isn’t that difficult if you follow the tutorial from Zombie Nations. You’ll start by pulling the paper off of a photo album until you’re down to the cardboard. Create your basic shapes for the back cover using some Super Sculpey sculpting compound and then continue to cover the entire page. Once you’ve got the entire page covered you can use a little turpentine and an artists brush to smooth out the Sculpey. Once the turpentine dries you can add some wrinkles and other finer details. Once dried, put it in the oven at 250 degrees for about 30 minutes and once its fully baked, coat it with some black primer. The front of the Necronomicon created in this tutorial pretty much follows the same procedure as the back cover. You’ll use your Super Sculpey to create the face and then continue to cover the entire cover with Sculpey. You’ll need to smooth it out using turpentine, then cook it and prime it. Once you’ve got both side fully primed with the black paint you’re going to apply a base coat of brown to both covers. Once complete, you’ll be brushing some thinned down dark brown acrylic paint to it. This will settle into the cracks of the book and you’ll finish it off by drybrushing a lighter brown over the entire book. The eyes can be painted using whatever color scheme you see fit to use. When completed lightly spray the entire book with some Spray Matte Fixative. The book that was created in this tutorial turned out amazing, I wouldn’t mind having a copy of the one pictured above. Rest assured, though, that...
Spider Hill Prop Works Swaying Zombie...
posted by SkeleTony
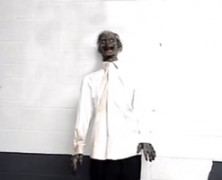
Spider Hill Prop Works has posted a great video detailing the framework for their Swaying Zombie prop. This silent film is meant to be more of a companion to the full Swaying Zombie Tutorial they put together which details the build. The parts list included details everything you’ll need to get this up and running and contains many of the pvc fittings and articulating joints that they sell. The frame consists of a plywood base with two pvc legs attached that connect to another plywood base that forms the waist. The wiper motor is mounted on the waist plywood and a swivel assembly is created out of pvc that connects the upper body of the zombie to the drive arm of the wiper motor. This will eventually create the swaying motion for your zombie. It’s a pretty intricate build that will require a delicate hand when setting up. The tutorial is well laid out with great images and descriptions to give you everything you need to get your zombie swaying short of a hula hoop and some extra brains. Items needed to complete this include: 10.5 feet of schedule 40 1 inch PVC pipe 4 feet of schedule 40 ½ inch PVC pipe (6) UMB-1 Universal Mounting Bases (2) ST-1 1 inch PVC slip-T fittings (1) Schedule 40 1 inch PVC cross fitting (1) Schedule 40 1 inch PVC T fitting (2) Schedule 40 1 inch PVC 45 elbows (1) Schedule 40 1 inch to ½ inch PVC reducer 12 Volt wiper motor with 5 volt power supply wiper motor bracket (hauntedparts.com) Approx. 25 #10 x 5/8” self drilling screws (1) ¼” x 20 x 3 ½” hex bolt (4) ¼” x 20 x 1 inch hex bolts (1) ¼” x 20...
Two Way Mirror
posted by SkeleTony
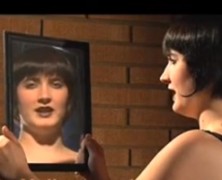
There’s nothing scarier than a good two way mirror prop, except of course paying for the two way mirror, which can be downright terrifying. Thankfully, Gila Privacy Film can help you turn a piece of glass into a fully functional two way mirror for at least an eighth of what you would drop for a manufactured two-way mirror. It’s available at Home Depot and other home improvement stores and comes in 3′ x 15′ rolls (you’ll want to pickup some of the Gila Window Film Application Solution and a squeegie as well). HalloweenAlliance has put together a nice video tutorial on the entire process, which is overall a pretty simple project. You will definitely want two people for this because peeling the privacy film apart can be a tricky solo proposition. Getting the bubbles out can be frustrating, but it’s not impossible and if you’re persistent enough you can create a flawless looking two way mirror. Items needed to complete this include: Piece of glass Frame Gila Privacy Film Gila Window Film application solution...
Tombstone Weathering
posted by SkeleTony
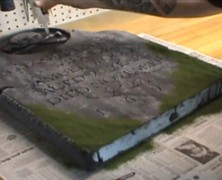
It seems like I spend more time watching tutorials on how to carve tombstones than I do actually carving tombstones, and that’s ok with me, because it’s all part of the learning process. Well a major part of that process comes in the form of the two video tutorials that S.K. Austin of The Haunting Grounds provided. This two part in depth analysis of how to weather your tombstones properly is an invaluable resource for those of us interested in created the most realistic looking tombstones possible. http://youtu.be/Owv7yyK5gno Shop These Materials on Amazon 5-Pack Foam RIP Tombstone Blanks for Carving Decorative Cemetery Fence Sections Rust-Oleum Flat Black Spray Paint 12oz Affiliate Disclosure: HauntersList.com is a participant in the Amazon Services LLC Associates Program. As an Amazon Associate we earn from qualifying purchases at no extra cost to...
The Build of a Giant Spider...
posted by SkeleTony
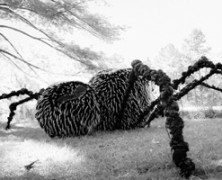
It seems like we can’t go more than a few weeks without a good spider tutorial here at Haunter’s List, but Rania Peet’s latest prop tutorial, The Build of a Giant Spider is way better than “good”. This is one oversized arachnid that could not possibly have turned out any better. In her tutorial you’ll start off making your head and body out of tension wire covered with chicken wire. The tension wire comes round but is completely bendable to get whatever shape you see fit to make, it doesn’t necessarily have to be round. The base is a rounded sheet of plywood that holds securely in place the 8 pieces of pvc that will form your legs. Once the base is complete and painted, the body of your spider can be connected to it via a piece of metal flat bar. The legs consist of three sections of 1″ pvc, a 5′ section that comes off the 45 degree fittings at the base, then connects to a 3′ section at the middle of the leg, and finishes with a 2′ section at the end. Once the legs are attached Rania wrapped the pvc with some burlap and proceeded to spray Great Stuff in the gap. The Great Stuff pushes the burlap and expands through the tiny gaps creating an amazingly creepy appearance that look both bulbous and hairy (just as I suspect spider legs would look like if you enlarged them to 17 feet in diameter). Once complete they legs were coated with flat black spray paint. The body is covered with several yards of two tone long pile fur that were applied in sections. The fur can be costly, but you cannot beat the appearance it gives the spider, it’s creepy unto...
Bulging Door
posted by SkeleTony
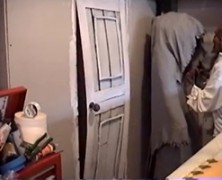
If you’re a fan of Disney’s Haunted Mansion, then you’ve probably already spent a considerable amount of time trying to figure out how to incorporate some of your favorite effects from it into your haunt already. Some are easier to accomplish than others, but if you’re looking for inspiration, HalloweenAddiction has a great tutorial on how to create a bulging door just like the one that appears to be breathing as it bows in and out in the corridor of doors. The great thing about his prop is that it’s really not that hard to build. Of course, you’ll need an empty door frame and a variable speed motor to create the effect, but the rest is constructed using 4 x 6″ foam that is held in the door frame via tension wire used for fencing. http://youtu.be/GfM8eUTCaig Shop These Materials on Amazon 12V Wiper Motor 2.5" Shaft 110 Degree (prop building) PWM DC Motor Speed Controller 9-70V 35A 45Kg High-Torque Waterproof Digital Servo Motor Affiliate Disclosure: HauntersList.com is a participant in the Amazon Services LLC Associates Program. As an Amazon Associate we earn from qualifying purchases at no extra cost to...

Sand Casting Skulls
posted by SkeleTony
If you have access to a sandbox, or even just have some sand and a box you can put it to good use in making some skulls using the sand casting tutorial that partsman at HalloweenForum wrote. You’ll need some play sand, a box, some great stuff, and a foam skull (or whatever you chose to cast). Once you’ve got all your supplies, you’re basically just pressing the skull into the sand and packing the sand really tight around it. Once it’s packed, just remove the form and add some great stuff to the impression you’ve created. As you can see the resulting product has a really great looking stone appearance to it. Shop These Materials on Amazon Realistic Replica Human Skull Statue 6.5" 5.4ft Full Size Halloween Foam Skeleton Affiliate Disclosure: HauntersList.com is a participant in the Amazon Services LLC Associates Program. As an Amazon Associate we earn from qualifying purchases at no extra cost to...
Foam Barrels
posted by SkeleTony
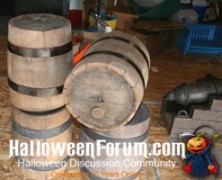
Ok, since September 19th was International Talk Like a Pirate Day, (and I was completely unaware of this fact), I thought I’d post the tutorial that fravak from HalloweenForum penned on how to make foam barrels. The barrels are crafted using styrofoam blocks, the kind that are used to stack small flatbed trailers, and while these may be hard to come by, even if you don’t need barrels and have access to these, they are gold, take them. Since the foam blocks start out square, fravak utilized the lid from a 5-gallon bucket to outline the round shape you’ll need. From there the corners were cut off using a hot wire cutter and the entire block was sanded down using a drywall rasp to round it out. Once this is complete the detailing of the barrel will actually begin. A soldering iron will be needed to carve out the individual pieces of wood on all sides of the barrel. Once this is complete you can add some finer detail by adding graining to all the wood planks with the soldering iron. Fravak utilized paper mache for the straps around the barrels and a piece of blue foam for the plug. Once all of these steps are complete it’s time to paint it up. The base is a browish color while the top he top is covered with a black wash that fravak rubbed all over the barrel to make the color more uneven. The end result is phenomenal, these barrels look completely realistic they don’t cost much, and they’re light as a feather. So next International Talk Like a Pirate Day, don’t forget to grab one of your barrels as you strut around town saying “Ahoy, me hearties, let’s see what crawled out of the bung hole.”, it’ll just make a lot more...

Making a Drop Panel
posted by SkeleTony
A drop panel prop is great for some quick and easy screams, and building one is a pretty easy process as long as you can cut a hole in a wall. Ok, it’s a little more involved than that, but if you’ve ever wanted to build one for your haunt, check out the tutorial that Brad of Bradsboobarn made. There are a lot of videos out there on how to build this prop, and they’re all pretty much the same, but I really like the way Brad has incorporated his kids into this video, really cool....

Mr. Gravedigger
posted by SkeleTony
I’ve wanted to build every prop I’ve come across lately, but none as much as I want to build this one. The Gravedigger that Mizerella at 102 Wicked Things To Do created for her cemetery is amazing looking and doesn’t seem that difficult to pull off (said the guy that’s never created an entire person out of paper mache). The head of this fellow will take the most care and attention to detail when creating. It’s made using a foam skull that’s a blend of paper mache, mache pulp, and Creative paper clay. The features of his face including the nose, ears, tongue, teeth and eye brows will need to be built up with the Creative paper clay which is where some basic sculpting abilities will come in handy. Once you’ve got the head done you’re almost done. The rest of the prop is a pvc frame that’s been heated and bent to give him a warped stance. The pvc frame is then covered in chicken wire and paper mached numerous times. The arms and legs incorporated pool noodles to build them up before coating them in paper mache. The final piece of the puzzle when creating this fellow were the hands, which were a mixture of wire, cut straws and many layers of paper mache and mache pulp. Once all of the pieces of the puzzle are complete it’s just a matter of dressing this guy up in your favorite old clothes and finding a final resting spot for him. Mizerella’s gravedigger looks incredible and I’m a little skeptical on whether I can make one that looks as nice, but I will definitely be giving this guy a shot. Shop These Materials on Amazon 5-Pack Foam RIP Tombstone Blanks for Carving...

Chicken Wire Ghosts
posted by SkeleTony
I’m going to be honest here, I’m not sure exactly who is making all of these chicken wire ghosts for their haunts, but I’m guessing that their hands and arms are covered with tiny little red spots from where the chicken wire pierced their skin. Seriously, though, I’ve noticed that a ton of people lately are searching for the chicken wire ghost prop, and while it’s not something that I would ever consider doing, they sure do look cool when they’re done right. Shawn and Lynne Mitchell have put together a pretty concise DIY tutorial on how to make these. You can make them with or without the cheesecloth dressing to get the look that’s best for you. Items needed to complete this include: semi-transparent fabric S-hooks thin wire mannequin head roll of chicken wire with 1-inch cells roll of chicken wire with 2-inch cells wire cutters cheesecloth scissors wire hanger work gloves Shop These Materials on Amazon 1/2" Hardware Cloth 19-Gauge 48"x100ft Galvanized Roll Aviation Tin Snips 3-pc Set (straight/left/right) Affiliate Disclosure: HauntersList.com is a participant in the Amazon Services LLC Associates Program. As an Amazon Associate we earn from qualifying purchases at no extra cost to...

Flying Ghosts
posted by SkeleTony
Originally created by Scott Axworthy in 1988, the Axworthy Flying Ghost prop is a great effect that is pretty easy to understand conceptually, but always seems to elicit some really hard to follow tutorials. The prop features ghosts that zip along on a tie line along the path of your choosing. It’s proven to be a time consuming prop that is prone to bogging down if things don’t go just right, but when it’s working and the ghosts are chugging around your line, it looks awesome. The Haunted Driveway has done a great job of putting this prop into an easy to understand tutorial that just might inspire someone to give this prop a shot this year. Items needed to complete this include: Gear motor around 1/8 hp and speed around 110 RPM Wheels made for V-belts, 5 inch diameter Threaded metal rod that will fit the wheels Locking nuts that fit the threaded rod Wood or angled steel to attach the threaded rod Black tie line Fishing line to hang the ghosts Hot glue gun Ghosts http://youtu.be/K0EU_0IjNEY Shop These Materials on Amazon 12V Wiper Motor 2.5" Shaft 110 Degree (prop building) PWM DC Motor Speed Controller 9-70V 35A 45Kg High-Torque Waterproof Digital Servo Motor Affiliate Disclosure: HauntersList.com is a participant in the Amazon Services LLC Associates Program. As an Amazon Associate we earn from qualifying purchases at no extra cost to...

Scary Guy at the End of the Hall...
posted by SkeleTony
The HollywoodHaunter has a hilarious prop idea for you if you have a corner of a haunt that’s in need of a prop. It’s also proof that haunt props don’t have to be exceedingly elaborate to add to the creep factor of your haunt. It’s essentially an oscillating fan with a head on it that appears to be a scary guy at the end of the hall! What could be easier, right? I can guarantee you, though, that more than a few people were creeped out by it before they realized what it was. Items needed to create this include: Oscillating fan PVC end cap w/screw 12″ of 1/2″ PVC Dark fabric Foam head Form arm Shop These Materials on Amazon 12V Wiper Motor 2.5" Shaft 110 Degree (prop building) PWM DC Motor Speed Controller 9-70V 35A 45Kg High-Torque Waterproof Digital Servo Motor Affiliate Disclosure: HauntersList.com is a participant in the Amazon Services LLC Associates Program. As an Amazon Associate we earn from qualifying purchases at no extra cost to...
Alien Capsule
posted by SkeleTony
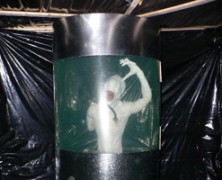
Now that the C.I.A. has actually acknowledged the existence of Area 51 it’s almost like they’re giving their seal of approval to the Muddy River Haunt’s tutorial for an Alien Capsule. Almost. And even if they’re not, we’re more than happy to give this prop a thumbs up because it’s exactly what we suspect we would find in the bowels of Area 51. It’s a really simple prop to build and will add a really cool element to any alien scene. It’s basically a wood box that’s wrapped with plexiglass and aluminum flashing with an alien inside. Even though they’re listed as optional, I would highly recommend using the fog machine and strobe light with this prop. Items needed to complete this include: Aluminum Flashing: 1 sheet 3 ½’ X 7′ 2 sheets 3′ X 16” 1 sheet 1′ X 7′ 2X4 wood: (4) 2”X 4”X 7′ (4) 2”X 4”X 3′ (2) 1”X 3”X 2′ Miscellaneous: 1 sheet Plexiglass 5′ X 3’X 0.016” (Thin enough to bend without cracking or without too much pressure) Some pieces of thin lattice board Alien for inside the capsule Optional: Fog machine Pipe Strobe...
One Armed Grave Grabber...
posted by SkeleTony
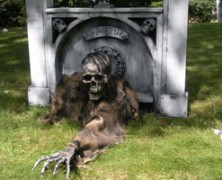
If you’re not familiar with the Grave Grabber tutorial that Kevin over at Haunt101 posted, you really owe it to yourself to check it out…right after you take a look at his One Armed Grave Grabber tutorial! This prop is a little easier to build than the full Grave Grabber but it’ll still provide you with an awesome effect in your cemetery. The mechanics are very similar between the two props, although the One Armed Grave Grabber utilizes an animated deer motor instead of a higher torque motor. There’s also an added element with the skull linkage in the One Armed prop. The animated deer motor actually reverses when it meets any resistance, thus the two “stop” screws that are drilled in the base. If you check out the video of this thing in action at Haunt101, you’ll see that this prop has just the right amount of movement to create an unforgettable prop. Items needed to complete this include: One foam skull One length of plastic tubing One tape and wire hand One length of 1/8”x1/2” aluminum flat bar One length of heavy wire One length of thin wire One length small foam block Burlap One Buck animated deer motor Two pieces of lumber 4” and 2 ½” screws Shop These Materials on Amazon 12V Wiper Motor 2.5" Shaft 110 Degree (prop building) PWM DC Motor Speed Controller 9-70V 35A 45Kg High-Torque Waterproof Digital Servo Motor Affiliate Disclosure: HauntersList.com is a participant in the Amazon Services LLC Associates Program. As an Amazon Associate we earn from qualifying purchases at no extra cost to...
Prop Dental Plates
posted by SkeleTony
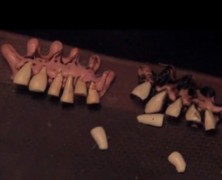
If you create your own masks or creatures for your haunt, you’ve probably needed to find some teeth for them. I always heard the phrase that necessity was the mother of invention, but it turns out it’s actually Allen Hopps. He’s got a great tutorial on how to make dental plates for your masks and props. Since they’re made from hot glue sticks you really don’t want to put them in your mouth, but they’ll look great as an accent to any prop....
Dry Brushing Tips & Tricks...
posted by SkeleTony
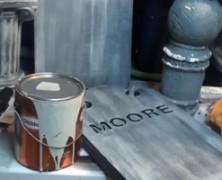
Whether you just finished building your latest masterpiece, or simply want to age a store bought prop a bit, properly painting your prop can make all the difference in the world. Eerie Acres Cemetery has a great video tutorial with some really helpful dry brushing techniques that might just give your next prop that extra bit of realism....
Stone Wall Facade
posted by SkeleTony
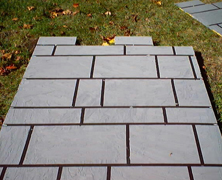
Stone walls for your haunted castle may be hard to come by but if you’ve got some time and some plywood you can create your own. The Bronson Boneyard has a tutorial that shows how to create a stone wall facade using monster mud applied onto plywood. You’ll start by painting the plywood black, and then applying masking tape where you would like the mortar joints. Then, you’ll apply a thick coat of monster mud to the entire sheet, and then remove the masking tape. The great thing about this method is that once the monster mud starts to dry it lightens up, which eliminates the need to paint the mortar joints, and it also begins to crack slightly, which gives it a realistic stone appearance. Items needed to complete this include: Plywood (4′ x 8′ sheets) Black paint Masking tape Monster mud Shop These Materials on Amazon USG Sheetrock Drywall Joint Compound 4.5 Gallon Cheesecloth Unbleached 36×36" (for Monster Mud draping) Affiliate Disclosure: HauntersList.com is a participant in the Amazon Services LLC Associates Program. As an Amazon Associate we earn from qualifying purchases at no extra cost to...
Ermelyn’s Horns...
posted by SkeleTony
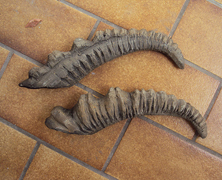
If you like creating your own creatures for your haunt you’ll eventually have the need to create some horns for them. You can probably buy some actual antlers, but if you’re planning on incorporating them into a mask or don’t want an overly heavy static prop, you may want to follow Ermelyn Hollerborn’s tutorial for making horns in 10 easy steps. The horns are made using multiple layers of styrofoam that’s shaved down to give it a more rounded appearance. From their it’s a matter of adding detail to it with a soldering iron, or heat gun. Ermelyn’s horns are then coated with Pattex adhesive and painted. They look fantastic and can be made as large as you like without weighing down your prop. Items needed to complete this include: Styrofoam Contact adhesive Acrylic paint Soldering iron / heat gun Google Translate (unless you read German) Shop These Materials on Amazon XPS Foam Board 1" Thick Craft Sheets 4-Pack 4-in-1 Hot Wire Foam Cutter Kit 15W Loctite Power Grab Foam-Safe Construction Adhesive Affiliate Disclosure: HauntersList.com is a participant in the Amazon Services LLC Associates Program. As an Amazon Associate we earn from qualifying purchases at no extra cost to...
Bats Are Easy
posted by SkeleTony
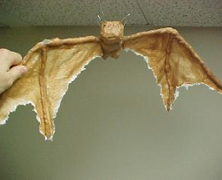
Every haunt needs some bats flying around, and if you’ve got some skills with a paint brush and some patience you can make as many as you want following Born2haunt’s method, because Bats Are Easy. These bats do seem pretty easy to make when you consider that they’re made using a styrofoam body with wire poking through it for the wing bones. The wire is then wrapped in cotton and paper towels are applied as skin. The entire bat is then generously coated with liquid latex and painted to suit. The great part about this prop build is that you can customize it to your heart’s content. Sure, it’s probably easier to go out and buy some bats, but they won’t look nearly as realistic as these will. Items needed to complete this include: Styrofoam Wire Cotton balls Liquid latex Paper Towels Acrylic paint Hot glue Shop These Materials on Amazon XPS Foam Board 1" Thick Craft Sheets 4-Pack 4-in-1 Hot Wire Foam Cutter Kit 15W Loctite Power Grab Foam-Safe Construction Adhesive Affiliate Disclosure: HauntersList.com is a participant in the Amazon Services LLC Associates Program. As an Amazon Associate we earn from qualifying purchases at no extra cost to...
Outback Gorehouse Fake Intestines...
posted by SkeleTony
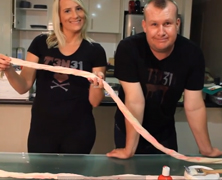
Many years ago I had to create a scene where an actor’s stomach was sliced open allowing their intestines to spill out. My solution was to buy a long link of Italian sausage, which was boiled and soaked in a Karo syrup blood solution. This allowed the intestines to be eaten by the actor as the neighborhood kids passed through creating quite a memorable scene (it was pretty dark, and they were pretty young, so we could get away with sausage guts). So if you need to make some fake intestines for your haunt, my advice to you is remember my method fondly, and DO NOT USE IT. No matter what you do, sausage guts do not make good intestines, besides that, Sonya and Caid from Outback Gorehouse have a better solution. Their method utilizes paper towels that are wrapped in a mixture of liquid latex and paint. The latex is spread on a flat glass surface for a total of eight layers before it’s wrapped around the towels. The resulting intestines are pretty good looking and you can make a ton of these for hardly any cost, but whatever you do, DO NOT eat them!...
Wheel of Death
posted by SkeleTony
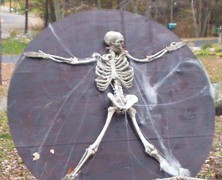
Have you ever seen the knife throwers that tie a person to a spinning wheel and then proceed to throw knives at them as they’re spinning around? Ever wonder what happens when they’re not very accurate throwers? The Wheel of Death prop created for The Haunted Driveway is a six foot diameter wheel that spins around with a skeleton, or whatever else you decide to tie to it. If you make it heavy duty enough you can even strap an actor to it (warning: DO NOT throw knives at people!). It’s an eye catching prop that will take a little bit of effort to create, but it has a gruesome potential that is limited only by your imagination. Items needed to complete this include: Two full size sheets of 1/2 inch plywood (6) 2 X 4 boards that are eight feet long (1) 8 X 6 board that is 8 feet long (6) 3/8 X 4 inch Carriage bolts (6) 3/8 inch nuts to fit the Carriage bolts 6 inch lazy susan (2) Ball bearings that fit a 5/8 inch rod and they should have tabs so you can attach them to the face of the wood 5/8 inch rod 16 inches long (1) 6 inch diameter V-belt wheel that fits a 5/8 shaft (1) 2 inch diameter V-belt wheel that fits a 5/8 shaft (this will fit on to the motor if the motor has a 5/8 shaft, if not get a different size that will fit) V-belt around a foot long (4) 1/4 inch bolts that are 2 inches long and washer and locking nuts for the blots A gear motor around 35 RPM and 1/8 hp will do the trick Shop These Materials on Amazon 12V...
Scary Terry’s Vortex Tunnel...
posted by SkeleTony
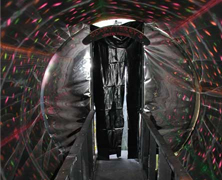
If you’re feeling extra industrious this year, and the notion that your efforts could result in an epic failure don’t frighten you, you might want to attempt to build a vortex tunnel for your haunt. Scary Terry has laid out a tutorial on how he built his, and while it doesn’t contain a complete supplies list, it should be more than enough to get you started. The tunnel has a frame that consists of three 10′ diameter “hoops” that are attached to each other, and it’s the precision required to get the plywood cut accurately that will ultimately determine your success with this project. The hoops are spun around by three pairs of bicycle wheels, five of which are free spinning with the sixth being driven by a motor. It’s the sixth wheel that actually rotates the tunnel itself. You’ll need to build a bridge for people to walk on, and the hoops will actually fit around the bridge, rotating around it. Once the frame is complete it’s just a matter of attaching fabric around the inside of the hoops and painting a sufficiently nauseating pattern on it. Building a vortex tunnel is a pretty serious undertaking that requires skill and accuracy. I’ve always said that confidence is a great asset, but knowing when you’re in over your head is a better one. I know that I would be in over my head with this build, but if you’ve got the skill to get it done, it will be a crowd pleaser. Good luck storing it, though! http://youtu.be/eUtd27mozzU Shop These Materials on Amazon 12V Wiper Motor 2.5" Shaft 110 Degree (prop building) PWM DC Motor Speed Controller 9-70V 35A 45Kg High-Torque Waterproof Digital Servo Motor Affiliate Disclosure: HauntersList.com is a participant...
Zombie Build
posted by SkeleTony
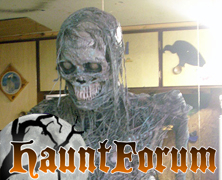
I’m truly amazed at some of the great looking props that people are able to build that cost next to nothing, and the creative ways they go about accomplishing it. Sytnathotep is one such prop builder with his 1/2 zombie build, which looks great and probably didn’t cost a whole lot. The spine of the zombie is crafted using three three foot sections of 12/2 electrical wire that are braided together to give it some extra rigidity. Since this is a 1/2 zombie it doesn’t have to support any real weight (no legs). The shoulders are 3/4″ pvc connected via a cross fit connection that slides over the spine while the collar bones are more 12/2 electrical wire, and the scapulas are styrofoam insulation. With a wire clothes hanger ribcage and hands made out of wire with plastic pen tube fingers this project is not exactly breaking the bank. Once the skull slides onto the electrical wire all that’s left to do is corpse and paint this bad boy! What I really like about Sytnathotep’s zombie is his corpsing technique. He used the melted plastic method as a base, but then stretched cheesecloth and spider web dipped in a 50/50 mixture of black latex house paint and elmers glue all over the zombie. It really does give the appearance of rotting flesh and is well worth the effort and the mess that it creates. Items needed to complete this include: 12′ – 12/2 electrical wire Skull 6 wire clothes hangers 1 pvc cross fit connector Scrap styrofoam 10 Plastic pen tubes Duct tape Plastic for corpsing Cheesecloth / Spider webbing Latex paint Elmers glue Shop These Materials on Amazon 1" Schedule 40 PVC Pipe 6-Pack Ratcheting PVC Pipe Cutter (up to 1-1/4") 1" PVC...
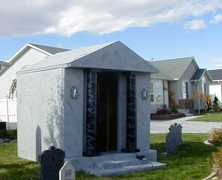
Raven Manor Mausoleum...
posted by SkeleTony
When does your passion for home haunting become an obsession? When you have to file a building permit to construct a temporary Mausoleum in your yard. Which is good, because I don’t think that Raven Manor had to file for a permit, but the passion for their yard haunt is second to none. The Mausoleum is a perfect fit in their front yard cemetery, but it’s real purpose is to house their flying crank ghost, Eleanor. That’s right, they built it for their flying crank ghost, how awesome is that! The Mausoleum stands 9′ tall by 10′ deep by 8′ wide and was framed in sections that are connected by carriage bolts. It looks superb and is the perfect house for Eleanor. While there really isn’t a step by step tutorial for this build, they do have the plans used to construct the Mausoleum as well as some general information about the framing of it, which should be more than enough to get your creative juices flowing. Shop These Materials on Amazon 5-Pack Foam RIP Tombstone Blanks for Carving Decorative Cemetery Fence Sections Rust-Oleum Flat Black Spray Paint 12oz 1/3HP Replacement Ceiling Fan Motor (for FCG builds) Braided Fishing Line — thin gauge for rigging 120" Wide White Sheer Voile Fabric x 25 Yards Affiliate Disclosure: HauntersList.com is a participant in the Amazon Services LLC Associates Program. As an Amazon Associate we earn from qualifying purchases at no extra cost to...

The Unborn
posted by SkeleTony
The Crawlspace Haunter has created one of the coolest and creepiest looking props that I’ve laid my eyes on. It’s based on a creature from the film The Unborn. It turned out great and its the kind of prop that is guaranteed to give people nightmares. Its made with a pvc frame that’s laid out as if you were building an animals skeleton. The pvc that makes up the backbone was heated up to give it a bit of a curve. The rest is a mixture of cardboard, tissue, and paper mache to give it some body. Items needed to complete this include: 1/2″ or 3/4″ PVC (amount to be determined by your build size) 4 – 90 degree pvc 4 – 45 degree pvc 1 – cross connector pvc fitting 1 – pvc T fitting Skull Cardboard Tissue Paper mache Foam pipe insulation Wire I’m honestly not sure which photo creeps me out more, the night shot, or the daytime shot! Shop These Materials on Amazon Instant Paper Mache Powder Mix 3.3 lbs Assorted 12" Latex Balloons 120-Pack 1" Schedule 40 PVC Pipe 6-Pack Ratcheting PVC Pipe Cutter (up to 1-1/4") 1" PVC Furniture Fittings Assortment 12-Pack Oatey PVC Clear Cement + Primer Handy Pack Affiliate Disclosure: HauntersList.com is a participant in the Amazon Services LLC Associates Program. As an Amazon Associate we earn from qualifying purchases at no extra cost to...
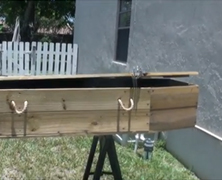
Animated Coffin
posted by SkeleTony
If you’ve got a coffin that’s looking for a little something extra then consider adding a slow rotating wiper motor to it. Eerie Acres Cemetery has a video tutorial on how he built his and it turned out great. The wiper motor spins at the perfect speed so that it doesn’t look obnoxious and you don’t even notice the wooden wheel that’s lifting the coffin lid. This is a great effect, and there’s really not much needed to get it done. In fact, building the coffin takes more skill than animating it does. http://youtu.be/AD95s3Z82vk Shop These Materials on Amazon 12V Wiper Motor 2.5" Shaft 110 Degree (prop building) PWM DC Motor Speed Controller 9-70V 35A 45Kg High-Torque Waterproof Digital Servo Motor Affiliate Disclosure: HauntersList.com is a participant in the Amazon Services LLC Associates Program. As an Amazon Associate we earn from qualifying purchases at no extra cost to...
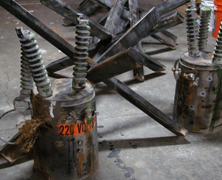
Making an Electrical Transformer...
posted by SkeleTony
High voltage is not something you want to be messing around with unless you really know what you’re doing. Luckily, Terra from HalloweenForum really knows what she’s doing, and she’s created a video tutorial on how to make authentic looking electrical transformers. They’re created with trash cans, pool noodles, pvc and rope, but you can make them as intricate as you’d like. When you put a strobe light under the trash can it really gives the appearance that the transformer is arcing, which, coupled with some high intensity audio will scare the heck out of anybody! Items needed to complete this include: Two trash cans in a good transformer shape One pool noodle 14″ thick manila twisted rope Four 18″ lengths of 3/4″ PVC pipe Two 12″ lengths of 1/2″ PVC pipe Two 1/2″ PVC elbow connectors Two 19″ lengths of plastic plumber’s tape Two scraps of 1 1/2″ foam (6 1/2″ long, 3″ wide) Two 12″ metal strappings Four car model wheels or something similar 220 volt sticker Bullet hole stickers Portable strobe light Hot glue sticks Gray latex Drylok...
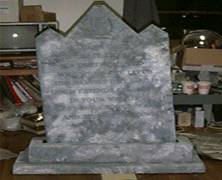
Rocking Tombstone
posted by SkeleTony
A styrofoam tombstone is about the simplest prop you can make for your haunt assuming you don’t make it overly intricate, but sometimes even the simplest of props can take on a whole new life by adding a motor. Just ask Christoper, of Chris’ Crypt who has a really simple tutorial on how to turn your Styrofoam tombstone into a rocking tombstone. You’ll need to build a wooden base to hold the tombstone on one end (pivot point) and the motor on the opposite side. When you connect the cam to the tombstone the slow rotation of the motor will get your tombstone rocking back and forth. Items needed to complete this include: Styrofoam tombstone Motor Wood for base 1/2″ piece pvc Shop These Materials on Amazon 12V Wiper Motor 2.5" Shaft 110 Degree (prop building) PWM DC Motor Speed Controller 9-70V 35A 45Kg High-Torque Waterproof Digital Servo Motor XPS Foam Board 1" Thick Craft Sheets 4-Pack 4-in-1 Hot Wire Foam Cutter Kit 15W Loctite Power Grab Foam-Safe Construction Adhesive 5-Pack Foam RIP Tombstone Blanks for Carving Decorative Cemetery Fence Sections Rust-Oleum Flat Black Spray Paint 12oz Affiliate Disclosure: HauntersList.com is a participant in the Amazon Services LLC Associates Program. As an Amazon Associate we earn from qualifying purchases at no extra cost to...
Kingwood Asylum Scarecrows...
posted by SkeleTony
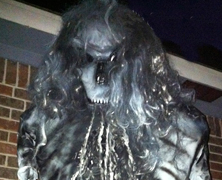
When the guys over at the Kingwood Asylum set out to build some scarecrows they had two real objectives in mind. The first was to make something wickedly evil looking, while the second was not to spend a lot of money completing objective number one. I would say their objectives were met with success. These scarecrows are amazing looking, and judging from their parts list, didn’t cost too much per unit. As creepy as it looks in the photos below, just imagine how amazing they’ll look at night with a little bit of creative lighting. Items needed to complete this include: Elmers Wood Glue (1 large bucket) 10 metal coat hangers 2 rolls masking tape 1 marker Oodles of newspaper 2 pieces of pvc pipe 1 metal rod to go in the pvc pipe Wig Spray paint Shop These Materials on Amazon Instant Paper Mache Powder Mix 3.3 lbs Assorted 12" Latex Balloons 120-Pack Affiliate Disclosure: HauntersList.com is a participant in the Amazon Services LLC Associates Program. As an Amazon Associate we earn from qualifying purchases at no extra cost to...
Slim-line Groundbreaker Coffin...
posted by SkeleTony
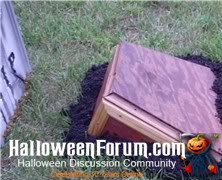
In New Orleans the dead are buried above ground to avoid the graves filling with water and forcing the coffins floating to the surface, but did you know that heavy rains will still occasionally dislodge coffins in areas well above the water table? And if you have any carpentry skills then DaveintheGrave’s tutorial on building a slim-line groundbreaker coffin will help you create this effect. This prop gives the freshly dislodged coffin look without having to build or bury a full coffin to get the effect (not to mention saving the storage space). Items needed to complete this include: 1/2 or 1/4″ Plywood (About 4 square ft.) 1 X 2″ wood (About 5 ft.) 1″ Wood Screws (2) “L” Brackets Small wood screws Decorative Moulding (Optional) Flat Moulding (Optional) Stain or...
Spyderwood Crypt
posted by SkeleTony
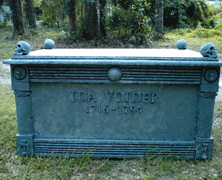
If you’ve constructed a mausoleum for your haunt or are just looking for something different for your cemetery you might want to give a look at the Spyderwood Crypt tutorial. It’s a little bit more detailed of a build than the coffin that Spyderwood created, but it doesn’t seem significantly more difficult to build and shouldn’t prove to be much heavier than the coffin. Items needed to create this include: 3 sheets of pink insulation foam 8 to 10 – 1 x 2″ lumber staples hotglue paint decorations hinges finishing...
Cyclone Jack’s Monster In A Box...
posted by SkeleTony
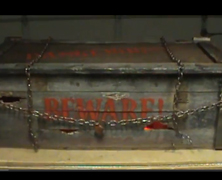
The monster in a box prop has been done a million times, and it seems like each one is done just a little bit differently than the last one. That’s ok, though, because they all operate using the same principle in which a spinning motor pushes a rod up forcing the top of the box to pop up and down creating the unsettling and startling effect. Add a couple of eerie lights inside the box and possibly some fog and you’ve got a winner, and that’s exactly what CycloneJackHH did when he made his monster in a box tutorial. http://youtu.be/IB9ewgh7Ads Shop These Materials on Amazon 12V Wiper Motor 2.5" Shaft 110 Degree (prop building) PWM DC Motor Speed Controller 9-70V 35A 45Kg High-Torque Waterproof Digital Servo Motor Affiliate Disclosure: HauntersList.com is a participant in the Amazon Services LLC Associates Program. As an Amazon Associate we earn from qualifying purchases at no extra cost to...
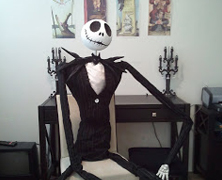
Full Size Jack Skellington Build...
posted by SkeleTony
If you’re a fan of Tim Burton’s Nightmare Before Christmas, and quite frankly, who isn’t, then you’re going to love the tutorial that KAM3152 penned for her blog DIY Nightmare Before Christmas Halloween Props. The prop seems pretty simple to build, although I’m not sure I could successfully clothe a full size Jack Skellington quite as well as KAM3152 did. Jack’s body is built using 1/2″ PVC frame while his head is crafted out of a foam floral ball. The arms are a pair of prop skeleton arms from a party supply store, but if you don’t feel like purchasing hands for this build you can create your own Clay Skeletal Hands. This prop ultimately comes down to the clothing, and if you can give Jack a proper looking suit, you’re going to have a great looking prop on your hands. Items needed to complete this include but are not limited to: 18′ – 1/2″ PVC (approximately) 1 PVC T joint 1 PVC Cross Joint 2 – 45 degree or 90 degree PVC joints for shoulders/elbows Skeletal Hands Round floral ball Material for clothing Shop These Materials on Amazon 1" Schedule 40 PVC Pipe 6-Pack Ratcheting PVC Pipe Cutter (up to 1-1/4") 1" PVC Furniture Fittings Assortment 12-Pack Oatey PVC Clear Cement + Primer Handy Pack Affiliate Disclosure: HauntersList.com is a participant in the Amazon Services LLC Associates Program. As an Amazon Associate we earn from qualifying purchases at no extra cost to...
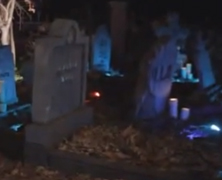
Breathing Grave Prop: Behind The Scenes...
posted by SkeleTony
The Breathing Grave tutorial we posted a while back is a favorite of many home haunters that visit us here at Haunters List, so the opportunity to post a video tutorial on this prop is not going to be missed. The HollywoodHaunter made the aforementioned video tutorial for his incredible looking breathing grave prop (seriously, forget about the breathing part, I’d be happy if I could make a grave look as good as his). The footage of this breathing grave in action is spectacular and should be considered a staple in any home haunters yard. http://youtu.be/_FZNRxugm9Y Shop These Materials on Amazon 12V Wiper Motor 2.5" Shaft 110 Degree (prop building) PWM DC Motor Speed Controller 9-70V 35A 45Kg High-Torque Waterproof Digital Servo Motor 5-Pack Foam RIP Tombstone Blanks for Carving Decorative Cemetery Fence Sections Rust-Oleum Flat Black Spray Paint 12oz Affiliate Disclosure: HauntersList.com is a participant in the Amazon Services LLC Associates Program. As an Amazon Associate we earn from qualifying purchases at no extra cost to...
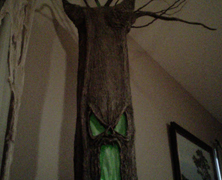
Haunted Tree
posted by SkeleTony
I’ve always been a big fan of the scene in Snow White and the Seven Dwarves when Snow White is running through the forest and the entire evil forest is trying to grab her. I love that scene, and I’m pretty sure Mizerella from the 102 Wicked Things To Do blog is a fan as well. She’s constructed a tree that would definitely be worthy of residence in Snow White’s forest. The tree is created using two round concrete forms that can be split for easier storage along with a mixture of paper mache and celluclay. It doesn’t seem like an extraordinarily difficult project and the tree looks incredible. Items needed to complete this include: 2 Concrete building forms (sonotube) 1/4 sheet of plywood Newspaper Masking tape Paper mache Celluclay Coat hangers Branches (to spread on top) Paint Shop These Materials on Amazon Instant Paper Mache Powder Mix 3.3 lbs Assorted 12" Latex Balloons 120-Pack Affiliate Disclosure: HauntersList.com is a participant in the Amazon Services LLC Associates Program. As an Amazon Associate we earn from qualifying purchases at no extra cost to...

Spider Egg Sack
posted by SkeleTony
WIth all the spider tutorials that we’ve been posting lately, isn’t it about time you see where they all come from? The answer, of course, is from Spider Egg sacs, and Voodoo Willy from Halloween Forum has a great tutorial on how to create them. These egg sacs are crafted using chicken wire wrapped in polyester batting to form the mass of the prop. The ping pong balls are then glued to the surface of the egg sac and the entire sac is painted. After its dried up the webbing is dipped in latex and stretched around the egg sac. They’re easy to produce and are a creepy finishing touch to any haunt that has a giant spider. Items needed to complete this include: Chicken wire Wire cutters Ping pong balls exacto blade Hot glue gun polyester batting (the thin kind) Spider webbing Liquid latex airbrush acrylic...