
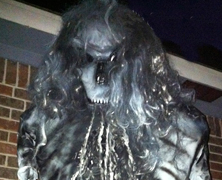
When the guys over at the Kingwood Asylum set out to build some scarecrows they had two real objectives in mind. The first was to make something wickedly evil looking, while the second was not to spend a lot of money completing objective number one. I would say their objectives were met with success. These scarecrows are amazing looking, and judging from their parts list, didn’t cost too much per unit. As creepy as it looks in the photos below, just imagine how amazing they’ll look at night with a little bit of creative lighting. Items needed to complete this include: Elmers Wood Glue (1 large bucket) 10 metal coat hangers 2 rolls masking tape 1 marker Oodles of newspaper 2 pieces of pvc pipe 1 metal rod to go in the pvc pipe Wig Spray paint Shop These Materials on Amazon Instant Paper Mache Powder Mix 3.3 lbs Assorted 12" Latex Balloons 120-Pack Affiliate Disclosure: HauntersList.com is a participant in the Amazon Services LLC Associates Program. As an Amazon Associate we earn from qualifying purchases at no extra cost to...
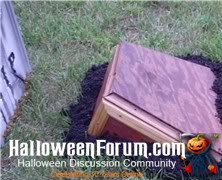
Slim-line Groundbreaker Coffin...
posted by SkeleTony
In New Orleans the dead are buried above ground to avoid the graves filling with water and forcing the coffins floating to the surface, but did you know that heavy rains will still occasionally dislodge coffins in areas well above the water table? And if you have any carpentry skills then DaveintheGrave’s tutorial on building a slim-line groundbreaker coffin will help you create this effect. This prop gives the freshly dislodged coffin look without having to build or bury a full coffin to get the effect (not to mention saving the storage space). Items needed to complete this include: 1/2 or 1/4″ Plywood (About 4 square ft.) 1 X 2″ wood (About 5 ft.) 1″ Wood Screws (2) “L” Brackets Small wood screws Decorative Moulding (Optional) Flat Moulding (Optional) Stain or...
Spyderwood Crypt
posted by SkeleTony
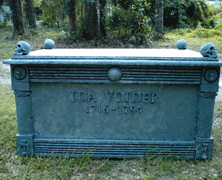
If you’ve constructed a mausoleum for your haunt or are just looking for something different for your cemetery you might want to give a look at the Spyderwood Crypt tutorial. It’s a little bit more detailed of a build than the coffin that Spyderwood created, but it doesn’t seem significantly more difficult to build and shouldn’t prove to be much heavier than the coffin. Items needed to create this include: 3 sheets of pink insulation foam 8 to 10 – 1 x 2″ lumber staples hotglue paint decorations hinges finishing...
Full Size Jack Skellington Build...
posted by SkeleTony
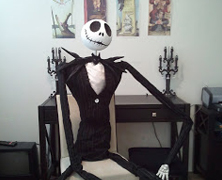
If you’re a fan of Tim Burton’s Nightmare Before Christmas, and quite frankly, who isn’t, then you’re going to love the tutorial that KAM3152 penned for her blog DIY Nightmare Before Christmas Halloween Props. The prop seems pretty simple to build, although I’m not sure I could successfully clothe a full size Jack Skellington quite as well as KAM3152 did. Jack’s body is built using 1/2″ PVC frame while his head is crafted out of a foam floral ball. The arms are a pair of prop skeleton arms from a party supply store, but if you don’t feel like purchasing hands for this build you can create your own Clay Skeletal Hands. This prop ultimately comes down to the clothing, and if you can give Jack a proper looking suit, you’re going to have a great looking prop on your hands. Items needed to complete this include but are not limited to: 18′ – 1/2″ PVC (approximately) 1 PVC T joint 1 PVC Cross Joint 2 – 45 degree or 90 degree PVC joints for shoulders/elbows Skeletal Hands Round floral ball Material for clothing Shop These Materials on Amazon 1" Schedule 40 PVC Pipe 6-Pack Ratcheting PVC Pipe Cutter (up to 1-1/4") 1" PVC Furniture Fittings Assortment 12-Pack Oatey PVC Clear Cement + Primer Handy Pack Affiliate Disclosure: HauntersList.com is a participant in the Amazon Services LLC Associates Program. As an Amazon Associate we earn from qualifying purchases at no extra cost to...
Haunted Tree
posted by SkeleTony
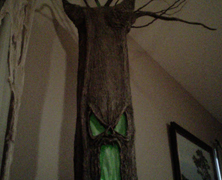
I’ve always been a big fan of the scene in Snow White and the Seven Dwarves when Snow White is running through the forest and the entire evil forest is trying to grab her. I love that scene, and I’m pretty sure Mizerella from the 102 Wicked Things To Do blog is a fan as well. She’s constructed a tree that would definitely be worthy of residence in Snow White’s forest. The tree is created using two round concrete forms that can be split for easier storage along with a mixture of paper mache and celluclay. It doesn’t seem like an extraordinarily difficult project and the tree looks incredible. Items needed to complete this include: 2 Concrete building forms (sonotube) 1/4 sheet of plywood Newspaper Masking tape Paper mache Celluclay Coat hangers Branches (to spread on top) Paint Shop These Materials on Amazon Instant Paper Mache Powder Mix 3.3 lbs Assorted 12" Latex Balloons 120-Pack Affiliate Disclosure: HauntersList.com is a participant in the Amazon Services LLC Associates Program. As an Amazon Associate we earn from qualifying purchases at no extra cost to...

Spider Egg Sack
posted by SkeleTony
WIth all the spider tutorials that we’ve been posting lately, isn’t it about time you see where they all come from? The answer, of course, is from Spider Egg sacs, and Voodoo Willy from Halloween Forum has a great tutorial on how to create them. These egg sacs are crafted using chicken wire wrapped in polyester batting to form the mass of the prop. The ping pong balls are then glued to the surface of the egg sac and the entire sac is painted. After its dried up the webbing is dipped in latex and stretched around the egg sac. They’re easy to produce and are a creepy finishing touch to any haunt that has a giant spider. Items needed to complete this include: Chicken wire Wire cutters Ping pong balls exacto blade Hot glue gun polyester batting (the thin kind) Spider webbing Liquid latex airbrush acrylic...
Spyderwood Coffin
posted by SkeleTony
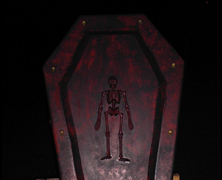
If you’re looking to build a coffin but don’t want an overly heavy prop then you might want to checkout Spyderwood’s styrofoam coffin tutorial. The frame of this coffin is made out of 1 x 2 lumber, which, even when covered with styrofoam won’t be as heavy as your typical toe pincher. You’re probably not going to want to get inside this coffin, but if you’re just planning on putting a skeleton or other prop inside, you might want to give this lightweight coffin a try. Items needed to complete this include: 2 sheets of pink insulation foam 8 – 1 x 2″ lumber staples hotglue paint decorations hinges finishing nails Shop These Materials on Amazon XPS Foam Board 1" Thick Craft Sheets 4-Pack 4-in-1 Hot Wire Foam Cutter Kit 15W Loctite Power Grab Foam-Safe Construction Adhesive Affiliate Disclosure: HauntersList.com is a participant in the Amazon Services LLC Associates Program. As an Amazon Associate we earn from qualifying purchases at no extra cost to...
Stiltbeast Studios Human Pelt...
posted by SkeleTony
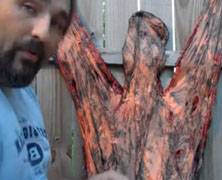
Allen Hopps tutorial on how to make a human pelt is one of those tutorials that makes me scratch my head and ask myself “Why didn’t I think of that”. It’s such an easy idea and the finished product looks great, so if you’ve got need for a human pelt for your haunt then watch the video below because it could not be any easier....
Killer Tombstones
posted by SkeleTony
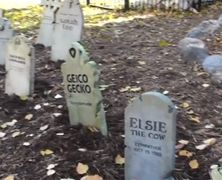
If you’ve ever wanted to make some really nice looking tombstones but didn’t think you had the skills to get the job done welcome to the club. Oh, and keep reading, because while making your own tombstones can range from being an easy project to an arduous task, once you have a few basic techniques down I can guarantee that you’ll be adding to your tombstone collection on an annual basis. DevonTT’s three part series on how to create some killer tombstones will definitely help to get you started. Items needed to create this include: 2″ Styrofoam Laserjet printout of your text Iron Dremel & Router bit Exterior Latex paint Shop These Materials on Amazon 5-Pack Foam RIP Tombstone Blanks for Carving Decorative Cemetery Fence Sections Rust-Oleum Flat Black Spray Paint 12oz XPS Foam Board 1" Thick Craft Sheets 4-Pack 4-in-1 Hot Wire Foam Cutter Kit 15W Loctite Power Grab Foam-Safe Construction Adhesive Affiliate Disclosure: HauntersList.com is a participant in the Amazon Services LLC Associates Program. As an Amazon Associate we earn from qualifying purchases at no extra cost to...
The Making Skulls Series...
posted by SkeleTony
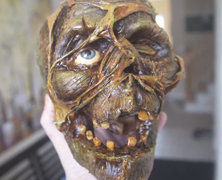
What makes Canadian skulls better than American Skulls? Brad Goodspeed,of course! The skulls he produces in his Making Skulls series of videos are so good looking it’s hard to believe that they start off being a cheap styrofoam skull. These videos are an invaluable tool to anyone that wants to create gruesome looking skulls. There’s a ton of useful information packed into 40 minutes that every haunter needs to see. And don’t forget to check out the Making Glow In The Dark Teeth tutorial to make some teeth for your skulls! Shop These Materials on Amazon Creature Liquid Latex 16oz Clear Special Effects Cheesecloth Unbleached (for draping and corpsing) Polyester Fiberfill Stuffing 30 LB Bag Realistic Replica Human Skull Statue 6.5" 5.4ft Full Size Halloween Foam Skeleton XPS Foam Board 1" Thick Craft Sheets 4-Pack 4-in-1 Hot Wire Foam Cutter Kit 15W Loctite Power Grab Foam-Safe Construction Adhesive Affiliate Disclosure: HauntersList.com is a participant in the Amazon Services LLC Associates Program. As an Amazon Associate we earn from qualifying purchases at no extra cost to...

Wailing Tree
posted by SkeleTony
When I was little the one thing that used to creep me out more than anything was walking through any kind of wooded area. I was certain the trees were alive and it would absolutely freak the heck out of me. I never truly felt like I was alone out there. Thank goodness I didn’t see the Wailing Tree that the Ghostess over at the Dead End created when I was a kid, because I’m pretty sure I wouldn’t have ever gone near a tree again. The frame of this tree is made of PVC while the body is a combination of chicken wire, paper mache, and a little bit of Great Stuff to seal the bottom. While not tremendously hard to create, you can tell that the Ghostess really put a lot of care into the creation of this prop. It’s an absolute thing of beauty, and I don’t think I’d be happy building just one, I want a whole forest of these things! Items needed to complete this include: 1 Bucky Skull PVC (variable depending on the size) Chicken wire Paper mache Great Stuff 14 gauge wire (for branches) Silk leaves DryLok masonry sealer Black / Brown / Gray Paint Shop These Materials on Amazon 1/2" Hardware Cloth 19-Gauge 48"x100ft Galvanized Roll Aviation Tin Snips 3-pc Set (straight/left/right) Great Stuff Gaps & Cracks Expanding Foam 12oz Professional Spray Foam Applicator Gun (2-Pack) Instant Paper Mache Powder Mix 3.3 lbs Assorted 12" Latex Balloons 120-Pack 1" Schedule 40 PVC Pipe 6-Pack Ratcheting PVC Pipe Cutter (up to 1-1/4") 1" PVC Furniture Fittings Assortment 12-Pack Oatey PVC Clear Cement + Primer Handy Pack Affiliate Disclosure: HauntersList.com is a participant in the Amazon Services LLC Associates Program. As an Amazon...
The Making of Grim
posted by SkeleTony
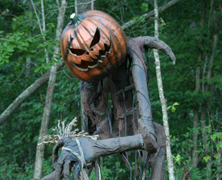
In 2008 the Grim Hollow Haunt created an incredible looking prop simply named Grim. This sinister looking creation stands approximately 5 feet tall and represents everything I fear is walking through the woods at night. I cannot imagine a better prop to welcome guests to a haunt than Grim, and thankfully, Grim, host of the Grim Hollow Haunt has left a short tutorial on the steps needed to create this amazing monstrosity. This creation rests on a 1 x 2″ wood skeleton that is covered in chicken wire and paper mache. The hands and feet are simply wire coat hangers with duct tape wrapped around them. Grim did some additional distressing of the creature via rope vines and cheesecloth, while a foam Funkin head was carved and given an ominous paint job. Items needed to complete this include: 1 x 2″ lumber 1 x 3″ lumber Chicken wire Wire coat hangers Paper mache Duct tape Rope (as needed) Flat black paint Cheesecloth Foam Funkin pumpkin Shop These Materials on Amazon 1/2" Hardware Cloth 19-Gauge 48"x100ft Galvanized Roll Aviation Tin Snips 3-pc Set (straight/left/right) Instant Paper Mache Powder Mix 3.3 lbs Assorted 12" Latex Balloons 120-Pack Affiliate Disclosure: HauntersList.com is a participant in the Amazon Services LLC Associates Program. As an Amazon Associate we earn from qualifying purchases at no extra cost to...
Making a Medieval Cauldron...
posted by SkeleTony
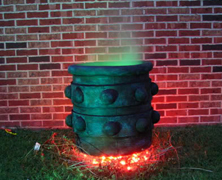
Five years ago CreepChrisS took the medieval cauldron prop build as seen on Woody Carr’s ScareFX site and won the Mad Lab’s September 2007 contest with it! His prize? A foam tombstone of course, but in doing so he’s left us all a prize in a clear and concise tutorial on how to build this fine looking cauldron. Before you do anything you’ll want to find a spare 55 gallon plastic drum, which can be tricky, but if you don’t have access to one you can always find a water storage barrel at a hardware store that will fit the bill. You’ll need to start by cutting approximately 1/4 off the top. Next you’re going to spray paint the entire barrel with your black spray paint and then add the pool noodle, sill foam, and styrofoam balls. After painting the styrofoam pieces with the black acrylic paint you’ll need to drybrush the entire cauldron with the grey and brown acrylic paints to give it some character. If you really want to make it look good, you’ll go ahead and add some Hot Burning Coals underneath it. Items needed to complete this include: 55 gallon plastic drum Pool noodle Flat black spray paint Sill foam Styrofoam balls Black acrylic paint Grey acrylic paint Brown acrylic paint Shop These Materials on Amazon XPS Foam Board 1" Thick Craft Sheets 4-Pack 4-in-1 Hot Wire Foam Cutter Kit 15W Loctite Power Grab Foam-Safe Construction Adhesive Affiliate Disclosure: HauntersList.com is a participant in the Amazon Services LLC Associates Program. As an Amazon Associate we earn from qualifying purchases at no extra cost to...
PVC Skeletons
posted by SkeleTony
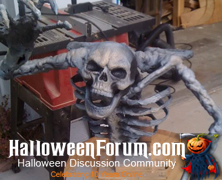
Not all grave grabbers need to be motorized, and if you’re interested in building an inexpensive one that still looks good then checkout LastHouse’s tutorial over at HalloweenForum. It’s a pretty easy project that allows for plenty of artistic freedom, but you will need a little bit of skill to cut the PVC for the rib cage, and of course you’ll need a blowtorch to get the PVC hot enough to bend. Once the ribcage is done, though, you’re all set to pose and bring your skeleton to life. The nice thing about this prop is that while it may look like a complete disaster while you’re framing it, once you’ve coated it with the Great Stuff and painted it up, it’ll take on a life of its own. And don’t forget to reference LastHouse’s tutorial on skeletal hands to add to your skeleton. Items needed to complete this include: Two 3/4 ” pieces of PVC 3 PVC T’s Some scrap 2 x 4 Hot glue ( LOTS) Liquid Nails Great Stuff Some Scrap foam Duct tape Drylock paint Model Magic clay Skull Shop These Materials on Amazon Great Stuff Gaps & Cracks Expanding Foam 12oz Professional Spray Foam Applicator Gun (2-Pack) 1" Schedule 40 PVC Pipe 6-Pack Ratcheting PVC Pipe Cutter (up to 1-1/4") 1" PVC Furniture Fittings Assortment 12-Pack Oatey PVC Clear Cement + Primer Handy Pack Realistic Replica Human Skull Statue 6.5" 5.4ft Full Size Halloween Foam Skeleton Affiliate Disclosure: HauntersList.com is a participant in the Amazon Services LLC Associates Program. As an Amazon Associate we earn from qualifying purchases at no extra cost to...
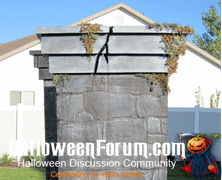
Nightmare on Bayshore Crypt Cemetery Columns...
posted by SkeleTony
There are numerous tutorials on how to make cemetery fence so it stands to reason that there would be multiple tutorials on how to make cemetery columns, and Camsauce from HalloweenForum has a highly detailed tutorial on how to easily build some really realistic looking columns. These columns are solidly built around a 2 x 2″ lumber and OSB / Plywood base. The joint compound is spread around the entire structure to create the stone facade, which is easy to do and looks great. Once you’ve got your joint compound spread you’re ready to black wash the columns to suit your taste. It’s really that simple, and the finished product couldn’t look any more realistic without a trowel! Camsauce’s tutorial includes some optional skeletal sconces, which seem like a lot of extra work, but judging from the photo below are well worth the time and effort. Items needed to complete this include: 2 x 2″ (approx 85′) 2 x 4 (approx 16′) 2 x 6 (approx 14′) 5 sheets 4 x 8′ OSB board (or plywood) 2 sheets 2″ Styrofoam insulation 2 gallons joint compound Exterior primer Acylic paints to black wash Optional items: Moss Skeletons Candles Shop These Materials on Amazon 5-Pack Foam RIP Tombstone Blanks for Carving Decorative Cemetery Fence Sections Rust-Oleum Flat Black Spray Paint 12oz Affiliate Disclosure: HauntersList.com is a participant in the Amazon Services LLC Associates Program. As an Amazon Associate we earn from qualifying purchases at no extra cost to...
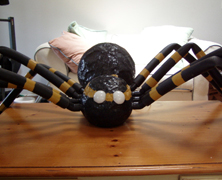
Spider & Spider Victim Plans...
posted by SkeleTony
Every home deserves an over sized spider hanging around on the roof, and if you can blow up a balloon you might just be able to create your own. Dano from Dano’s Spider House has a tutorial on how to create some really good looking paper mache spiders that are worthy of any haunt. The good news is they’re easy to create and you can make them as large as you want since all of the parts used are sizable based on your needs. It”ll help if you’ve got some experience creating with paper mache, but even if you don’t you should still be able to create these awesome arachnids. Dano’s even got a great single bodied option using PVC legs that’s worth trying as well! Items needed to complete this include: Balloons Water Flour PVC connectors Foam pipe insulation Indoor/Outdoor lights Plastic semi-transparent ball Black tempera paint Waterproof sealer Coffee grounds for texture (optional) Shop These Materials on Amazon Instant Paper Mache Powder Mix 3.3 lbs Assorted 12" Latex Balloons 120-Pack 1" Schedule 40 PVC Pipe 6-Pack Ratcheting PVC Pipe Cutter (up to 1-1/4") 1" PVC Furniture Fittings Assortment 12-Pack Oatey PVC Clear Cement + Primer Handy Pack 300 Sq Ft Stretch Spider Web with 20 Fake Spiders Giant 295" Fake Spider + Triangular Web Black Braided Fishing Line (for rigging props) Affiliate Disclosure: HauntersList.com is a participant in the Amazon Services LLC Associates Program. As an Amazon Associate we earn from qualifying purchases at no extra cost to...
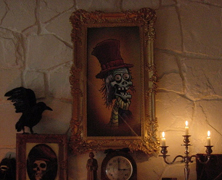
Dave Lowe’s Moving Eye Portrait...
posted by SkeleTony
Dave Lowe is an incredibly talented artist and one heck of a prop builder, and If you’ve never checked out his Para Abnormal web comics, do not wait any longer, because there’s a pretty good chance that you’re going to love them. Anyway, he’s got a quick little tutorial on how he built his moving eye portrait. Of course, it really helps if you have your own art that you can enlarge to start with (I honestly think that if I had Dave’s artistic abilities I’d probably fill an entire room with moving eye portraits). The prop build is pretty straight forward. Once you have your favorite portrait enlarged, just cut out the eye sockets and glue two ping pong ball halves on the back (concave so they have some depth). Dave utilized green craft crystals for the iris which added a little sparkle to his portrait, but you could always just print one. That’s all there is to it, but this prop is definitely a crowd pleaser, and well worth the time it takes to create (especially if it turns out as good looking as...
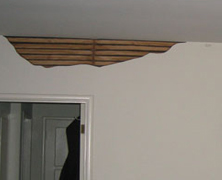
Bust (fake) Holes in your Walls...
posted by SkeleTony
If you’re looking for an effective and inexpensive way to give your haunt some extreme distressing then you may want to check out the tutorial that Marcus132 posted over at HauntForum. His tutorial utilizes wood grain shelf paper and a little bit of paint shadowing to create a faux wood lathe look. From there, it’s just cut into cracked hole shapes an applied to the drywall. This project is just another great example of how you can sometimes get great results without having to follow long and tedious...

The Build of a GIANT PumpkinHead!...
posted by SkeleTony
Some props are big and some props are larger than life. Rania Peet’s Build of a Giant Pumpkin tutorial falls into the “larger than life” category. I’m not even sure I would want to attempt to duplicate this, I’m pretty content to just revel in its awesomeness. This Giant Pumpkinhead Scarecrow that she built for her Haunted Garden measures in at an impressive 18-feet tall and breathes fog. That’s not just a little too cool, now, is it? If you’ve got some prop building skills you should be good to go with this tutorial as it’s a pretty straightforward build. The Pumpkin is constructed using Great Stuff sprayed over a chicken wire frame. The threaded rods are wrapped in chicken wire to help give the pumpkin its shape before the Great Stuff is sprayed on. The hat was updated on July 26th, 2013 and is now made of chicken wire with tension wire wrapped around it and tension rods to support it. The frame is then wrapped with landscape fabric with burlap applied to give it a more seasoned look. The chilled fog is pumped in through the back of the Pumpkin’s head and should be considered mandatory if you are going to attempt this prop because it looks incredible. Items needed to complete this include: PumpkinHead 2×2 wood Flat pieces of wood for bases 1/4″ threaded rods Wing nuts for rods 1″ Galvanized Chicken wire Stainless Steel Screw Eye Tie Line/Rope Cheesecloth A ton of Great Stuff Spray Foam Protective Eyewear/goggles Protective Mask White Spandex Burlap Hat 1″ and 2″ rolls of Galvanized Chicken Wire Galvanized Steel Chain Link Fence tension wire Galvanized Steel Chain Link Fence Tension Bars Zip Ties Craft wire Black Craft Fabric/Landscape Fabric...
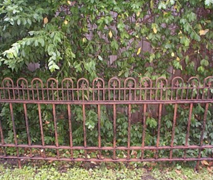
Simple Fancy Fence
posted by SkeleTony
If you want a really good looking fence for your cemetery but don’t want to go through the heavy detail of the Faux Wrought Iron Fence tutorial, then have no fear, you can get a great effect for just pennies on the dollar if you follow this tutorial from the old abandoned Haunter’s Hangout. The fence is made of 1/2″ PVC and 1×2″ lumber, but you crown the top of it with the fancy garden fence that is available at WalMart, or most home improvement stores. After antiquing the fence a bit it looks fantastic, and the time you’ve saved in not adding the detail from the Faux Wrought Iron Fence tutorial can be better spent on other endeavors. Items needed to complete this include, but should be measured per section: 1×2″ Lumber 1/2″ PVC Decorative garden fence Black spray paint Brown craft paint Sponge Shop These Materials on Amazon 5-Pack Foam RIP Tombstone Blanks for Carving Decorative Cemetery Fence Sections Rust-Oleum Flat Black Spray Paint 12oz 1" Schedule 40 PVC Pipe 6-Pack Ratcheting PVC Pipe Cutter (up to 1-1/4") 1" PVC Furniture Fittings Assortment 12-Pack Oatey PVC Clear Cement + Primer Handy Pack Affiliate Disclosure: HauntersList.com is a participant in the Amazon Services LLC Associates Program. As an Amazon Associate we earn from qualifying purchases at no extra cost to...
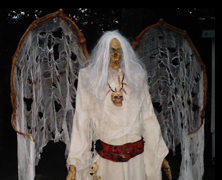
Winged Reaper
posted by SkeleTony
I love it when you set out to build a prop a certain way and a better prop or process reveals itself to you along the way. That very scenario happened to SpyderWood when he saw a grossly overpriced Winged Reaper prop and decided to alter the course of an existing prop and build his own version. His Winged Reaper tutorial marries a Bucky skull to a Blucky torso and throws in a variety of Bucky bones for the wings. The build originally utilized the whole Blucky, but as the project progressed he realized that he’d only need the top half. With the robe covering the reaper, though, you may not even need much more than the Skull! The tricky part with this prop is obviously the wings, but if you can get the Bucky bones screwed together so they can hold the weight of the cheesecloth, the results will be spectacular. Items needed to create this include but are not limited to: 1 Blucky Skeleton 1 Bucky skull 10 to 12 assorted Bucky bones Cheesecloth Latex (for wings) 3′ – 2×4 wood 6′ – 2″ PVC Shop These Materials on Amazon Instant Paper Mache Powder Mix 3.3 lbs Assorted 12" Latex Balloons 120-Pack Affiliate Disclosure: HauntersList.com is a participant in the Amazon Services LLC Associates Program. As an Amazon Associate we earn from qualifying purchases at no extra cost to...
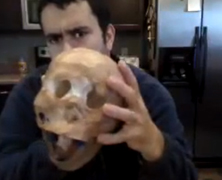
Milk Jug Skulls
posted by SkeleTony
What was it that Dr Kreepy said? “A home haunt without skulls is like a cake without icing”? Well what if I like a whole lotta icing? I’m a big proponent of saving money, and the less money I have to pay for a quality prop the better. Bearing that in mind, I don’t think that you can get more cost effective than this tutorial, especially if you have little kids running around your house. You see, we go through milk in my house like they’re giving it away on street corners. And being a good eco-friendly household, we’ve recycled all of our containers. But now that I’ve seen this cool tutorial that Mystang posted on the HauntForum, I realize that for every empty gallon of milk I’ve recycled, I may as well have chucked a skull in the trash. And I would never throw a skull in the trash. So if you like drinking milk and saving money on your haunt props, check out Mystang’s video tutorials on how to make Milk Jug Skulls. http://youtu.be/Os1Wj-VeYvA Shop These Materials on Amazon Realistic Replica Human Skull Statue 6.5" 5.4ft Full Size Halloween Foam Skeleton Affiliate Disclosure: HauntersList.com is a participant in the Amazon Services LLC Associates Program. As an Amazon Associate we earn from qualifying purchases at no extra cost to...
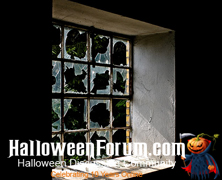
Making Glass Look Broken...
posted by SkeleTony
The great thing about the haunting community is that when someone is struggling with an idea for a prop build there is usually someone around that has a solution, or an alternate method to accomplish the same idea. Such is the case with TK421’s solution to the question of how to make glass look broken posed at HalloweenForum. And while TK421’s solution wasn’t the only idea provided (and there were several offered), it does look to be the best. It’s very easy to do actually, utilizing frosted contact paper cut to look like cracked glass and applied to the window. The results look great....

Clockwerk’s Ghost Girl...
posted by SkeleTony
Clockwerk from HalloweenForum has built a really eerie, almost cartoonish looking Ghost Girl and has posted some great pictures and a brief tutorial on how it was constructed. This creepy little girl sits atop her tombstone with an ominous glow beckoning passers by to enter her cemetery. There’s nothing I don’t like about this prop. Heck, I think the tombstone alone looks great, but Clockwerk has really shown some artistic skill with this girl. It seems like a pretty easy prop to build, but the arms, legs, and head may take some skill to craft (ok, so maybe it’s not that easy). You’ll need to create and mount a PVC frame to the tombstone. The head is constructed out of a styrofoam craft ball with ping pong balls (with LED’s implanted) for eyeballs, while the legs and arms are created using a combination of paper mache and Crayola model magic. Items needed to complete this include: Tombstone Styrofoam craft ball Ping Pong balls LED lights Paper Mache Crayola Model Magic (4) – 90 degree 3/4″ pvc (2 or 3) – 3/4″ pvc T joints 4 feet – 3/4″ pvc Shop These Materials on Amazon Instant Paper Mache Powder Mix 3.3 lbs Assorted 12" Latex Balloons 120-Pack 1" Schedule 40 PVC Pipe 6-Pack Ratcheting PVC Pipe Cutter (up to 1-1/4") 1" PVC Furniture Fittings Assortment 12-Pack Oatey PVC Clear Cement + Primer Handy Pack XPS Foam Board 1" Thick Craft Sheets 4-Pack 4-in-1 Hot Wire Foam Cutter Kit 15W Loctite Power Grab Foam-Safe Construction Adhesive 5-Pack Foam RIP Tombstone Blanks for Carving Decorative Cemetery Fence Sections Rust-Oleum Flat Black Spray Paint 12oz Affiliate Disclosure: HauntersList.com is a participant in the Amazon Services LLC Associates Program. As an Amazon Associate we earn...
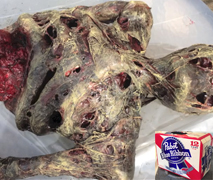
How to Make a Corpse
posted by SkeleTony
Some people have great tutorials on how to corpsify a Bucky, and that’s truly fantastic. Others, like Mr. X & Dr. V, the brains behind MonstarCraft Productions, have tutorials on how to actually build a skeleton and then further tutorialize how to corpsify the Hell out of it. Chris, aka Mr. X sent this tutorial to HauntersList via our Facebook page, and I cannot thank him enough. The production value of the video alone is worth the time spent watching it, but the product that they’ve created in this video is nothing short of spectacular. The best part is that you get a gruesome looking prop for far less money than you would spend buying a prop as good looking as this! http://youtu.be/4RYXGxU0JxQ Shop These Materials on Amazon Realistic Replica Human Skull Statue 6.5" 5.4ft Full Size Halloween Foam Skeleton Creature Liquid Latex 16oz Clear Special Effects Cheesecloth Unbleached (for draping and corpsing) Polyester Fiberfill Stuffing 30 LB Bag Affiliate Disclosure: HauntersList.com is a participant in the Amazon Services LLC Associates Program. As an Amazon Associate we earn from qualifying purchases at no extra cost to...
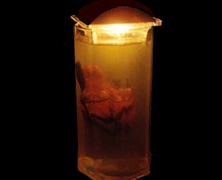
Strange Jell-O Thing
posted by SkeleTony
It has been brought to our attention that while we’re heading in the right direction with HauntersList, we’ve completely omitted family friendly haunt projects. While this may or not be true (and it definitely is), we’ve decided to spend a little time on the softer side of haunt projects (at least for today). All hyperbole aside, this hanging heart tutorial by Uncialle’s Halloween Darksite is an easy project that really looks cool and would look great in any haunt. The best part is that the parts are really easy to come by if you don’t already own them (and trust me, you’ve already got most of these parts). Items needed to complete this include: Vase or suitable container Heart Jell-O Sticks (dowels, or pencils) Monofilament (fishing line)...
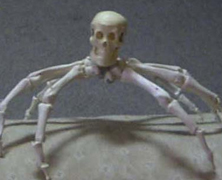
PerfessorEvil’s Mini-Spider Bucky...
posted by SkeleTony
The late PerfessorEvil left us with a great tutorial on how to craft a truly creepy mini-spider. These gems are crafted using a pair of Bucky hands (thumbs removed) and a Tiny Tim skull. I’m not sure how many spare pairs of Bucky hands you’ve got laying around, but I know I can’t get enough of this prop. Items needed to complete this include: 2 Bucky hands (thumbs removed) Tiny Tim skull Wire Hot glue Shop These Materials on Amazon Realistic Replica Human Skull Statue 6.5" 5.4ft Full Size Halloween Foam Skeleton 300 Sq Ft Stretch Spider Web with 20 Fake Spiders Giant 295" Fake Spider + Triangular Web Black Braided Fishing Line (for rigging props) Affiliate Disclosure: HauntersList.com is a participant in the Amazon Services LLC Associates Program. As an Amazon Associate we earn from qualifying purchases at no extra cost to...
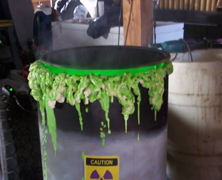
Goldie’s Toxic Waste Barrels...
posted by SkeleTony
Woodhegm has posted a great tutorial on how to make some awesome Toxic Waste Barrels. These cool looking props utilize the same technique as Goldie’s Bubbling Halloween Cauldron, but the sheer size and the addition of fog help take this prop to new heights. I think the hardest part of this tutorial may be getting your hands on some empty 55 gallon drums, but the rest should be smooth sailing. Items needed to complete this include: 55 gallon drum 1 set orange lights (solid) 1 set orange lights (flashing) Rope party lights Great stuff Paint Fog...
Merlin’s Reaper Stone...
posted by SkeleTony
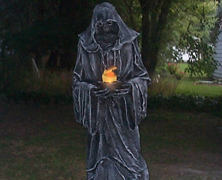
The old abandoned Haunter’s Hangout has a nice tutorial on how to make a great looking Monster Mud Reaper holding a faux flame light. I’ve seen a lot of tutorials on making similar props, but this one looks especially nice, and the tutorial is pretty straight forward (albeit a bit lacking in some of the details). You’ll need to create a base for the Reaper to stand on, but it’s pretty much a PVC Frame with skull and hands, chicken wire, and burlap covered in Monster Mud. Of course the faux flame light adds a bit of a wrinkle that really isn’t covered much by the tutorial, but by the looks of it, it’s well worth the extra planning. Items needed to create this include (but are not limited to): 12′ – 2 x 2″ Wood 6′ – 2 X 3″ Wood 1 – 2 x 4′ sheet 1/4″ plywood 1 – 2 x 4′ sheet 1/2″ foam board 1-1/4 by 4″ piece of pipe 1″ PVC 4 way joint 4 – 90 degree joints 3 – 45 degree joints Skull Skeletal hands Chicken wire Burlap 1/4″ bolts Aluminum stock Flame box Shop These Materials on Amazon 1/2" Hardware Cloth 19-Gauge 48"x100ft Galvanized Roll Aviation Tin Snips 3-pc Set (straight/left/right) USG Sheetrock Drywall Joint Compound 4.5 Gallon Cheesecloth Unbleached 36×36" (for Monster Mud draping) 1" Schedule 40 PVC Pipe 6-Pack Ratcheting PVC Pipe Cutter (up to 1-1/4") 1" PVC Furniture Fittings Assortment 12-Pack Oatey PVC Clear Cement + Primer Handy Pack Realistic Replica Human Skull Statue 6.5" 5.4ft Full Size Halloween Foam Skeleton Affiliate Disclosure: HauntersList.com is a participant in the Amazon Services LLC Associates Program. As an Amazon Associate we earn from qualifying purchases at no extra cost to...
Frankenstein Plans
posted by SkeleTony
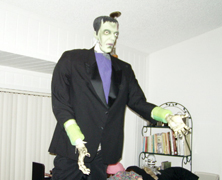
Dano’s Spider House has what is probably the easiest set of plans I’ve ever seen to make an 8′ Frankenstein prop. The design doesn’t account for much flexibility after you create it because the PVC frame is not jointed, but if you need a prop that doesn’t require any movement, you’re all set. And if you’ve got the chops to deviate from these plans, you can add whatever flexibility you may need to your design. You’ll need to create a PVC frame, have plenty of bubble wrap, a set of hands, and a mask, but that’s pretty much it. This thing is easy to build and offers a life sized prop at barely any cost! Shop These Materials on Amazon 1" Schedule 40 PVC Pipe 6-Pack Ratcheting PVC Pipe Cutter (up to 1-1/4") 1" PVC Furniture Fittings Assortment 12-Pack Oatey PVC Clear Cement + Primer Handy Pack Affiliate Disclosure: HauntersList.com is a participant in the Amazon Services LLC Associates Program. As an Amazon Associate we earn from qualifying purchases at no extra cost to...
How To Make Slime
posted by SkeleTony
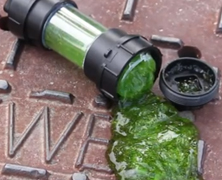
Grant Thompson of thekingofrandom.com posted a great tutorial on how to create your own Slime, or as he likes to refer to it, Ninja Turtle Ooze. This is really easy to make, inexpensive, is non-toxic and looks great when you add a couple of glow sticks to it! The container he creates for it is a perfect match for radioactive ooze and is easy to make as well!...

Steel Haunt Panels
posted by SkeleTony
If you’ve ever browsed the HalloweenForum you’re no doubt familiar with Terra. Suffice to say, she’s a prop making goddess. Her video tutorial on making steel haunt panels showcases the kind of cool, realistic looking props you can make for your haunt if you’ve got a little bit of skill and a lot of desire. This prop is not hard to create by any stretch of the imagination and won’t cost you a lot of money to create. Items needed to create one panel include: Little over one 3/4″ thick pink or blue foamboard panel Three 8′ furring strips Twelve 4″ x 1 1/2″ pieces of plywood Four 2 1/2″ coarse drywall screws Twenty-four 1 5/8″ coarse drywall screws Foamboard glue Super 77 glue Twenty 3/8″ tile spacers Quart of exterior gray Glidden Gripper paint (exterior) Silver latex paint (had used Ralph Lauren) Raw sienna acrylic paint Rust colored monster mud Light rust colored monster mud Flat black acrylic paint Clear gloss acrylic varnish Paper towels Optional Accessories include: 4 mini louvers 3″ (air vents) 1/2″ thick pink or blue foamboard panel PVC drain strainer Plastic rafter vent 16″ x 8″ air vent 16″ x 4″ air vent Hooks and zip ties for mounting to house Cement...
Skin Face
posted by SkeleTony
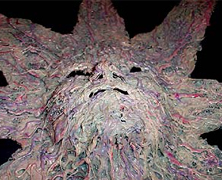
Derek Greenwood has a tutorial on how to make a skin face mask using hot glue, which looks great, and could easily add a super creepy element to any haunt. He states that the mask is not intended to be worn, which I suspect is because it’s flat, however as you can see by the photo below, it certainly could be. I could easily see a hallway wall full of these with people peering out from the other side at a haunt. Now that’s creepy....

Baby in a Jar
posted by SkeleTony
I love this prop. At least I think I do. Actually, I find it kind of unsettling, (I mean look at the picture below), but that might only be because the doll that Old Man Bakke over at HalloweenForum chose to use is the creepiest doll every produced. I mean, in his defense, if there was ever a doll that needed to go into a jar it’s the one he used…look at those eyes. Anyway, this is a simple prop that adds a lot of creep factor to any scene that you put it in. I’d be a little worried about putting it right on my oven rack, but as long as you monitor the heating you should be good to go. Items needed to complete this include: Mason jar Plastic doll...
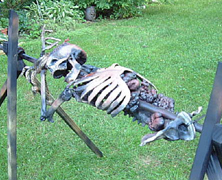
Boneyard BBQ
posted by SkeleTony
Well if you’ve gone to the trouble of following the charred corpse tutorial, you may as well go the extra mile and check out the Haunt 101 tutorial to create a Boneyard BBQ for it. This barbaric looking prop is the perfect exclamation point for a prop that’s pretty in your face as it is. Put a cauldron creep next to it and you’re well on your way to an incredibly creepy scene. This one is getting filed as a static prop, but it wouldn’t take much to put a motor on this baby and take it up a notch, now would it? Items needed to create this include: Rubber skeleton Metal shower curtain rod (6) lengths of pressure treated 1”X1” deck spindles 2 1/2” U-brackets (1) 10” length 9/16” all-thread rod, nuts and...
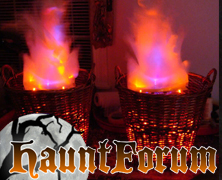
Faux Fire Basket
posted by SkeleTony
I know Beelce’s tutorial on how to build a Faux Fire Basket has been featured on a ton of home haunting how-to sites, but it really is one of the best tutorials for this effect that I’ve run across so it would be hard not to feature it on HauntersList. It’s a very simple effect to create and will set the right mood for any scene that requires flames. If you’re going to be using the wicker basket make sure that you’re extra careful with the power cords as you don’t want to turn this faux fire into a real fire. Items needed to create this include: Wicker basket Electrical wire Assorted holiday light strings (for embers) LED spotlights for flames Silk like fabric 12″ high velocity 3 speed fan 3M High performance 2mil decal material (or equivalent heavy duty tape) ...
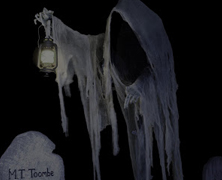
Grim Hollow’s Cloaked Ghost...
posted by SkeleTony
There’s a great tutorial on how to make a Cloaked Ghost over at Grim Hollow that is well worth your time to check out. This eerie prop was inspired by Pumpkinrot’s Cloaked Ghost and is pretty easy to build for something so awesome looking. It looks great both day and night and is sure to be an attention grabber at your haunt. Items needed to create this include: 5′ – 1-1/2″ pvc pipe 10′ – 1 x 2 wood Chicken Wire Burlap Monster Mud Glue Sticks Cheesecloth Lantern Plywood (for base) Shop These Materials on Amazon Instant Paper Mache Powder Mix 3.3 lbs Assorted 12" Latex Balloons 120-Pack 1/2" Hardware Cloth 19-Gauge 48"x100ft Galvanized Roll Aviation Tin Snips 3-pc Set (straight/left/right) USG Sheetrock Drywall Joint Compound 4.5 Gallon Cheesecloth Unbleached 36×36" (for Monster Mud draping) 1" Schedule 40 PVC Pipe 6-Pack Ratcheting PVC Pipe Cutter (up to 1-1/4") 1" PVC Furniture Fittings Assortment 12-Pack Oatey PVC Clear Cement + Primer Handy Pack Affiliate Disclosure: HauntersList.com is a participant in the Amazon Services LLC Associates Program. As an Amazon Associate we earn from qualifying purchases at no extra cost to...

Cemetery Entrance Columns...
posted by SkeleTony
Some people are capable of producing great things using very few resources. Such is the case with Robert Anderson and his Cemetery Entrance Columns tutorial. These remarkable columns consist of nothing more than a few pieces of scrap wood and boxes covered with newspaper. The paper mache mortar seems like an incredibly tedious detail but it really helps make this prop that much more authentic, I mean, this looks like actual masonry here. Robert admits to being cheap, and that’s a really great thing here because he’s managed to create an incredibly detailed prop without having to break the bank. Items needed to create this include: 60′ – 1 x 2 16′ – 2 x 4 Foam insulation, MDF, particle board, or cardboard Assorted boxes or Styrofoam Insulation Assorted latex & acrylic paint...

Cheap Easy Skulls
posted by SkeleTony
In the immortal words of Dr. Kreepy, “A home haunt without skulls is like a cake without icing…” And to the great benefit of us all, Dr. Kreepy has given us the icing (in video form) in his tutorial on how to make your own skulls using Great Stuff expanding foam. There are a few variables that can affect your success in making your own skulls using this tutorial, but even your failures will result in useable skulls. A few of mine resulted in really thin sliver sections of the skull that seem more like broken fragments that had been bashed in. They looked great just laying in front of my tombstones. For the price per skull, you cannot go wrong in doing this tutorial, just don’t make too much of a mess. Items needed to create this include: Hollow plastic skull Great Stuff expanding foam Vaseline Duct Tape Latex Gloves http://www.youtube.com/watch?v=edhDTaLMpng Shop These Materials on Amazon Great Stuff Gaps & Cracks Expanding Foam 12oz Professional Spray Foam Applicator Gun (2-Pack) XPS Foam Board 1" Thick Craft Sheets 4-Pack 4-in-1 Hot Wire Foam Cutter Kit 15W Loctite Power Grab Foam-Safe Construction Adhesive Realistic Replica Human Skull Statue 6.5" 5.4ft Full Size Halloween Foam Skeleton Affiliate Disclosure: HauntersList.com is a participant in the Amazon Services LLC Associates Program. As an Amazon Associate we earn from qualifying purchases at no extra cost to...
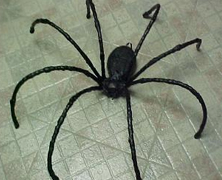
Making Spiders
posted by SkeleTony
If you need some spiders for you web and don’t feel like purchasing posable spiders then have a look at Born2haunt’s tutorial on Making Spiders. This project is pretty easy to complete and the detail on the spider is pretty forgiving to most sculpting imperfections. Once you get started you’re not going to want to stop making these things, and that can only add to your creep quotient. Items needed to complete this include: Foam Plastic tubing Wire Latex Hot glue Shop These Materials on Amazon 300 Sq Ft Stretch Spider Web with 20 Fake Spiders Giant 295" Fake Spider + Triangular Web Black Braided Fishing Line (for rigging props) Affiliate Disclosure: HauntersList.com is a participant in the Amazon Services LLC Associates Program. As an Amazon Associate we earn from qualifying purchases at no extra cost to...
Cocooned Spider Victim...
posted by SkeleTony
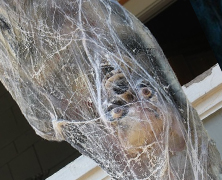
Grimvisions has an interesting take on how to create a cocooned spider victim. While most tutorials would have you wrap a plastic skeleton or torso, Grimvisions utilizes a pvc frame with newspaper and plastic bags to fill the body. While it may take a little more effort to create your own torso (and let’s be honest, it won’t take that much effort), you’ll feel better knowing that you haven’t wasted a perfectly good skeleton for a prop that would render most of it barely visible anyway. Items needed to complete this include: PVC Duct Tape Spray Adhesive Spider Webbing Saran Wrap Fake Eyeballs Wire A skull either plastic or foam Pipe insulation Newspaper Plastic Bags Spray Paint Liquid Latex Shop These Materials on Amazon 1" Schedule 40 PVC Pipe 6-Pack Ratcheting PVC Pipe Cutter (up to 1-1/4") 1" PVC Furniture Fittings Assortment 12-Pack Oatey PVC Clear Cement + Primer Handy Pack 300 Sq Ft Stretch Spider Web with 20 Fake Spiders Giant 295" Fake Spider + Triangular Web Black Braided Fishing Line (for rigging props) Affiliate Disclosure: HauntersList.com is a participant in the Amazon Services LLC Associates Program. As an Amazon Associate we earn from qualifying purchases at no extra cost to...
Monster Mud Wall Breaker...
posted by SkeleTony
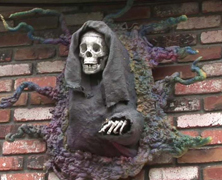
If you’re looking for an eye grabbing prop to welcome guests to your haunt then look no further. The late PerfessorEvil created an excellent Monster Mud Wall Breaker tutorial that looks great. After glancing at the tutorial I was surprised at just how simple this is to create. The pvc frame is simple to put together and the chicken wire framing doesn’t require a high degree of accuracy, it’s a simple cloak wrap. The rest is just monster mudded burlap and great stuff, what could be easier? The finished product looks great and will really be a nice focal point in or around your haunt. I’m not a hunter, so I’ll never be able to mount a deer above my fireplace, but I could easily see putting this beauty up there (at least during the Halloween season) Items needed to create this include: 10′ – PVC – 3/4″ 4 -PVC 3/4″ 90 degree connectors 4 – PVC 3/4″ “T” connectors 1 – Bucky Skull 1 – Bucky Hand 5 gallons – Joint Compound (You will have a LOT left over, but that’s how it comes) 1 gallon Black (or whatever color you want) paint Chicken wire Burlap Heat Gun Assorted drywall screws Zip ties Flat piece of plastic (dropcloth type) Great Stuff Triple Expanding Foam Shop These Materials on Amazon USG Sheetrock Drywall Joint Compound 4.5 Gallon Cheesecloth Unbleached 36×36" (for Monster Mud draping) Affiliate Disclosure: HauntersList.com is a participant in the Amazon Services LLC Associates Program. As an Amazon Associate we earn from qualifying purchases at no extra cost to...
Clay Skeletal Hands
posted by SkeleTony
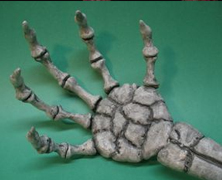
There’s a great tutorial on how to craft some skeletal hands out of Crayola Model Magic and coat hangers at a site called Mousecave. I’m not a good sculptor so I would normally shy away from something like this, but it sure seems super simple, and what could be easier than skeleton arms, right? Items needed to complete this include: Coat hangers – 3 to 5, depending on the length of the forearm Craft wire – any solid single strand wire will do Marker pen Lineman’s pliers – any pliers will do, so long as you can cut and bend the wire Two-part epoxy – because it’s strong and sets fast Acrylic craft paint – black and white Soft paint brush and small mixing dish Paper towels Scissors Modeling tools – nothing fancy, just something to etch some jagged lines Crayola Model Magic –...
The Scarecrow
posted by SkeleTony
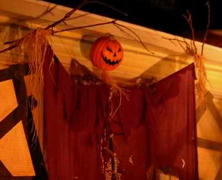
Like a giant sentry standing guard against the legions of masked marauders that descend upon our fair homestead, the pumpkin king provides tasty treats to the interlopers in exchange for their deference. Ok, that may be waxing poetic a bit, but I’ve always wanted to build a giant Pumpkin King prop to mount to the side of our garage to welcome the neighborhood kids to our house on Halloween. Most of the ones that I’ve seen involve using vines to create the body, and while I think that those tend to look more realistic, there’s just no way that I see myself gathering all of the vine necessary to pull it off. That’s why the DemonWare Scarecrow tutorial appeals to me, because with a pvc frame, I could actually see myself getting this one done. You can still use vines to fill in the gaps, but it’s not the major component here. The best part is you can make this prop as tall as your house if you want (although the size of the pumpkin may make it look a bit disproportionate if you do). Items needed to complete this include: 20 feet of PVC pipe PVC Fittings: (2) tees, (2) 45° Angle, 2 straight 2 Yards of crinkled cotton (or other cheap material) Fake Pumpkin Sticks- 6 long ones for fingers, 6-8 short ones for ribs Screws Paint (to cover PVC) Raffia (found at local craft store) Wire RIT Dye, 2 boxes of purple or black 5 Gallon Plastic Bucket Optional Materials: Large cardboard box Leaves 50 lbs of sand Eye hooks 5ft 1/2 – 3/4 in metal pipe PVC and connectors for...

Keeba’s Tombstones...
posted by SkeleTony
If you’ve ever had a cemetery in your haunt or yard you already know the pain of having to purchase tombstones for it. The pain revolves around having to pay for a foam product that you could easily produce yourself. Moreover, yours will certainly look better because you can put as much detail as you desire into it, and personalize it to your hearts content. Personally, I can’t stand working with styrofoam, but for those that don’t have a problem with it, you’re going to want to take a look at Keeba’s Tombstones. Not only is Keeba’s tutorial nicely laid out from the start of the project to completion, but offers some really good examples of detailing techniques like dry and wet warping that you just don’t find in most tombstone tutorials. After undergoing some simple painting and aging, the finished products look fantastic. These will take a while to make, and you’re going to have to factor your time into these when deciding whether or not it’s worth your while, but you certainly don’t find tombstones this nice for sale. Shop These Materials on Amazon 5-Pack Foam RIP Tombstone Blanks for Carving Decorative Cemetery Fence Sections Rust-Oleum Flat Black Spray Paint 12oz XPS Foam Board 1" Thick Craft Sheets 4-Pack 4-in-1 Hot Wire Foam Cutter Kit 15W Loctite Power Grab Foam-Safe Construction Adhesive Affiliate Disclosure: HauntersList.com is a participant in the Amazon Services LLC Associates Program. As an Amazon Associate we earn from qualifying purchases at no extra cost to...

Large Cauldron
posted by SkeleTony
If you’ve ever needed to purchase a cauldron for a haunt you’ve probably been disappointed with your purchasing options. They’re tiny. I mean, so tiny that a baby witch would feel uncomfortable using them. So your best option is to craft your own cauldron. I’ve seen several really good tutorials on how to build your own cauldron, and Old Man Bakke has a pretty good one posted over at HalloweenForum. I must admit that when I first saw the cardboard, hot glue gun, and duct tape I was reluctant to continue, but by the time I reached the finished product images on page 7, I was sold. The size is what I would expect that a couple of old hags would use, and it looks completely realistic. What I like best about this tutorial is that it was a completely fluid tutorial. If you follow the posts you’ll see that during the creation of this tutorial a user posted a link to some photos from Dave The Dead’s aging technique tutorial that really helped make this into the finished product that it became. Most of the time tutorials don’t get better on the fly like this one did. Items needed to complete this prop include: Large rope handled bin (rope removed) Heavy duty cardboard Duct tape Hot glue gun Paper Mache Spar Varnish Round towel rings Oatmeal & sand / water & glue...
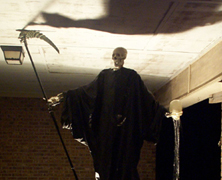
Floating Grim Reaper
posted by SkeleTony
If the end justifies the means then this prop is going to be worth everybody’s time and effort. This cool floating grim reaper made mostly out of black iron piping could be one of the coolest additions to any haunter’s graveyard. Floating close to 10′ off the ground, the only trick is to shield the base from view as illustrated in this photo. Dating back to 2003 this prop tutorial comes to us by the Evil Geniuses Howard I. Scott, III and his partner in crime Ron. Items needed for this prop include: Torso, Arms, and Skull Scythe blade (plastic) 1/2″ Black Iron Threaded Pipe in the following lengths: One 48″ Two 36″ Three 24 Four 12″ One 6″ (unused) One 5″ Seven T connectors Three connecting nipples One 90 degree elbow Two 45 degree...
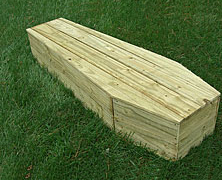
$25 Full-Size Toe-Pincher Coffin...
posted by SkeleTony
Every haunt needs a toe pincher coffin. It’s a fact. Ok, well, it’s not a hard and fast rule, but if you’re looking for a good tutorial on how to build your own full sized toe-pincher coffin, look no further. Woody over at ScareFX has a great tutorial on how to build one and here’s the best part, his build should only cost around $25.00! You’ll need a modicum of skill with a circular or table saw to get this done, but the rest is just piecing it together and gluing / screwing the pieces in place. The thing I like best about this tutorial (besides the fact that it doesn’t involve any miter cuts) is that it looks just rough enough to be completely realistic looking. There are 100’s of tutorials on how to build a toe pincher coffin, but this is the one for me. Items needed to complete this include (ScareFX pricing included): $15 for 15 Fence Pickets $5 for drywall screws $4 for wood...
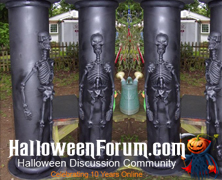
Skeletal Columns
posted by SkeleTony
If you’re looking to make a creepy entrance to your haunt you may want to take a look at the Skeletal Sonotube Columns tutorial that Effie posted at HalloweenForum. These columns are really simple to make and would easily make an eerie entrance to a cemetery, dungeon, or mausoleum. All of the pieces of this puzzle are easily obtained and the best part is that Effie actually planned to use the empty sonotubes for storage at the end of the season! Items needed to create this include: Sonotube 10″ x 4′ (Sonotube comes in many diameters and heights, 4′ being the most easily obtainable at Home Depot, but you can get 6′, 8′ and 10′ heights as well) Century Novelty Plastic Skeleton Heavy pressboard Foam pipe insulation Spray...
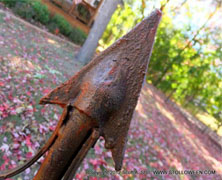
Faux Wrought Iron Fence...
posted by SkeleTony
Ok, so we all know there are about 1,000 tutorials on the web about how to build a fence for a graveyard. Most of them use the typical 1 x 2″ furring strips at the top and bottom with PVC creating the bars of the fence. Well, Scott A. Stoll has definitely taken it up a notch, and if I was going to pick a tutorial to follow to make my own cemetery fence, I would choose his method. His tutorial on how to build his fencing is incredibly detailed, and the resulting product is well worth the time spent because it is remarkably realistic looking. This could pass for a real fence. The finials and curved iron is also incredibly easy to implement and adds so much to this fence. The best part is that you won’t have to worry about running out of finials, or heating up the PVC to accomplish this because it’s done using craft foam! If you are thinking of making some cemetery fence, you would be well served to check out this tutorial, it is the real deal. Items used to create fencing include: 1×2″ lumber 1/2″ PVC Craft Foam Drywall screws Hot glue Shop These Materials on Amazon 5-Pack Foam RIP Tombstone Blanks for Carving Decorative Cemetery Fence Sections Rust-Oleum Flat Black Spray Paint 12oz Affiliate Disclosure: HauntersList.com is a participant in the Amazon Services LLC Associates Program. As an Amazon Associate we earn from qualifying purchases at no extra cost to...