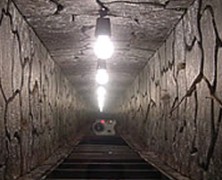
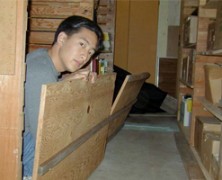
I’ve always wanted to do a bottomless pit but it’s always seemed like more effort than It was worth. I’ve always told myself that if I had an extra two way mirror that I’d build one for sure. That’s not really a valid excuse, though, because I could always make a Two Way Mirror. Bottom line, I guess I’m just too lazy to make this prop, but that shouldn’t stop you because it’s really not that difficult of a build. Trisha Morse put together a nice tutorial based on Larry Lund’s original build that employs the use of a home made plexiglass two way mirror. You’ll start by building the support frames for the two mirrors. You’re going to cut a groove in the length of your 2×4 to slide the mirror into. Once you’ve got all grooves cut in your four frame pieces you can screw three of them together, slide your mirror in and attach the final 2×4. The walls of the pit are framed with 3/8″ plywood that are secured together using L-brackets. Wood blocks on the outside bottom and top of the walls of the pit allow for it to sit on top of the frame with the regular mirror, while the frame holding the two way mirror can sit on top. This allows the pit walls to run straight into the bottom mirror which is reflecting the two way mirror above, which is also reflecting the pit walls. Since you’ll be viewing it through the two way mirror side, you won’t have to worry about seeing your own reflection. You can add styrofoam rocks to both the inside and outside of your pit to make it look a bit more realistic and you’ll want to be sure to add...
Creepy Shelly
posted by Tony
I used to know a girl named Shelly, and while she was hardly what I would consider creepy, I couldn’t help but think of her when I saw undead_october’s tutorial for Creepy Shelly. And that would probably bum her out because Creepy Shelly is terrifying! I mean, I genuinely find it unsettling. Job well done undead_october. I also have to give a tip of the hat to undead_october because I had heretofore never heard of snot rag mâché, or the process of utilizing Kleenex, glue, and water, in place of the typical paper mâché. Again, job well done! This macabre masterpiece started with a child sized skull sculpted using DAS clay. It was hot glued to a two liter bottle that was then attached to a wood base. After extending the neck over the bottle with more clay some aluminum foil arms and shoulders were attached to the bottle with more hot glue. The legs were created with wood dowels attached to the undersized of the wood base and the feet were crafted using oval pieces of craft wood. Once the full frame was in place the entire body was snot rag mâchéd. The final part of the body was the hands, which were sculpted with more clay. Once the body is fully sculpted and mâchéd it was given a coat of brown paint. Undead_october did more than just slap some brown paint on Shelly, though, the highlights added give a truly decayed look to Shelly. Items needed to complete this include: DAS modeling clay Aluminum foil 2 liter bottle Wood base Wood dowel 2 – Oval wood plaques Kleenex Elmer’s glue Brown paint Old dress...
Deluxe Witches Broom
posted by Tony
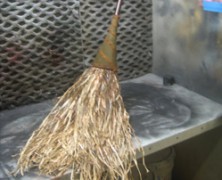
My mother was the driving force behind my love for all things Halloween. She was born on October 31st so I suppose there was little chance that she wouldn’t love Halloween herself, but It was more than just Halloween. She had a great appreciation for classic horror films, too. I remember on Saturday evenings our local UHF channel (UHF, how’s that for dating yourself!?) would show a classic horror film followed with a few of the old Flash Gordon episodes. Saturday Night at the Movies was a staple at our house and those films have always been a major source of my inspiration. For that I have my mother to thank, and while I can’t imagine my mother doing many of the tutorials on HauntersList, this Deluxe Witches Broom tutorial that Stanley Basconbe (aka Gary Benson) posted is exactly the kind of crafting project that my mother would have loved to do. And she would have owned it, too. You’ll need to start off with a standard straw broom. You’re going to want to remove the metal band if it has one and then cut off the twine that holds the bristles in place. Once you’ve got the twine removed you’ll have a pretty nicely fanned out broom. You’ll want to remove the outer layer of the bristles to create a more narrow broom. At this point you’ll want to focus your attention on creating the ferrule, which is crafted from an automotive oil funnel. You’ll need to cut it down so that it will fit down the broom handle. Once you’ve got the ferrule in place you’re going to want to hot glue some grass skirt to the top of the bristles which will complete your witches broom. Of course you can decorate...
Easy Brain in a Jar
posted by Tony
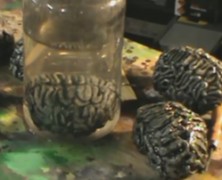
Allen Hopps has a brain the size of a baked potato. Ok, now that I’ve got your attention I should probably rephrase that. Allen’s got a great tutorial on how to easily make a brain in a jar that starts out roughly the size of a baked potato and requires far fewer ingredients than I would put on said potato. His method starts by balling up some aluminum foil and then adding some caulk to it to create the sulci and gyri (brain grooves). Once you drop it in a jar filled with water the size of the brain looks deceptively larger! Items needed to complete this include: 1 gallon jar Aluminum foil Gray silicone caulk Black paint White acrylic paint Polyurethane spray...
The Build of Giant Mushrooms...
posted by Tony
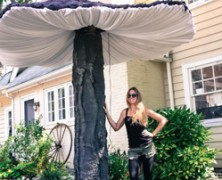
Ever hear the phrase “Go big or go home”? Well I’m pretty sure Rania Peet has, and her larger than life Halloween props sure live up to that standard. This time she’s set her sites on The Build of Giant Mushrooms, and her finished fungi could not have turned out any better! Her mushroom build is broken down into three core parts: the stem, the cap and the underside gills. Realistically, I could get the stem and the cap done, but I’d probably fail miserably on the gills. The top and bottom of the stem was made from 3/4″ plywood. She used (3) 2x4s in the center to create an approximately 18″ diameter stem. The 2×4’s are secured to the base using lag screws and washers for extreme strength and stability. For her build, Rania was lucky enough to have access to a wood cable spool which provided the perfect oversized round base. The stem was then wrapped with chicken wire. The build of the mushroom cap is pretty ingenious, it consists of a 1′ piece of 4×4 that is securely screwed to a sheet of plywood with lag screws. She then proceeded to bore four holes through the four by four and ran some rigid electrical conduit through it. Once in place the conduit was bent to provide the cap with a more “mushroom” shaped appearance. Some 3/4″ poly-flex tubing was screwed to the end of the rigid conduit to give the cap a finished, rounded edge. A layer of chicken wire was then added to the cap which was covered with a dense cheesecloth to hold the layers of spray foam. Think Rania bought a couple of cans of Great Stuff? Guess again, because this is where she takes this project up a...
Aging Wood Quickly
posted by Tony
There’s nothing worse than a building a toe pincher coffin with pristine looking lumber. Yeah, it still looks good, but you probably want it to look as though it’s fresh from the ground instead of Home Depot. If you’re lucky enough to have some old pallets or some weathered wood laying around, then read no further, but if you’re anything like me you’re going to want to age it pretty quickly. Terror Tom has a great technique for aging wood that’s easy to achieve and only takes 1 night to prep for. You’ll need to fill a mason jar with as much white vinegar as you think you’ll need to coat your wood and add a nicely rusted item to it. You can use rusty nails, screws, or even steel wool. Let it soak over night and when you wake up you should have a rather rusty (and pungent) solution that will quickly age your wood. Items needed to complete this include: Rusty nails or steel wool Mason jar White...
LED Lunacy
posted by Tony
I’ve got a confession to make. I’m clueless when it comes to basic electrical circuitry. In fact, pretty much all of the concepts of electricity other than don’t stick your fingers in the outlets seem to be over my head (ok, well, don’t stick your fingers in the outlets while your standing in water, yeah, I got that one too). So when it came to buying the components to make my own Homemade LED Spotlights my inexperience with a few basic LED concepts was a definite confidence killer. The worst part is that up until this point every written tutorial I’ve seen on this has been a complete snoozer. Thankfully, CreepyCreations have posted a really simple to follow tutorial that outlines all of the essentials you’ll need to purchase the correct resistors to power your LED’s without fear of them blowing up on you. The tutorial is really well made and it’s really simple to follow....
Make a Fake Brain
posted by Tony
It turns out the Scarecrow didn’t need to make a pilgrimage to see the Wizard of Oz after all, he just needed to check in with a Girl In Winnipeg! Her tutorial on how to make a fake brain is awesome in its simplicity and seems like the kind of project that the whole family can participate in. You’ll start with a base of crumpled newspaper covered in duct tape to form your brain mass. The next step is to painstakingly roll your playdough into long round lengths so you’ve got enough to completely cover your brain. After applying some spray adhesive to your duct taped brain mass, the playdough is simply placed on it in a sufficiently wavy brain pattern. Once your gray matter is in place you can paint it in whatever color scheme pleases you. Items needed to complete this include: 2 parts red playdough, 1 part blue newspaper duct tape spray adhesive corn syrup food...
Cheap Rusty Chain
posted by Tony
I must admit that when I first glanced at the tutorial that Lake of the Dead penned over at the HalloweenForum for Cheap Rusty Chain I was a bit underwhelmed. The opening photos of the PVC used to create the chain left me skeptical that the finished product would deliver. Luckily I didn’t stop reading because the finished chain looks amazing and it’s incredibly easy to create. You’ll need to start by cutting all of the links for your full chain. Next, using a PVC pipe cutter you’re going to cut a slit in 1/3 of your links to easily attach the rest of the links. Once you’ve got all your links threaded you can paint the chain using a rust colored paint. Rust-Oleum’s multicolored texture sprays are perfect for this. Items needed to complete this include: 3/4 PVC pipe Rust colored...
Kitchen Accident
posted by Tony
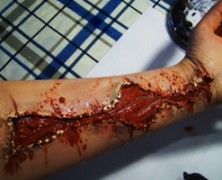
If you’re looking for a gruesome looking makeup effect for your scare actors then CrazyHappy08 has a tutorial that may suit your needs. Its a super simple effect to achieve (assuming you’re reasonably adept at applying makeup) and the results look amazing. You’ll need glue, foundation, some makeup, and a bit of a depraved imagination. ...
1-2-3 EZ Creep
posted by Tony
It’s 5 pm on Halloween night and you’ve put up no decorations to great your trick or treaters. Actually, if you’re a regular at Haunter’s List, there’s probably no chance that this has ever happened to you, but it might be the type of recurring dream that plagues you. If anyone you know finds themselves in this predicament, though, tell them not to panic, because they’ve probably got all the materials they need to create this cheap and EZ Creep that SpookySam from HauntForum created. You’ll take your ladder and attach your skull (and arms if you’ve got them) to a piece of scrap wood and then set it on the paint shelf. You can add a cardboard box to the top rung of the ladder and attach it to the scrap wood. This will add a little bulk to your Creep as well as hold both items in place. The final step is to add your fabric or clothes to your creep, which can be stapled to itself to keep its shape. This creep looks great and is the perfect last minute no hassle prop to build. Items needed to create this include: Step stool (preferably with paint shelf) Foam skull (arms and hands optional) Scrap board Cardboard box Scrap cloth or landscaping...
Cheap Fake Barbed Wire...
posted by Tony
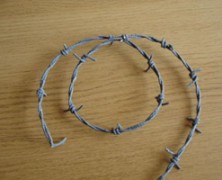
If you’ve got a scene that requires realistic looking barbed wire your best bet is to head over to Home Depot and pick up a roll, it’s only $65 for 1300 feet! I mean, what’s the worst that can happen? Someone grabs it to see if it’s real and cuts their hand, or rips their clothing on it, or actually falls into it and slices themselves up real good leaving a bloody mess on your floor, and if any of that happens you know what that means… BEST HAUNT EVER!!!! It’s probably not worth the liability, though, so with that said, you may want to checkout the tutorial that msraynsford created on how to create Cheap Fake Barbed Wire You’ll start by folding your length of string in half, tying one end of it down and twisting the string whichever direction you prefer. Once you’ve got it good and twisted you’ll dip it completely in your glue. You can mix your paint directly into the glue to ensure a nice even color. Let it dry making sure that it doesn’t touch itself or unwind during this time. You’ll next need to add your barbs, which are nothing more than lengths of 10cm (3 inch) string dipped in the glue and then wrapped around the main string. Once you’ve got the barbs wrapped around the main string and they’ve dried completely, simply cut the barbs on an angle to give them a sharp pointed appearance. Once your barbed wire is completely dried your wire is ready to hang. It looks realistic and won’t cut anybody (probably). Items needed to complete this include: String (roughly 2.5 times more string than you want barbed wire) PVA glue (Elmer’s) Grey...
How to Chop Someone in Half...
posted by Tony
Seeing a person cut in half can be a life altering event. The kind of event that makes you want to try to recreate yourself, which is ok, provided you see the person cut in half at a haunt and not in some back alley in the wee hours of the night. And that’s pretty much how I’ve felt ever since I was 10 years old and got to see this done at the March of Dimes Haunted House. It was a terrifying and exhilarating thing for a kid to see, and while it may seem a bit campy by today’s standards, it’s still one of my fondest haunt memories. I’ve seen several tutorials that tackle this prop, but I really like the video tutorial that HauntingHooligan has created. The tutorial is fairly general, but will give you everything you need to get started creating this effect. http://youtu.be/Baqe4MBphUg Items needed to complete this include: 16′ – 1 x 3″ lumber (approximate) 2′ x 6′ sheet of 1/4″ plywood (approximate) Wire Styrofoam Cloth to cover platform Great stuff Newspaper Old pants Old shirt...
Monster Mud Reaper
posted by Tony
Nothing looks better than a well crafted Monster Mud Reaper standing guard over your cemetery. As he welcomes recently departed souls to their final resting grounds, this dark and foreboding spirit will cause all eyes to focus their attention to him if for no other reason than to make sure he isn’t actually alive. And the best part is, he’s pretty easy to build if you follow the tutorial that Jimmyzdc wrote up at HalloweenForum. The frame of your reaper will be created by securing a steel flange to a 2 x 2′ piece of MDF board and then threading a 4” steel pipe to the flange. You’ll connect the PVC that will create your reaper’s spine to the 4″ steel pipe and then connect your 4 way PVC cross fitting to the top so you can add your arms. Once the PVC frame is complete you’ll wrap some chicken wire around the skeleton for the reaper’s body and then measure out your burlap and drape it on the chicken wire to verify you have the correct size and shape for the reaper you want. Once you have the reaper shaped to your liking you’ll peel your burlap off and dip it in your monster mud until its completely submerged in the mud. Once coated, remove it from the mud and squeeze off the excess mud as you pull. Re-drape it on your frame and continue until you’ve got all of your burlap reassembled on the reaper. Once coated in monster mud, make sure you use a some Drylock masonry sealer to weather proof your reaper otherwise you may have a mess on your hands if it rains. Items needed to complete this include: (2) 90 degree PVC elbows (3) 45 degree PVC elbows (1) 4-Way PVC...
Rickety Floor
posted by Tony
An unstable, rickety old floor is a great way to catch visitors to your haunt off guard, especially when lights are low. It’s a simple project, and if you’re so inclined (pun intended), Raymond from RFHaunt has a tutorial on how to quickly and easily add this effect to your haunt. Your floor will be made of plywood and is best suited to a hallway section where you can have it extend from wall to wall. You’ll start by making a stationary section which consists of your piece of plywood with sections of 1 x 2 lumber nailed to the entire length of the center and both sides. For the rocking piece you’ll simply nail the 1 x 2 to the length of the center which will allow it to rock back and forth when you walk on it. You’ll want to be careful to make sure there are no gaps between the two sheets of plywood because you don’t want anyone getting their feet stuck in between and a piece of carpet draped on top of it allows for worry free enjoyment. Items needed to complete this include: Two large plywood boards On thin length of wood (Optional) Thick...
Faux Moss Application...
posted by Tony
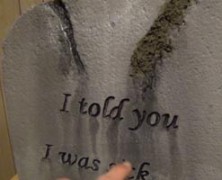
A rolling stone gathers no moss, but a tombstone (and my patio) gathers plenty. So if you want a realistic looking tombstone you’re going to need to find a way to add some realistic moss that will stick to it. Troy from Halloween Hellmouth has a great method that produces a great looking moss for any prop utilizing a mixture of pre-dried moss and paint. You can buy dried moss at most craft stores, but if you have access to moss you can dry it out for a couple of days and use it. You’ll start by puréeing the dried moss in a blender and then you’re going to start mixing your paint until you get your desired color. Once you’ve got the correct color mix you’re ready to start spreading it onto your prop. Use your fingers to spread it and don’t worry if you’re a bit sloppy because moss doesn’t exactly grow straight. After you’ve spread the moss mixture onto your prop you’re going to want to wait for a good three days for the entire mixture to set, which sounds like an inordinate amount of time to wait for something to dry, but trust me, it’s worth it. The end result looks amazing. Troy adds even more detail by tea staining his moss application, but even before doing this his method is a success. Items needed to create this include: Bag of moss (or actual dried moss) Paintbrush Mixing stick Mixing bowl Spray bottle filled with water Drip pan (for water to drip in to) Acrylic paint...
Tombstone Lettering
posted by Tony
Nothing spoils a good tombstone more than poor lettering carved into it. No matter how realistic your tombstone looks, all eyes will eventually focus on the text, and if you want it to look really good, you’ll want to check out the video tutorial that Eerie Acres Cemetery put together on effective tombstone lettering. It covers some very simple but essential techniques for creating really good looking tombstone text....
Spirit Panel
posted by Tony
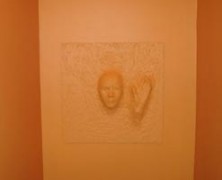
If you want to add a bit of subtle detail to your haunt walls, Violetkitty has an instructable for a Spirit Panel that could very easily be used. The tutorial is based on an original idea titled Ghosts in the Bookcase Halloween Project, and it’s a simple way to add some depth to any flat surface. In a nutshell you’re going to glue or screw down the item you want protruding from the wall. You’ll then start to cover the protruding items with your paper mache mixture so that it completely covers them and appears to be stretching the wall. After you’ve got the items coated you’ll need to let them dry a bit and then cover the entire surface with the paper mache mixture. Once completely coated you can sand it down a bit and paint it. The great thing about this idea is that you can use plastic masks, skulls, prop hands, pretty much whatever you want to appear to be coming through the walls. It’s not a tricky project, and it can add a nice wrinkle to an otherwise plain wall. Items needed to complete this include: Plywood (or the flat surface of your choice) Plastic Mask Manicure plastic hand Gorilla glue Celluclay paper- mache Sandpaper Latex...


